7 Creative Ways To Repurpose Cutting Boards In Your Kitchen
We may receive a commission on purchases made from links.
Figuring out ways to reuse old kitchen stuff is always a smart move. Whether you're keeping your old condiment bottles or rejigging your plastic fruit containers, there are tons of ways to repurpose items to reduce waste and the need to purchase brand-new products all of the time. Two birds with one stone, right? However, when it comes to old cutting boards, they can be a little bit more challenging to re-incorporate into your kitchen in different ways. After all, they're just planks of wood or plastic, and are usually covered in knife marks. Neither of these qualities particularly lends itself to innovation.
Before you sigh and throw them out, though, come on a journey with us. There are far more ways to repurpose old cutting boards than you might think, extending their lifespan and providing innovative solutions to kitchen problems. Whether you're creating a brand-new serving tray or kitchen riser, making yourself a kitchen blackboard to write menus or grocery lists on, or constructing a nifty cookbook stand, old cutting boards can be the base you work from. Oh, and a lot of the time, they'll make your kitchen look a lot better than you think.
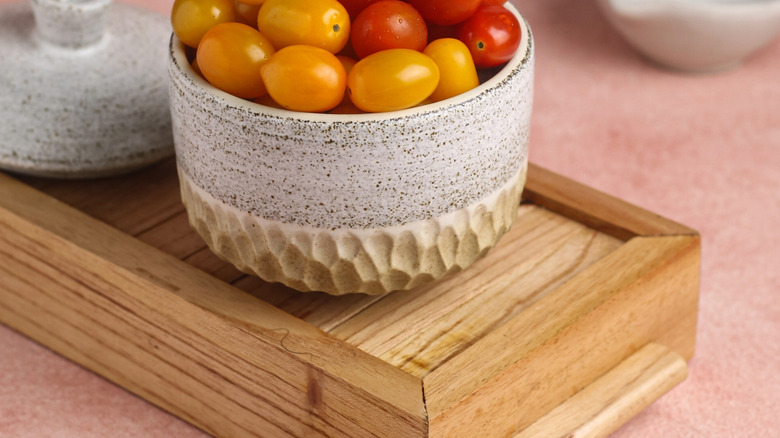
Turn them into serving trays
Unless you're a serial TV dinner or breakfast-in-bed eater, serving trays might be a bit of an afterthought — and it's also the kind of thing that you don't replace very often, meaning that they can get scuffed, scratched, and grubby. By using your old cutting boards to make serving trays, though, you can create a stylish, yet functional item that also stops you from having to splash the cash on a new one. To make a simple serving tray, all you need is a drill, some drawer pulls, some felt pads, and (of course) your wooden cutting board. Drill holes in each side, attach the drawer pulls, and put the felt pads on the bottom to prevent it from scratching any surfaces.
If your cutting board is heavily marked (and even if it's only lightly scratched), we'd recommend sanding it down before you attach the drawer pulls. You can then paint or lacquer the surface to give it a nice finish. If you want to make a bulkier tray and you're not afraid of a little woodwork, you can trim down larger cutting boards and then build higher sides on their base. Alternatively, if this all feels like a little too much work, sand down your cutting board, refinish it, and then use it as a simple but effective charcuterie board for serving meats and cheeses.
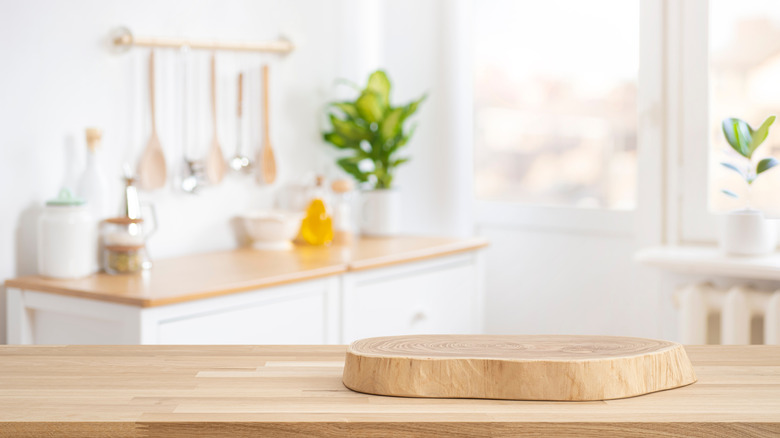
Create a kitchen riser to display utensils or rest hot pots
Kitchen risers are highly useful, highly underrated items. There are dozens of reasons why you might need a little extra height when working or entertaining in your kitchen, from having a slightly elevated surface to put dishes on, to requiring something that can keep hot pots away from your countertops, to creating extra counter space to store jars of utensils or herbs on. A DIY riser, made from a cutting board, can provide all of those, with barely any work. You simply attach little legs to the underside of your cutting board after sanding it down, and hey presto. Those legs can be made from old scraps or offcuts of wood, or you can buy a couple of cabinet knobs and glue them on the bottom.
Then, once your kitchen riser has been constructed, you can get to work on the fun part: Decorating it. Paint the top, or decoupage it with tissue paper, wallpaper, or even some old magazines for a vaguely popart effect. Or, keep it rustic and vintage-looking, and allow time to do its work. Just make sure you're using a smaller cutting board for this one, as you don't want your new riser to completely dominate your space.
Paint them with chalk paint for a menu or grocery board
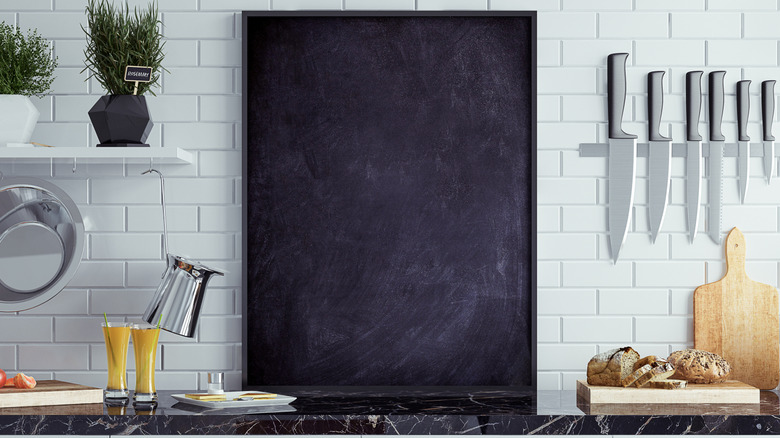
The usefulness of having a chalkboard in your kitchen cannot be understated. You can use it to write menu ideas for the week, keep track of groceries, let your kids draw on it, or simply just to write messages to the family before you leave the house. The problem, though, is that so many chalkboards you find in stores or online can be boring and flimsy, and add no style to your kitchen. That's where an old cutting board comes in.
Making a DIY chalkboard is as simple as sanding down an old cutting board and then painting it with black chalk paint, which you can find at your local craft store (or just head to Walmart for this Multi-Surface Chalk Paint). This paint is designed to be used with regular chalk and to be wiped clean once you're done. If you want to spruce up your new board even more, you can paint a trim or some lettering on with some white chalk paint or a paint pen. Then, the fun part: Grab your chalk and get to work. To keep your chalk handy, you can drill in a small ledge to keep it on or just attach it to a string. Oh, and don't forget to add a hook to the back of your cutting board, so you can hang it wherever you want.
Transform old cutting boards into wall planters for your herb garden
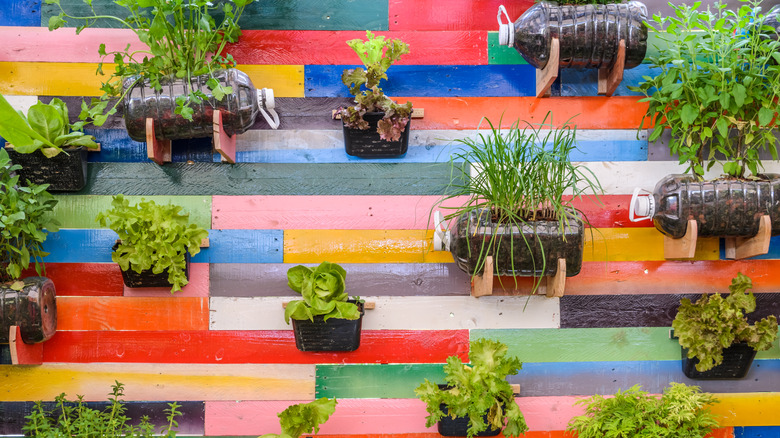
We love starting a kitchen herb garden — but finding space for one? It's tough, guys. Kitchen counter and windowsill space is often at a premium, and when the idea of a dedicated herb garden meets reality, it can get nudged out of the equation. That's why we love the idea of using an old cutting board to make a wall-based herb garden, which you can hang wherever you want. Doing this really is as simple as attaching a pot or an old jug to a cutting board, either with some super-strong glue or a nail, and then hanging the board on your wall. Presto: An herb garden and a decoration, all in one.
If you want to keep things simple and low-key, use a plain wooden board and a nice metal pot. If, however, you want to get crafty, you can paint both the pot and the board however you like. Giving it a rustic farmhouse feel is a nice move here, and "aging" the wood slightly with some matte paint can create a lovely effect. Importantly, though, we'd recommend using a lighter-weight cutting board. Remember that your pot will be filled with soil, and if you go for a bulky board, the whole thing will end up being very heavy (and will therefore be harder to hang).
Make a cookbook or tablet stand
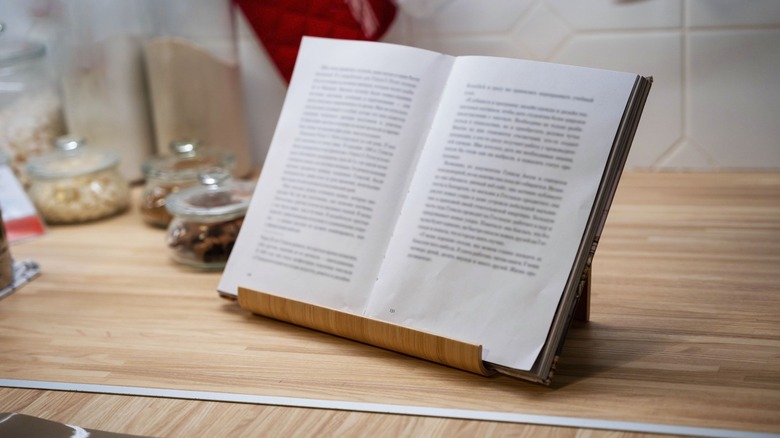
You know what we love? Cookbooks. You know what we hate? Finding a place for them. Not so much to display, but when we're actually cooking. We end up putting our special retro cookbook (or the iPad displaying our recipe) down next to our ingredients, face-up on the counter, and they inevitably get splattered with food.
This is why a cookbook or tablet stand is a must for any home cook, and you don't need to go out and buy one: Just use your old cutting board to make it. Creating this is low-effort, high-reward, and there's no drilling involved. Just grab your old cutting board (sanded down, to make sure it looks good), a couple of wooden wedges, some glue, and — the secret item — a Scrabble letter rack. Glue the rack to the front of the board, the edges to the back, and that's it.
We prefer to use a paddle cutting board here, with the handle facing up; we just think it looks better. However, any old cutting board will do. Just ensure that the letter rack is actually wide enough to house your biggest cookbook, as otherwise, you might find that it's a little redundant. Do you wanna know the best thing about this? Once you've finished cooking, you can use it to display your favorite cooking texts.
Use your cutting board as the base for a seasonal centerpiece
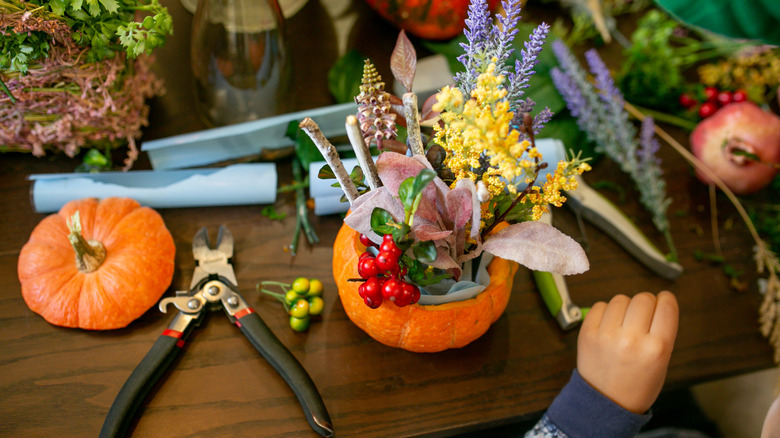
Unless you're Martha Stewart (and if you are, hi!), centerpieces probably aren't high on your priority list. Nonetheless, they're a delightful addition to your table when Thanksgiving or Christmas rolls around, and you wanna make sure you're prepared. So, instead of throwing away your old cutting board, sand it down and then stash it in a cupboard or in the attic. Then, once the holidays arrive, use it as a base for your centerpiece.
What we love about this hack is that not only does it save you spending money on something you may only use once or twice a year, but it looks really good. Wooden cutting boards give any centerpiece a rustic, vaguely nostalgic feel, which is very in keeping with the holidays. However, we recommend that you build your centerpiece around the color of your cutting board. Otherwise, it'll stick out like a sore thumb. For example, if it's a darker wood, use items like pinecones or acorns to build it up; if it's lighter, go for pine decorations.
Repurpose old cutting boards into a base for your stand mixer
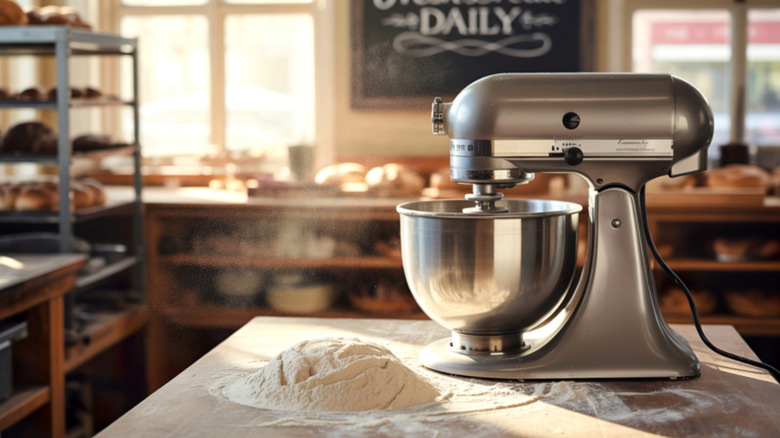
Isn't it wild how some of the biggest, bulkiest kitchen appliances are also the most mobile? For proof of this, we give you stand mixers and food processors. These machines may be hard to lug around, but the moment you turn them on, they start skittering along your countertop towards the edge, where they threaten to drop off and smash into pieces. Creating a base for them can keep them in their place and prevent this from happening, and an old cutting board is the perfect item for it.
You can use either plastic or wooden cutting boards here; we tend to drift towards wooden cutting boards as a rule (they just look better), but colorful plastic ones can work well in a retro-inspired kitchen. While most cutting boards will provide enough traction to stop your appliances from moving, you can add some by attaching small rubber pads to the bottom. On the other hand, if you have trouble moving these appliances, you can use your cutting board to make them more mobile by sticking some Teflon glides onto the underside.
If you want our top tip, though, kill two birds with one stone by using small, lockable wheels. Drill or hammer them onto your cutting board, and place it under your appliance. When you want to move it, unlock them; when you want to prevent it from shaking around, seal them off.