Make The Best Strawberry Shortcake With These 10 Baker-Approved Tips
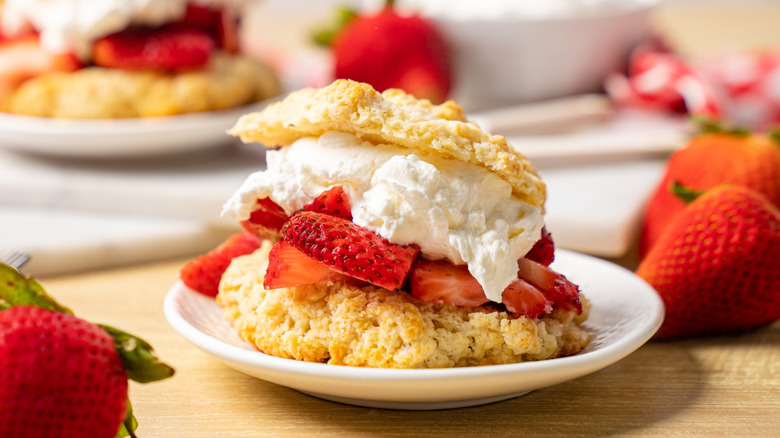
Summer's here, and that means strawberries are back in season! For avid bakers like me, that means just one thing: It's time to whip up a tasty strawberry shortcake. This dessert consists of three very simple elements, which are macerated strawberries, a whole lot of whipped cream, and of course, the shortcake itself. While the sweet treat is easy to prepare in theory, it can still seem a little daunting for those who have never made it before, because there are a few techniques that need to be followed to get the right texture and flavor. Don't let fear take you over, though; a little expert guidance is all you need to make an amazing strawberry shortcake. And that's exactly what I'm here for.
I've made quite a few strawberry shortcakes in my life, given that I am a pastry chef with five years of experience and have a diploma in patisserie from Le Cordon Bleu, London. I can very proudly say that I have mastered this dessert by now, especially after learning from my mistakes along the way, so you can count on all the tips I've put together in this story. There's something I'd like you to be mindful of before we begin: Strawberry shortcake has gone through a massive evolution over the years and there are many modern versions that use bases like vanilla sponge cake or angel food cake. However, I'll be sticking to the original, traditional shortcake in this story. With that out of the way, let's get right into it.
1. Start with the right ingredients
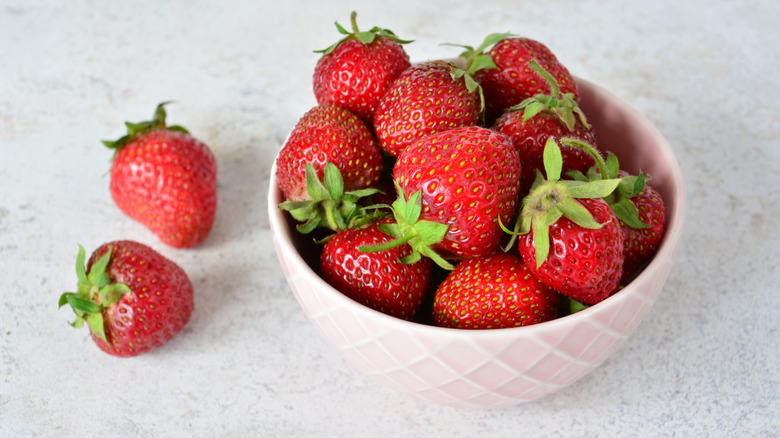
Since strawberries are the hero of this dessert, you need to be sure to use fresh and ripe ones for the best flavor. I'd suggest getting them from a farmers' market rather than a grocery store, as that's usually a nice way to find good-quality fruit. There are some simple rules for choosing the absolute best strawberries that are worth bearing in mind, like looking for strawberries that are red all over, because that means they are fully ripe, which is key to making a good strawberry shortcake. Besides that, if you can, taste them before buying. Get the ones that have a balanced sweet and tart flavor.
It's equally crucial to use the right ingredients for your shortcake and whipped cream to make a decent strawberry shortcake. When it comes to the shortcakes, stick to all-purpose flour because cake flour has too little gluten, so it may not be able to provide enough structure. Bread flour, on the other hand, has too much gluten and that will give the shortcakes a dense texture. Similarly, I recommend opting for unsalted butter with a high fat content to make the shortcakes, because that's an easy way to prevent them from tasting too salty and to ensure they have the right texture. Also, don't use expired leavening agents. Lastly, go for heavy whipping cream — it will hold its shape a lot better and also give the sweet treat a richer mouthfeel.
2. Use cold ingredients to make the shortcake and whipped cream
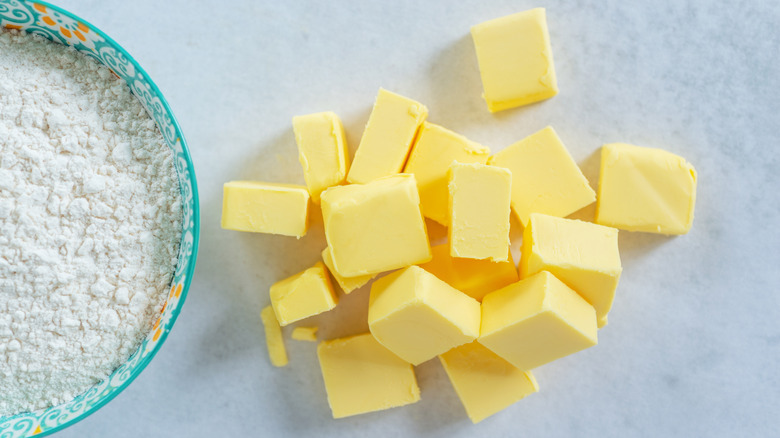
One of the biggest mistakes you should avoid when making strawberry shortcake is using room-temperature ingredients. Though it may seem harmless to use them, ingredients that aren't properly chilled can actually alter the texture of your shortcakes and whipped cream, too. Of course, this doesn't mean you need to place dry ingredients like flour, sugar, and leavening agents in the refrigerator. This point is specifically for wet ingredients which, in the case of the shortcakes, are butter and buttermilk, and the heavy whipping cream for the whipped cream.
If the buttermilk and butter aren't cold, there's a high possibility that the shortcakes will turn out flat and dense. That's because cold butter creates steam pockets in the shortcakes, which helps them develop a light, flaky, and airy texture. Warm butter will end up melting before you bake the shortcakes, so it won't be able to create those steam pockets. Cold buttermilk is also crucial as it prevents the butter from melting.
Now coming to the heavy whipping cream; it's ideal to chill it well before you plan to use it. Cold whipping cream whips better, forms more stable peaks, and won't fall apart even if you leave it out for some time after it has been whipped.
3. Don't overwork the shortcake dough
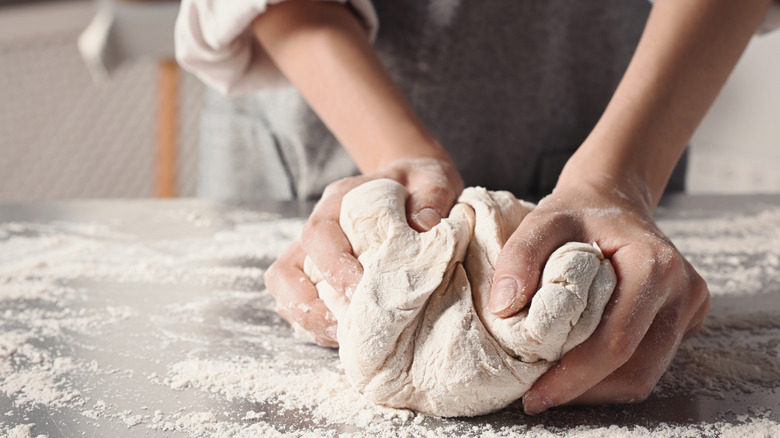
While you might think it's a good idea to knead the shortcake dough until it becomes smooth, it's best to avoid doing so. One of the things that makes shortcake unique is its light, flaky, and crumbly texture, and as explained earlier, the lightness and flakiness are achieved by the steam pockets created by cold butter. But apart from that, the crumbly texture is mostly a result of mixing the dough only until it's shaggy.
I get why you might want to mix it properly until it's smooth — the dough does look unfinished otherwise. However, if you mix — or rather, knead — it that much, it will start developing excess gluten and then you'll get shortcakes that have a bready texture rather than a crumbly one. So you'll need to rub the butter into the dry ingredients with the tips of your fingers or a pastry cutter until you get a sand-like texture, then add in the buttermilk and stop mixing once everything comes together to form a dough. Then, transfer the dough onto a table dusted with a little flour, fold it over itself a couple of times, and that's it. The dough should be able to hold together, but should still look a little rough and shaggy. After this, you can roll it out and cut out as many shortcakes as you want.
4. Refrigerate the shortcakes before baking them
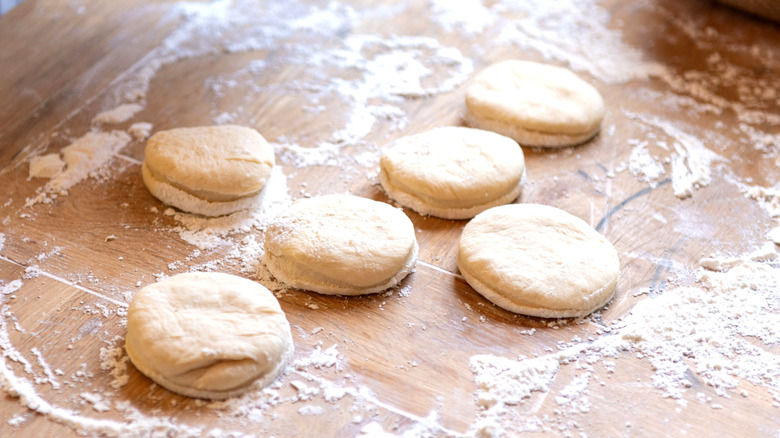
Not every recipe or baker will suggest refrigerating the shortcakes after you cut them out. However, I highly recommend doing so, especially if you're making them on an extra hot day. You don't need to refrigerate them for hours before baking them — just 15-20 minutes does wonders.
There are two primary reasons why I believe this step is extremely important when making shortcakes. The first one is that the chilled butter will come down to room temperature (or at least soften) by the time you're done making the dough and rolling and cutting out the shortcakes. But if you place them in the refrigerator, the butter will solidify once again, and the final baked goods will have that perfect light and airy texture. The second reason is that the shortcakes won't hold their shape as well as they should while baking if you don't refrigerate them first. Since the butter will firm up when you chill them, they'll stay in their original shape rather than looking like amoebas. With all that in mind, though this step may not seem too relevant to some, it's worth doing if you want to be extra sure that your final dessert looks and tastes incredible.
5. Remember to brush them with cream before popping them in the oven
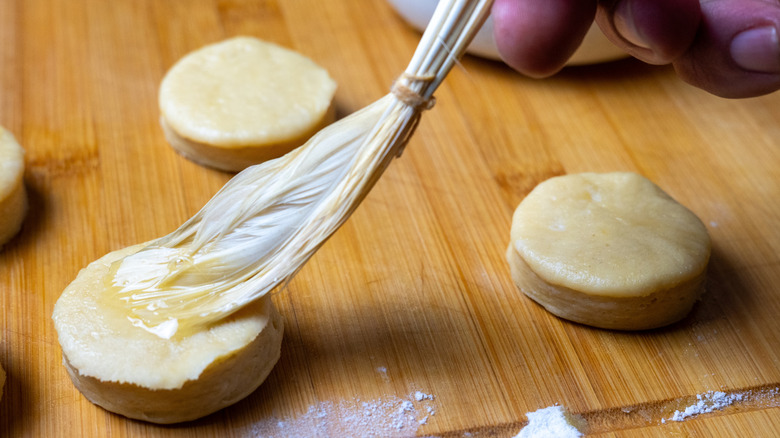
I know you'd want to bake the shortcakes right after you've refrigerated them, but there are a few more things you should do before that. Arrange them on a tray lined with parchment paper if you haven't done that already, then brush them with a generous amount of heavy cream. This little step will give those shortcakes a lovely golden color.
You'll need to use chilled heavy cream here as well, as it will help maintain the shortcakes' overall cold temperature. If you don't have a pastry brush to brush those shortcakes, there's no need to stress. You can follow a simple parchment paper hack to make a pastry brush in a pinch by folding it multiple times and then cutting one end into bristles.
Also, sprinkle some sugar on top of your shortcakes after brushing them with heavy cream. I usually go for granulated sugar, as it gives the shortcakes a crunchy bite. But you can also use caster sugar if that's all you have. Don't skip this bit; the sugar will caramelize when the shortcakes bake and give them a crispy crust that makes the overall dessert taste even better. You can pop those shortcakes right into a preheated oven after you're done with these little steps.
6. Try unsweetened drop biscuits instead of shortcake
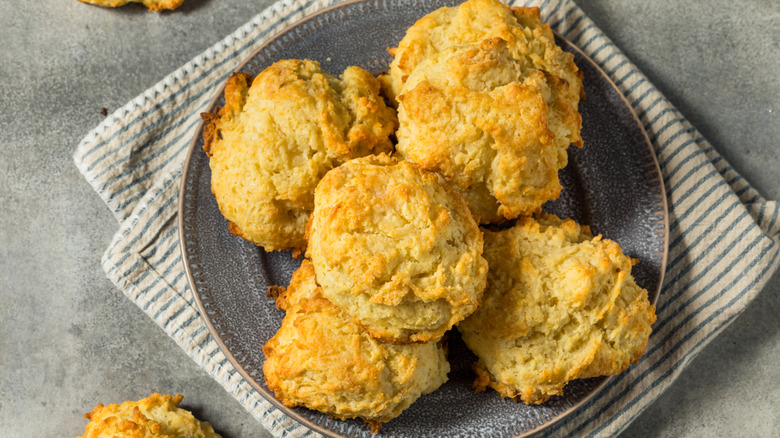
I get it, not everyone feels too confident about making shortcakes for this dessert. Though seemingly easy, getting the dough right and then rolling and cutting it out can be a bit too much for beginners. Fortunately, this dessert is quite versatile, so you can use unsweetened drop biscuits instead if you'd like to cut down some extra work. A few major perks, as you've likely already guessed, are that they are easy to make and they also have a crumbly texture that's similar to shortcakes.
That said, there are a few differences between the two that are worth noting. The first is that, though drop biscuits are crumbly, they are also a lot denser than traditional shortcakes, so your overall assembled dessert won't be as light and flaky. Moreover, drop biscuits don't look as polished as shortcakes do. If you're okay with these little nuances, go ahead and make some drop biscuits.
They start off the same way as shortcakes, because you'll need to rub chilled butter into the dry ingredients. Some recipes also suggest mixing melted butter with buttermilk instead, which makes the process much simpler. Either way, you'll just need to add the wet ingredients into the dry ones, fold everything with a spatula, and then drop those biscuits onto a tray lined with parchment paper using a large spoon or an ice cream scoop. Bake them until they are golden brown.
7. Macerate the strawberries in advance
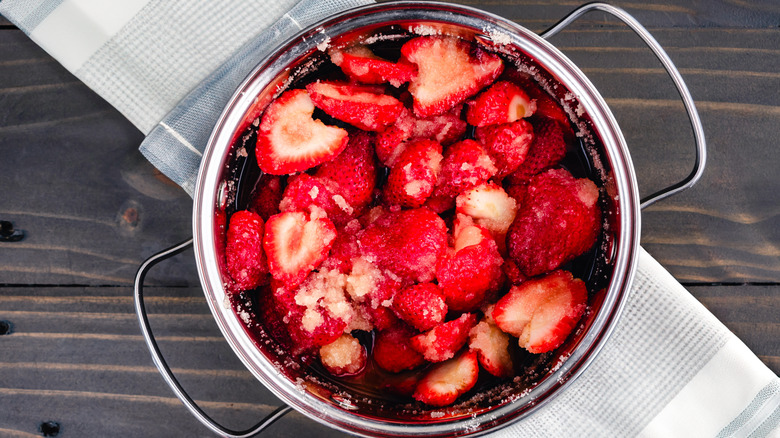
A very important step when making a strawberry shortcake is to macerate the strawberries ahead of time. That's the best way to get them to taste the way they should for this dessert. But I'm getting ahead of myself. In case you're new to this term and are wondering what it means to macerate strawberries, let me explain: Maceration involves chopping strawberries (or any fruit, for that matter) and then tossing them in sugar, a little lemon juice, and vanilla extract. This process draws out the water from the strawberries. The water mixes with the sugar and turns into that thick syrup that's topped onto the shortcake along with the berries.
Now that you know what the basic process is all about, it's also crucial to note that macerating in advance doesn't mean hours or a whole day before you're planning to assemble your strawberry shortcake. Usually, 30 minutes to about 2 hours is a decent enough time to get the best results. If you macerate the strawberries for longer, they might turn overly mushy, which isn't how they're supposed to be for this dessert. On the contrary, less than 30 minutes won't be enough time for the berries to release enough juices. And so, I would recommend planning out how you want your strawberry shortcake to turn out while keeping this factor in mind.
8. Avoid overwhipping or underwhipping the cream
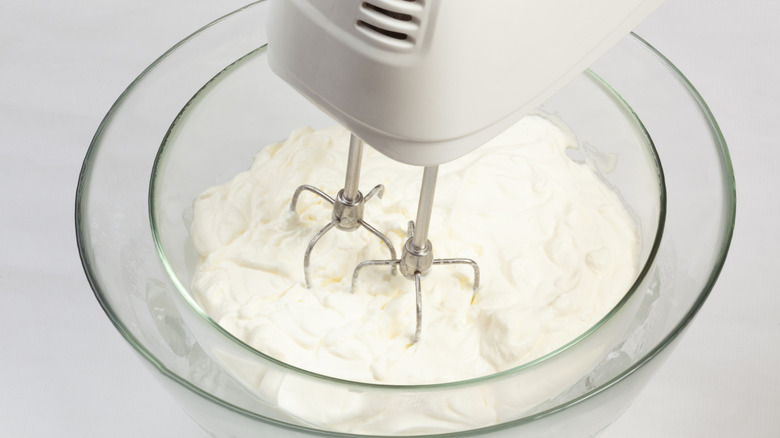
The last (but equally important) element that you need to get right to make the best strawberry shortcake is the vanilla whipped cream. It looks exceptionally easy to prepare, but things can go south a lot faster than you'd imagine — even more so if you aren't keeping a close eye on the heavy cream while it's whipping.
Usually, the most common mishap is accidentally either overwhipping or underwhipping the cream. Truth be told, underwhipping isn't too big of an issue because you can always whip the cream further to get it to the right texture, which, in case you're wondering, is medium peaks. Medium peaks are achieved when the cream holds its shape but isn't too stiff. Overwhipping, on the other hand, can cause more trouble than you'd want, especially if you end up whipping the cream to a point that it starts splitting. In this case, you'll have no option but to start over.
Here are a few tips to avoid both these issues: Start with cold heavy cream, as noted earlier. But along with that, also keep your bowl and whisk in the freezer for some time before you begin whipping — that's a great hack for the absolute easiest homemade whipped cream. Also, I'd suggest you stop whipping it once it reaches soft peaks if you're using a hand or stand mixer. You can whip it further by hand with a whisk to get it to medium peaks, as this reduces the chances of the cream becoming too stiff, or worse, splitting.
9. Let the shortcakes cool down before assembling the dessert
Freshly-baked shortcakes smell incredible, so you might want to start assembling the dessert right after taking them out of the oven. As difficult as it may be to do so, I suggest waiting until they cool down. The main reason is that if you top hot shortcakes with macerated strawberries, they'll end up soaking a lot more of the syrup than they should and turn mushy. Then, you won't get that tender bite like you'd expect. Other than that, hot shortcakes can lead to one more major issue — the whipped cream will melt, even if it's at the right consistency. Lastly, the entire dessert will most likely fall apart because each element won't stay in place.
Considering all this, it's better to wait it out. And when I say give the shortcakes time to cool down, I mean only until they are cool to the touch, which usually takes about half an hour at room temperature as long as you've kept them on a wire rack. They could take a little longer depending on their size, but the point here is that they don't need to be kept in the refrigerator or freezer for hours! Once they're sufficiently cool, you can start topping them with the macerated strawberries and whipped cream.
10. Try not to overload the shortcakes
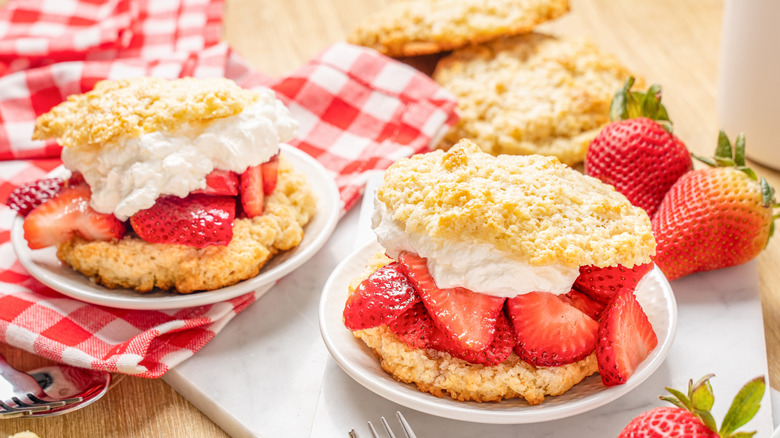
This point may sound outright weird to many of you because the whole point of this dessert is to pile the shortcake with the macerated strawberries and whipped cream. While that's true, it's also a fact that overloading the shortcakes isn't the best thing to do, with the reason being that they'll get lost under all the toppings. They're one of the main features of this dessert; they provide a crumbly texture that balances out the softness of the cream and strawberries. Hence, not being able to taste them at all will be a huge bummer. On top of that, they will get soggy faster even if you've chilled them properly before topping them with the macerated strawberries, all because of the excess juices.
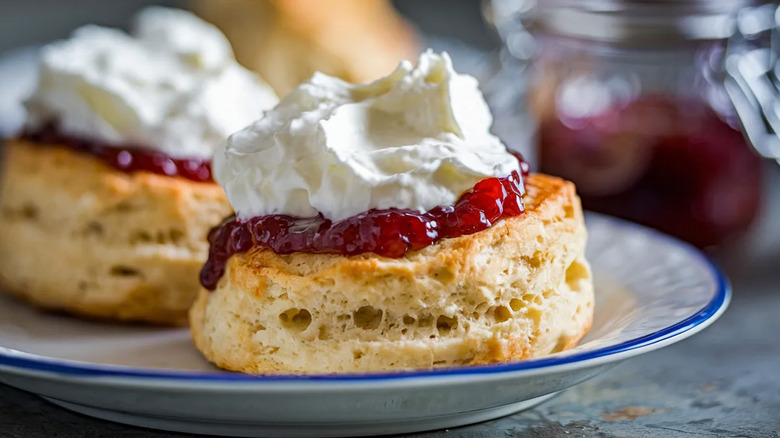
Instead of overloading the shortcakes, you should aim for a balanced approach. Once you cut them open, top them with enough strawberries so that they're piled high but don't start falling off from the sides. Then, top the strawberries with a generous amount of whipped cream, but again, it shouldn't start slipping off. I can't tell you exactly how many tablespoons of each you'll have to top your shortcakes with because that can vary based on their size. But take a good look at how big they are, and keep the pointers I've mentioned in mind — that will give you a pretty fair idea.