10 Cookie Decorating Tips You Need To Know, According To A Professional Baker
Who doesn't love cookies? They're sweet, come in various flavors, and if decorated well, they might even look too pretty to eat. And when it comes to decorating, the best part is that there are so many ways to go about it. From using different types of icings and toppings to following decorating hacks that are festive for fall (or any other time of the year), the options are pretty much endless.
If you want to try any of these ways to decorate your cookies, the task may feel quite daunting if you're an amateur or aspiring baker. And I completely understand that, because while it seems easy, there's so much that can go wrong when decorating cookies. Your icing can be at the wrong consistency, you could use the wrong colors, you might use incorrect tools or techniques and ruin the decoration even when everything else is okay, and so much more. But despite all that could go wrong, you don't need to give up on decorating cookies because I'm here to help.
As a pastry chef with over five years of experience and a diploma in patisserie, I'll be sharing some cookie decorating tips that I've learned so far. These tips are perfect for beginners who genuinely want to improve their decorating skills in the simplest, most practical way possible. So, stick around till the end to make sure you get the hang of all these tips to have easier and better cookie decorating sessions moving forward.
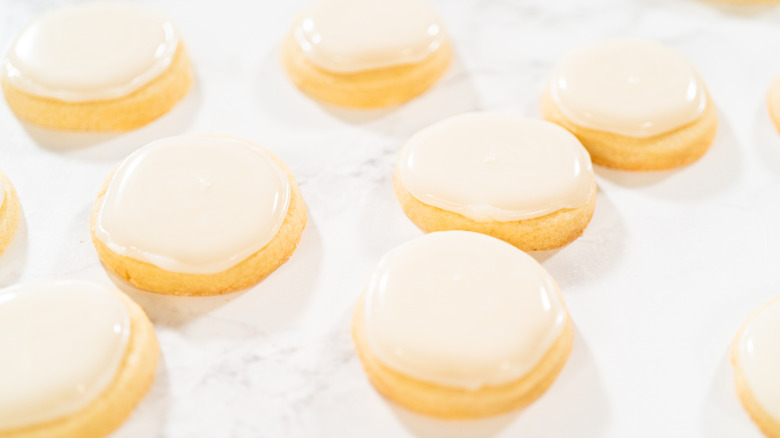
Always start with fully cooled cookies
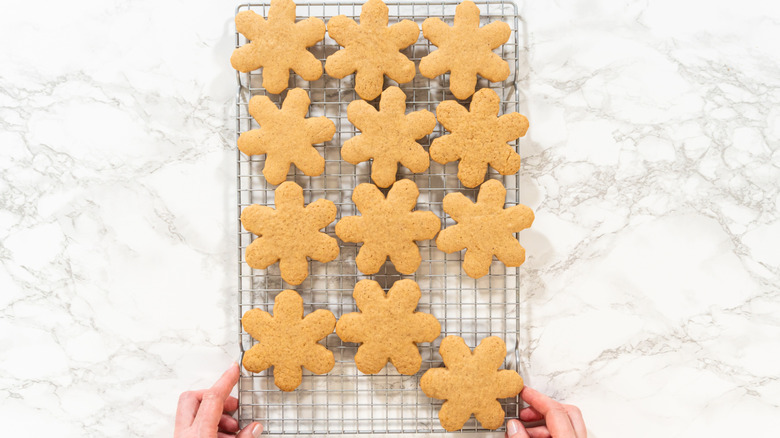
You might think that there's nothing that could go wrong when you try to ice warm cookies. However, the reality is actually the opposite; it's not just the decoration, but even your cookies can get ruined if you try to ice them while they are still warm. For instance, the icing will melt before you know it and start dripping off the sides, or worse, melt into your cookies and ruin their texture. But that's just the beginning of things that can go wrong.
If your cookies are just slightly warm and the icing somehow manages to stay put, there's a chance it could dry unevenly later due to the residual heat from the cookies. The icing could also get condensation spots because of the steam released from the hot cookies. Lastly, the colors could all bleed into one another due to the heat, not giving you the result you were aiming for.
Considering these aspects, I'd recommend cooling your cookies properly on a wire rack before you start decorating them. A wire rack will help with even cooling and also ensure the cookies stay fresh longer. In fact, that's one of the ways professional bakeries keep their treats fresh, including cookies, so it's definitely worth it.
Use the right cookies and icing
One of the most important things when it comes to decorating cookies is using the right ones and pairing them with the right icing. While all sorts of cookies can be decorated, not all of them will go well with every sort of icing. So that's something you need to keep in mind. Let me explain this with a few examples.
Everyone's favorite chocolate chip cookies can indeed be decorated. But since they have a bumpy surface because of all those chips, you won't be able to frost and pipe out intricate details on them with royal icing. Besides that, the flavor of royal icing will also not pair too well with the chocolate chips. So, when it comes to chocolate chip cookies or any other type of cookies with a bumpy surface, it's best to decorate them with melted chocolate or simple glazes and then get creative with toppings like sprinkles, nuts, or candies.
If you're really into decorating and piping with royal icing, you should stick to sugar cookies, gingerbread cookies, shortbread cookies, or any other types that are rolled and cut out with a cookie cutter and have almost no mix-ins. These cookies have a flat surface that's the perfect canvas for all that detailed piping work. Plus, maybe not all of them, but most of these cookies have a flavor that pairs well with the sweetness of royal icing, so that's a bonus.
Ensure your icing is at the right consistency
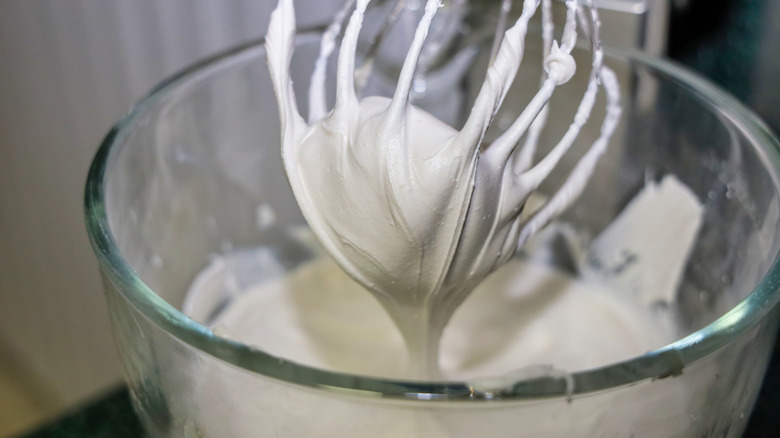
Besides choosing the right cookie and the correct icing for it, it's equally important to ensure your icing is at a proper consistency before you start decorating. If your icing is even slightly off, you won't get the results you're hoping for, and this applies to all types of icing, be it royal icing or melted chocolate.
When it comes to royal icing, regardless of whether it's regular or eggless royal icing, it needs to be a little stiff when you're using it to outline your cookies. If the icing is too thin and drips off easily, it will start spreading everywhere. Similarly, the icing also needs to be at a slightly thick consistency when you're piping designs on your cookies. On the other hand, if you're using the icing to fill inside the outline (also called flooding), it needs to be slightly thinner so that it spreads evenly without looking too stiff.
In case you'd like to decorate your cookies with melted chocolate instead, it's essential that you melt it properly. Try not to melt it at a very high temperature or for too long, as that will burn the chocolate and turn it lumpy. Instead, you can melt it for short intervals at a steady temperature, stirring in between, either in a microwave or over a hot water bath. If the chocolate seems too thick for dipping after you've melted it, add a bit of oil to adjust the consistency.
Use the right colors
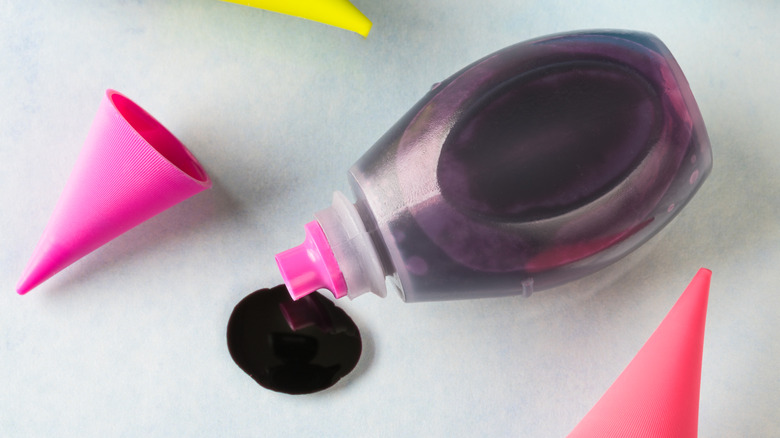
It's a given that you'd want your icing to look pretty and colorful before you start decorating your cookies. That said, a mistake beginners often make is not choosing the right type of food color for the icing they're using. As harmless as food colors look, they can actually make or break your icing. So it's crucial to choose the right kind for the icing you're working with.
Let's start with melted chocolate. Of course, you only need food colors when you're using white chocolate as an icing. And for that, you'll have to use oil-based liquid colors or powdered ones. You could also use color powder blends made with natural ingredients if you'd like to stay away from artificial colors. I'd highly recommend not using water-based food colors for chocolate, as they can make it seize and turn grainy.
For royal icing, on the other hand, you actually need to use water-based food colors because oil-based ones will ruin its texture. It's ideally best to use water-based gel colors, as they have that nice thick consistency and are very bright. However, powdered ones can work too, as long as you're using the water-soluble kind. Liquid food colors aren't the best bet for royal icing, as their thin consistency can throw off its texture and make it extremely runny. As long as you keep these things in mind, decorating your cookies will become a breeze.
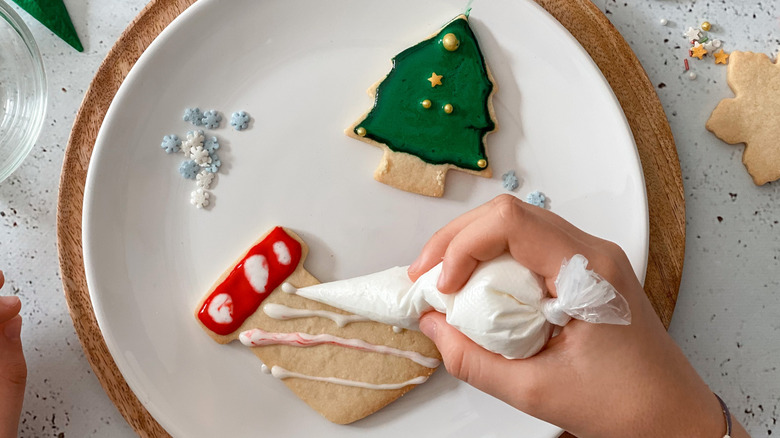
Ice your cookies strategically
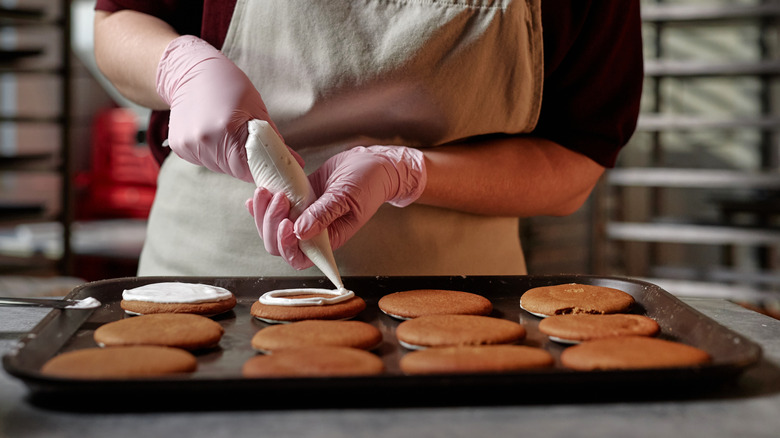
It's important that you decorate your cookies strategically, regardless of the icing you choose. This is because if you go about the process without planning ahead, it's highly likely that your cookies won't turn out the way you want them to.
What does it even mean to ice cookies strategically? Well, it's about figuring out what design you'd like first, then piping the outline for that on your cookie. If you're planning to do a detailed design on your cookies with royal icing, it's essential that you finish the outline and let it dry out slightly before flooding the center. If you skip the outline, though the icing in the center won't necessarily drip off the cookie (at least if it's at the right consistency), it won't look too neat, either. Similarly, even if you're using melted chocolate, it's best to pipe an outline first rather than directly filling the center. This is crucial as chocolate's consistency can be thinner than that of royal icing, so the chances of it dripping off the sides of the cookies are higher.
Besides these obvious factors, there are a few other benefits of icing your cookies strategically. These include: fewer chances that you'll have to redo your cookies over and over again, and also that you won't really waste your icing as it'll be a lot easier to figure out how much you'll need when piping each section.
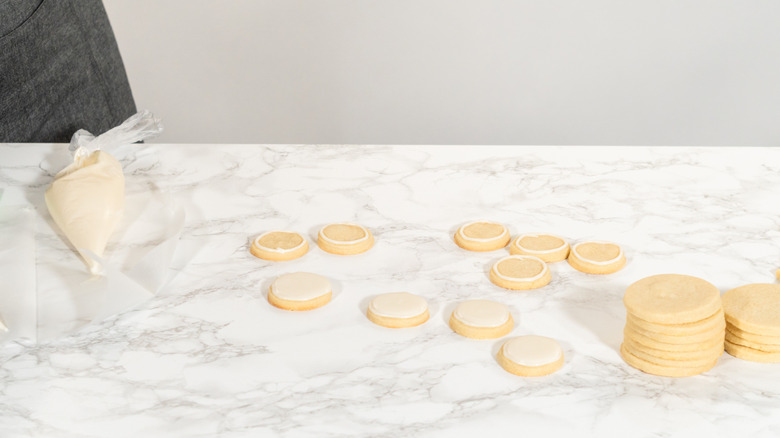
Dip them in icing if you aren't sure about your piping skills
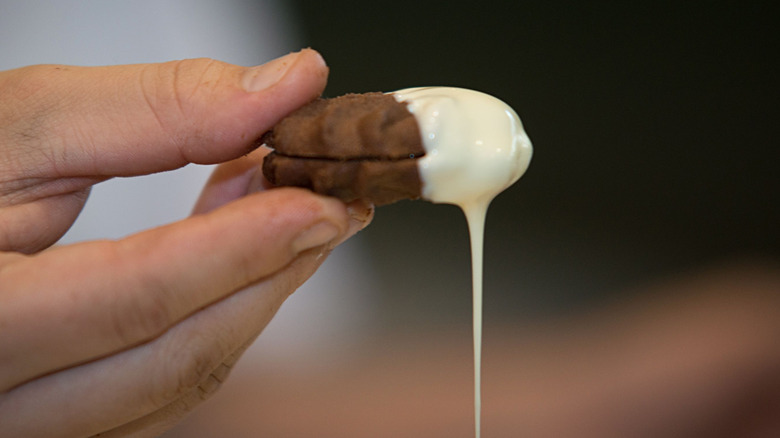
Sure, piping the icing on your cookies is probably one of the neatest ways to decorate them. But at the same time, I understand that it might not be everyone's cup of tea (especially beginners), given the slightly complicated technique. If you'd like to ice your cookies without any piping, I have a trick for you! You can just dip them in icing instead. You might feel that the cookies won't look so elegant if you follow this method, but if you're careful enough about a few things, they'll turn out just as pretty as they would if you pipe the icing on them.
One of the factors to be careful about when decorating your cookies this way is ensuring the icing is at the right consistency before you start. Speaking of royal icing, it should be at a slightly runny consistency so that it coats the surface of the cookie properly after dipping without looking too stiff. Just hold the cookie in your hand, dip the top lightly until the icing covers the surface, twist the cookie so that the icing settles down evenly, then let it rest. Also, make sure you store royal icing properly to prevent it from hardening, even while you're dipping, by covering it loosely with plastic wrap.
If you're considering dipping your cookies in chocolate or any other sort of glaze, the process is pretty much the same. Just be quick so the icing doesn't harden.
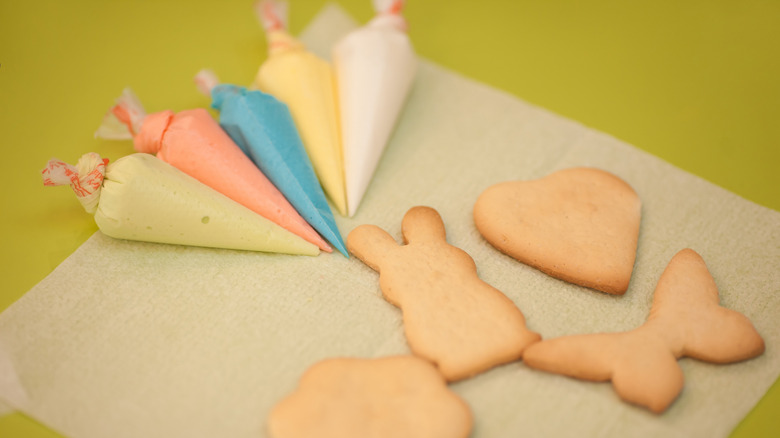
Use the right piping tools and techniques
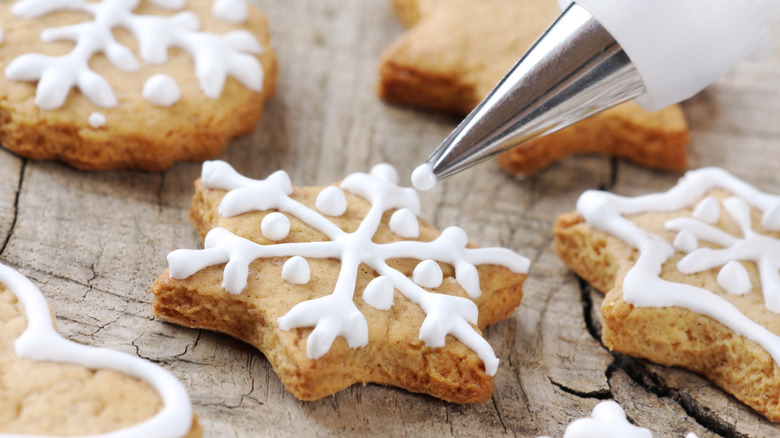
One of the biggest blunders a lot of people make when trying to decorate their cookies is not using the right piping tools or techniques. Sure, if you aren't looking for chef-level perfection, you can get away with decorating them with whatever you have on hand. But if you've been wanting to decorate them like a true professional, it's worth investing in the right piping tools.
You won't need a whole set of fancy tools, at least while you're learning. I'd recommend stocking up on good-quality piping bags and a basic set of piping tips initially. To outline the borders of your cookies, you'll need really small piping tips. For instance, if you're using Wilton piping tips, you will mostly need anything between nozzle sizes #1-4, depending on the size of the cookie. These tips are also perfect for piping dots on your baked goodies. To flood the center, go for a slightly larger round piping tip, but make sure it isn't too big. Otherwise, it will be difficult to control how much you squeeze out.
Now, coming to piping techniques, it's critical that you don't hold the piping bag too close or too far from the cookie. That's one of the mistakes everyone makes with royal icing, especially. Moreover, try not to apply too much pressure on the piping bag when squeezing the icing out, regardless of which one you're using, as the bag could burst and create a mess.
Fix mistakes quickly
When you're learning how to decorate cookies, it's possible that not everything will go as planned and you'll end up making plenty of mistakes. That's completely okay, though, and you won't really need to scrape the icing off and redo the cookies completely if you make a few mistakes, as long as you're quick at fixing them.
For that, I'd first suggest keeping a few toothpicks, a pair of tweezers, and paper towels handy before you start piping. Icings can harden really quickly, and once that happens, it's a lot more difficult to fix mistakes. Plus, once the icing hardens, fixing it will ruin its texture, and you'll most likely have to redo the whole thing. Not to mention that if you aren't quick enough and don't have these tools around while fixing small blunders, different colored icings can bleed into one another and make your cookie look messy.
If you notice smudges on the icing, you can wipe them off with a damp paper towel immediately after it hardens slightly. Similarly, if the icing has any air bubbles, pop them with a toothpick while it is still wet. If you notice the icing spilling out of its borders but not bleeding into other colors, fix that by picking up the excess icing with a toothpick. Tweezers will come in handy if you have any excess sprinkles that you'd like to remove without spoiling the iced base. Try these techniques first and redo the entire icing only if there's really no way to fix it.
Top with sprinkles while the icing is still wet

It's likely that you might find piping details on your cookies with icing a bit too intricate, but you would still want to decorate them in some way. Luckily, sprinkles are a godsend for that! Topping your cookies with not just sprinkles, but also chocolate chips and candies, is a great way to make them look pretty. However, it's important that you top them with these decorations at the right time to get that perfect finish.
Once the icing dries and sets, the sprinkles won't stay put that easily. And in that case, the only thing you can do is use more icing as glue to stick them on your cookies. But if you apply too much pressure while placing the sprinkles on your iced cookies, the dried icing will likely crack, or it could end up with smudges and fingerprints. Royal icing, especially, starts drying up very quickly and is more likely to get these issues if you add sprinkles on it after it dries up.
Given all that could go wrong, it's ideal to top your cookies with any sort of sprinkles or add-ins right after you frost them with icing. This way, you'll not only ensure your cookies look nice, but you'll also save extra time and effort as you won't need to stick the sprinkles on later.
Give the icing enough time to dry
Have you ever had instances where you seem to be doing everything right while decorating your cookies, but somehow the icing starts bleeding and looking messy? Well, a rookie mistake you may have inadvertently made in this case is not giving the icing enough time to dry. But fortunately, it's easy to turn that around.
Being patient and letting each layer of icing dry completely before you start piping the next one is a key factor in decorating cookies. If you don't let each layer dry out properly, the colors will immediately start bleeding into each other. It's also crucial that the cookies dry in a proper environment and at the right temperature, as that plays a major role in whether or not the icings will mix up with one another. The right environment and temperature can vary slightly for each sort of icing. But the general rule here is to let them dry in a cool room with minimal humidity.
If you're using royal icing, it's also important not to place it under direct sunlight, as that could prevent the icing from setting properly. With chocolate, sunlight won't be as major an issue as humidity, as the latter can cause the surface to look dull. Plus, humidity is chocolate's worst enemy, so it's highly possible that it won't dry properly on the cookies either. As long as you take care of these little things, your cookies will definitely turn out amazing.