Cocktailing On A Budget: How To Improvise Your Bar Tools
Entering the world of home bartending can be an intimidating — not to mention expensive — proposition. Before you even start mixing your very first drink, it seems like you have to stock up on hundreds of dollars worth of glasses, shakers, strainers, jiggers, muddlers, spoons, mallets, ice cube trays, canvas bags, swizzle sticks, and all kinds of other esoteric stuff that people say you need if you want to make "real" cocktails. And you know what? Hardly any of it is really necessary.
We'll let you in on a secret: the most important thing about bartending, at home or professionally, is the final product. It seems obvious, but all that matters is finding something that'll get the job done. And we're willing to bet that if you live in a place with a kitchen, you probably already have most of the things you need to start whipping up cocktails.
Mixing Glasses

Let's start simple. For cocktails that only include alcoholic ingredients (i.e., no fruit juices, soda, or other mixers of the sort), you're almost always going to want to stir rather than shake. Why? Part of it is convention, with a half-century of cranky old bartenders kicking anyone out who asks for their martini "shaken, not stirred."
The other reason is practical. When you shake a drink, little chunks of ice tend to break off, melt, and water it down. With spirit-forward cocktails like martinis and Manhattans, that sort of defeats the purpose. A daiquiri, on the other hand (made with white rum, sugar, and lime juice), doesn't mind a bit of extra water—in fact, it can be useful to take the sour edge off of the lime juice.
Anyway, back to the task at hand. If you poke around online, you're sure to find hundreds of different cocktail mixing glasses, ranging anywhere from five bucks to nearly one hundred. While a lot of them are certainly pretty, they're one of the last things you need to spend your money on when building a home bar.
The alternative? Literally any heavy glass with a thick and relatively square bottom. Pint glasses work great, as do small Pyrex-style measuring cups (the two-cup size is just about ideal). The weight is probably the most important thing to keep in mind, since stirring a dainty little glass when it's full of ice and booze runs the risk of a messy (and very disappointing, considering the contents) spill.
You also don't want to use a bowl or anything with too rounded of a bottom, because the way you stir a cocktail is different from the way you'd mix other things in the kitchen.
Barspoons

The key to chilling a cocktail properly is to forget everything you know about culinary stirring. Rather than agitating through the middle of the mixing glass like you're mixing a stew, you want to rotate your spoon around the inside of the glass in a smooth, circular motion. The individual ice cubes shouldn't move too much, but they should move together as a single, rotating cylinder. This gets the drink nice and cold without watering it down.
Unfortunately, this can be difficult to do with a regular spoon. Most teaspoon handles are too short to reach all the way to the bottom of a mixing glass, and the head of a soup spoon is usually too large to properly seat between the ice and the inside of the glass.
Not to backpedal so shortly after saying how unnecessary most bar tools are, but a barspoon is one of the few things you might want to spend a few bucks on when building your collection. And when we say a few, we mean a few. You can find fancy ones for $30 and up, but a sturdy copper or stainless steel spoon shouldn't run you more than $15.
There are a few things that make these perfect for mixing cocktails. First, the handle is long and thin, meaning that there's plenty sticking out of the glass for you to work with. The handle is also twisted into a smooth, spiral coil that allows it to rotate freely in your hand as it makes its way around the glass. Finally, the actual head of the spoon is only curved very slightly, which lets it fit perfectly into the small gap along the outer edge of the ice.
This article isn't called "Why You Should Buy a Barspoon," though, so onto the alternative. In a pinch, any long-handled spoon you have lying around (or tucked into the back of that drawer you never open) should do the trick, as long as it doesn't have too large of a head. Try to find one that's thin enough to move in your grip with relative ease, and you can avoid most issues by simply not holding on to it too tight while you're stirring.
But, when you get right down to it, this might be the one tool that's worth a little investment.
Strainers

After you've stirred up your Lavender Martini (or whatever it is, we just happen to really like those), the next step is separating it from all that ice. Normally you'd use a Hawthorne strainer or julep strainer, but since we've already established that you probably don't have either of those, we'll get right into some other options.
The ideal choice, partly because of its effectiveness and partly because we think it's pretty clever, is to simply find a glass that's slightly smaller (and a good bit shorter) than your mixing glass. Place it in the top of the mixing glass as if you're stacking them, leaving about a half inch or so of room around the sides. Holding it firmly in place, pick up the stacked contraption and carefully pour your cocktail into the serving glass. The smaller glass ensures that none of the ice will come spilling out in the process.
Alternatively, you can improvise a julep strainer of sorts with a large, wide, slotted serving spoon. If it fits inside your mixing glass, stick it in at about a 45-degree angle so that it's resting just on top of the ice. Holding it in place with your finger (make sure you're using enough force to keep the ice from spilling), pick up the mixing glass and pour it into the serving glass. Voila!
Muddlers

Speaking of juleps (and mojitos and strawberry daiquiris and really more delicious drinks than we can count), it's time to talk muddling. At its core, this is the process of smushing herbs and fruits at the bottom of a glass, and it's a necessary step in all kinds of recipes. Sometimes, as with mint, all you need to do is press lightly on the ingredients to express their essential oils. Other times, you want to pulverize the stuff into oblivion (this is usually only the case with fruit, since herbs start to taste bitter if you muddle too hard).
As such, all you need to improvise a muddler is something that's good at pressing and smashing food. Purpose-built muddlers are really just shaped wooden or plastic dowels with a flat end, so a wooden meat pounder or thick wooden spoon makes for a totally acceptable substitute. In case you need some reassurance, we bartended for years before ever buying a muddler to use at home — it's simply not that important when it's so easy to get the job done without spending money.
Lewis Bags

Come Kentucky Derby season, you might start to hear the word "Lewis bag" bandied around on local-news fluff pieces about mint juleps (don't worry if you haven't, since it's a bit of an obscure tool). A Lewis bag is used for making crushed ice that you can use in all sorts of things, from Moscow Mules and Whiskey Smashes to Queen's Park Swizzles and more. But, much like the muddler, it's generally easier to use a homemade substitute than it is to go out and buy one.
The way it works is surprisingly simple: you place ice cubes into the bag, close it up, and then smash them to pieces with a wooden mallet. Because Lewis bags are made from canvas, they wick water away from the crushed ice, keeping it from melting too fast and turning your cocktail into a slushie. As a result, this is a really easy process to replicate.
All you need to do is find a cloth napkin or large hand towel that isn't too fuzzy. The really soft and fluffy ones have a tendency to leave behind lint, which is a pretty unpleasant surprise when you're sipping on your drink, so ideally you want to find one that isn't so prone to shedding. Those rustic-looking canvassy ones are perfect.
Then you simply wrap your ice cubes up in the towel, fold the edges over so they won't go flying everywhere, and go to town with a meat tenderizer, wooden mallet, rolling pin, or other heavy kitchen implement until the ice is crushed into small chunks and powder. After that, you can scoop it out with a serving spoon (try not to use your hands, as that'll undo all the drying the towel accomplished) and get started on your swizzles!
Swizzle Sticks

While we're on the topic of swizzles, we should probably address one of the most overpriced items on our list: the swizzle stick. It is, quite literally, just a fancy stick (we're not talking about the plastic things that come with your latte), but an authentic one will run you between $15 and $20 (!) depending on the retailer.
To be fair, though, it is a very particular kind of fancy stick that serves a very specific purpose, and a good amount of work goes into crafting them properly. They're traditionally harvested from a tree that grows in the Caribbean (Quararibea turbinata for the geeks), trimmed into the classic chicken-foot shape, and finally cured with a sealant, all by hand. It's a labor-intensive process, which makes the price seem a little less ridiculous. But you're probably still wondering, why bother?
Well, swizzle sticks came about as a sort of primitive blender, and they're primarily used to make — you guessed it — swizzles. Aside from just being a fun word to say, a swizzle is a drink made with a spirit (originally rum), lime juice, falernum (a spiced syrup that's used in a lot of Tiki drinks, similar to orgeat syrup), and a few sprigs of mint.
It's built in a highball glass by filling it partway with crushed ice and the other ingredients, placing the swizzle stick in, positioning it between your palms, and then rubbing them together rapidly to twist it and mix the drink. Then you add more ice, add more booze, swizzle again, and repeat until the glass is full. There are dozens of variations on the classic, but those are the basics.
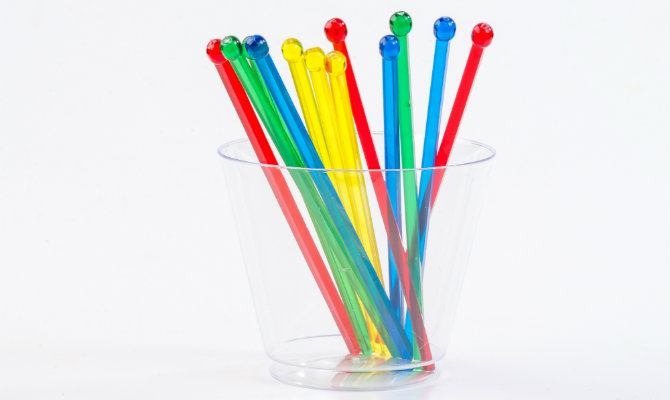
Luckily, you don't need an authentic swizzle stick in order to make one. All you have to do is find a long, thin implement with a wider segment on the end. A barspoon works perfectly, but assuming you don't have one lying around, we've found a decent alternative to be those metal skewers with a circular ring on the not-pointy end. As an added convenience, you'll probably already be getting them out to make shish kabobs on the grill by the time you feel like having a summer swizzle.
As you can see, it's actually pretty easy to put together a serious set of bartending tools from random stuff you have lying around your kitchen. Making cocktails should never be exclusive or intimidating (and most bartenders are nice people who would love to answer your questions, we swear), so don't let the mountain of "necessary" equipment stop you. There's always a way to make the drink you want, and sometimes it tastes even better with an extra little bit of DIY flair!