How To Laminate Dough Like A Professional Baker
There's no denying that most of us love croissants, turnovers, and even vol-au-vents predominantly because of their crispy layers. If you're an amateur baker or even slightly inclined towards the art, you'd surely know that the amazingly flaky texture of these baked goodies is a result of carefully laminating dough. In simple terms, lamination involves rolling out a piece of dough, enclosing butter within it, and then folding it multiple times before cutting out portions and baking them.
If we dive deep into the world of French pastries, quite a few kinds of dough need to be laminated for them to get those perfect layers. However, out of all these types, most folks outside of France are primarily familiar with croissant dough and puff pastry dough. Unfortunately though, laminating either of these doughs isn't as easy or quick a task as eating those baked goods is.
As a pastry chef and baker with over five years of experience working in high-end bakeries, I can safely say that laminating dough feels like child's play to me. It takes practice for sure, but knowing the right techniques helps a lot more than most newbies would've thought. I'm here to spill the beans on those chef-level techniques. If you've so far had trouble with the same, I assure you that after reading this article, you too, will be able to laminate dough like a professional baker effortlessly.
Start with the right type of dough
Before beginning with lamination, you need to be mindful about using the right type of dough. I've seen many newbie home bakers who don't know much about the process presume that any type of dough can be laminated, but that isn't the case. For lamination, it is essential that the dough has the right elastic consistency so it can be rolled out easily and stretch without tearing. Obvious examples are, of course, puff pastry dough and croissant dough. Besides that, it's also common for inexperienced bakers to believe that puff pastry dough and croissant dough are similar and hence interchangeable.
While the assumption is understandable from a beginner's point of view, the two types of dough aren't similar and ideally you shouldn't use one in place of the other. The main factor that makes puff pastry and croissant doughs different from each other is their ingredients. Puff pastry dough is made with flour, water and heaps of butter. Croissant dough essentially uses the same three ingredients, but also contains milk, sugar, and yeast, which makes the final product fluffy, along with flaky. Moreover, puff pastry dough also needs to be folded more times than croissant dough during lamination. Once you decide on the type of dough you'll be using, you can more easily move on to actually laminating it.
Rest the dough before laminating
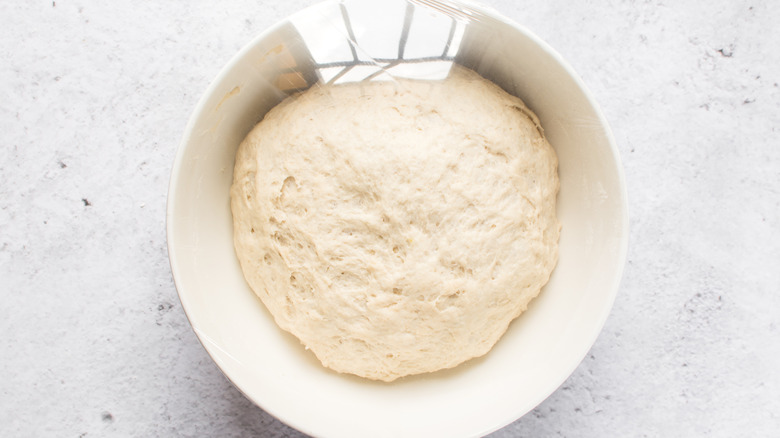
After preparing your dough you must to let it rest. This is an essential step not only in bread-making but also for lamination. There are two main reasons why it's crucial with the first one being that it helps the gluten strands in the dough relax. Gluten is a protein present in wheat and hence also in the flour used to make croissant and puff pastry dough. It gives the dough a structure and aids elasticity. But after kneading any type of dough, the gluten strands tend to contract and toughen up, making it less pliable and difficult to roll out. Letting your dough rest makes rolling it out a lot easier due to relaxed gluten strands.
The second reason resting is an important step is particularly relevant for croissant dough as it contains yeast. Any sort of dough that contains yeast, let alone croissant dough, needs to rest at room temperature so that it can double in size. This process is called proofing and is basically what gives most types of breads and croissants that soft and fluffy texture. If you don't let your croissant dough rest, you'll sadly be left with a baked good as hard as a rock. On the contrary, as puff pastry dough does not contain any yeast, proofing it isn't necessary.
Always use cold ingredients
When it comes to lamination, it is vital that both your dough and butter be cold. Cold dough is less likely to cling onto the rolling pin and surface you are rolling it on. Moreover, since warm dough is tacky and difficult to work with, you would need to use a lot of flour to dust the surface you're be rolling it on. All that excess flour can very easily dry out the dough and ruin its texture. Hence, it's important to allow your dough to rest in the refrigerator for at least 30 minutes prior to laminating.
It's equally pivotal to use cold butter, as warm butter can potentially melt into the dough during lamination. Sadly, salvaging rolled out dough with a block of butter melted within it isn't really possible, so you'll just have to start over. However, my recommendation is to use cold butter that is also slightly soft and pliable, especially for croissants, instead of using a rock solid block. That will make the folding process easier and also reduces the chances of the dough tearing.
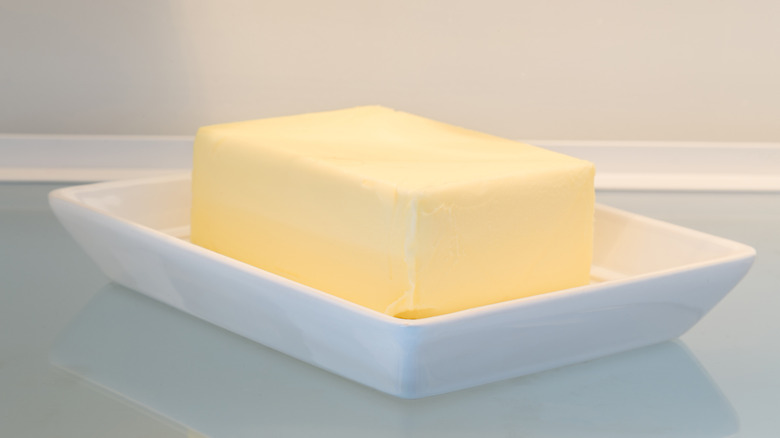
Use the right type of butter
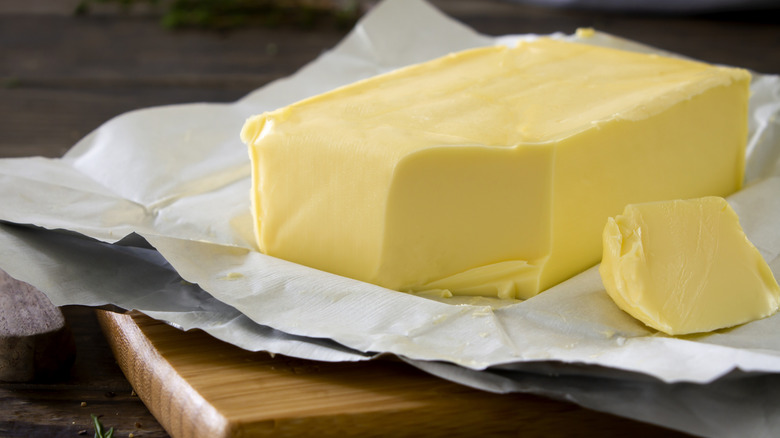
There are plenty of types of butter and when it comes to lamination, using the right kind is highly crucial. Before I get to why that is, let's first understand what makes varieties of butter differ from one another, as it's important to know before choosing the ideal one for laminating dough. In addition to being salted, unsalted, and flavored, butter can also vary based on its overall fat and water content. Although most types of butter have a higher fat content than water, the amount isn't consistent across all kinds.
So, which type is the best one to laminate dough? For great results and the right flaky finish, you should preferably use European butter. It has a much higher fat content than other types, coming to about 82%. Plus, its low water content also works in favor of creating those crispy layers. Besides all that, using European butter will additionally make your baked goods taste a lot richer due to the high fat content. Using this particular type is the best bet, but if you're having trouble finding it, you can use regular unsalted butter. Although, bear in mind that the results won't be as good.
Prepare the block of butter
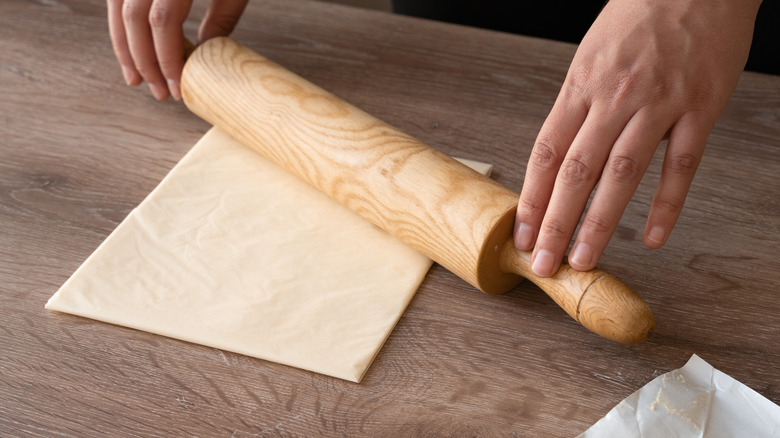
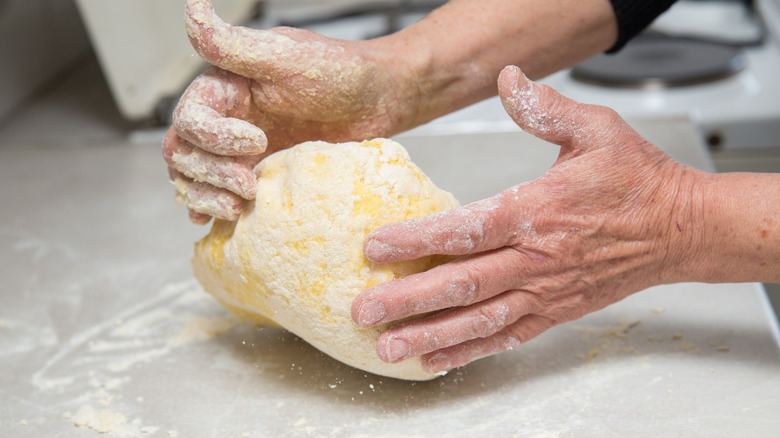
Once you have the right type of butter with you the next step is all about preparing it for lamination. As it's impossible to roll or fold dough with a large block of butter enclosed within it, you'll first have to knock the butter down into a thin sheet. To do so, start with a block of butter that is hard enough for it to maintain its shape, but at the same time soft enough that it's pliable. If necessary, you can easily soften it with your handy rolling pin.
Next, take a large piece of parchment paper –- preferably a high quality one. Place the block of butter a little off the center and cover it with the remainder of the paper. Then, begin knocking it down gently with a rolling pin until the block flattens slightly. After that, roll over the parchment until the butter is rectangular in shape — about 5 to 6 inches in size. Also ensure it is evenly thick all over, roughly about ¼ inch. To prevent the butter from leaking out of the parchment paper while rolling, fold the open edges of the paper inward by about half an inch. Place the flattened block in the refrigerator until you begin lamination so that it doesn't melt.
Enclose the butter in the dough properly
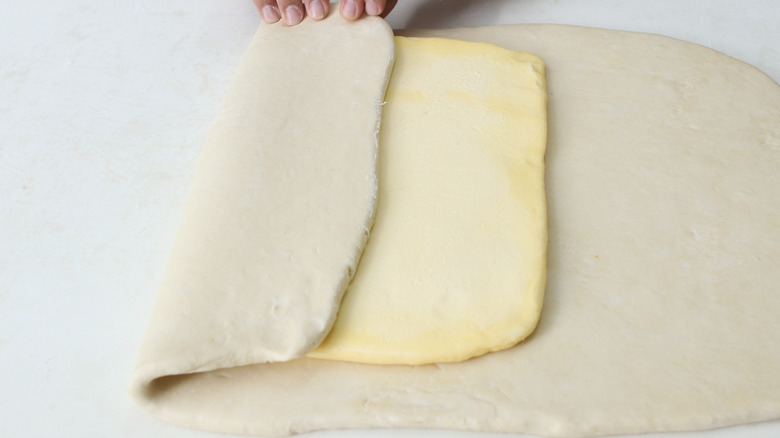
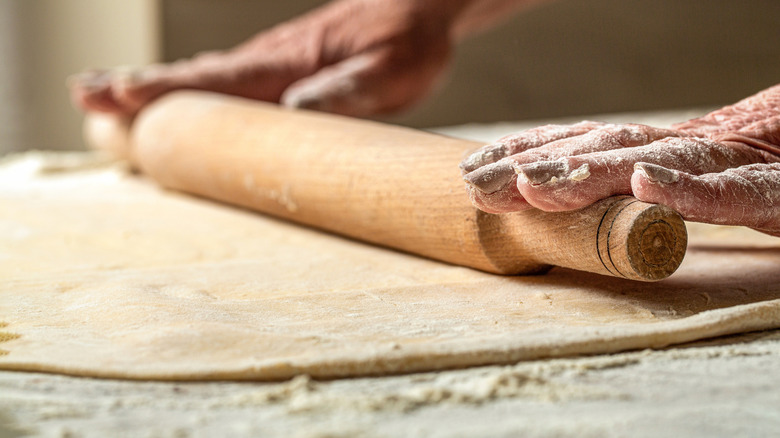
The next step involves enclosing the butter in the dough. To do so, you'll first need to roll the chilled croissant or puff pastry dough out into a large rectangle about triple the length of the butter block you prepared earlier, while ensuring it's also a bit wider. It's best to use a thick wooden rolling pin for this. But there's no need to worry if you don't have one as there are some ways to roll out dough without a rolling pin –- like using a bottle. Also, while rolling the dough make sure not to dust the surface with too much flour, because as noted, the excess will dry it out. I'd also recommend working in a cold room to further reduce the chances of the dough getting tacky and difficult to work with.
After you roll the dough out to the right size, place the cold flatted butter block right in the center. Then, take the remainder of the dough from all sides and fold them over the butter, and seal the edges. Make sure the edges are tightly stuck together and there's no butter oozing out, as otherwise, the dough may tear and subsequently cause a lot of issues later on in the lamination process. Now, pop the dough with the butter enclosed in it in the refrigerator for at least 30 minutes before you start with the next part.
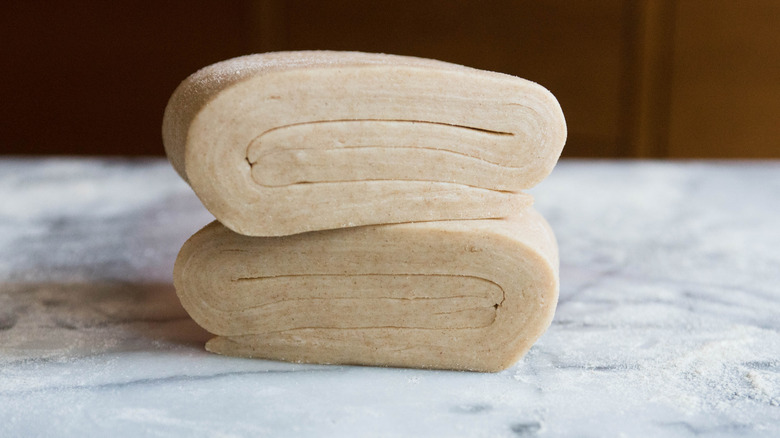
Roll the dough out evenly and begin folding
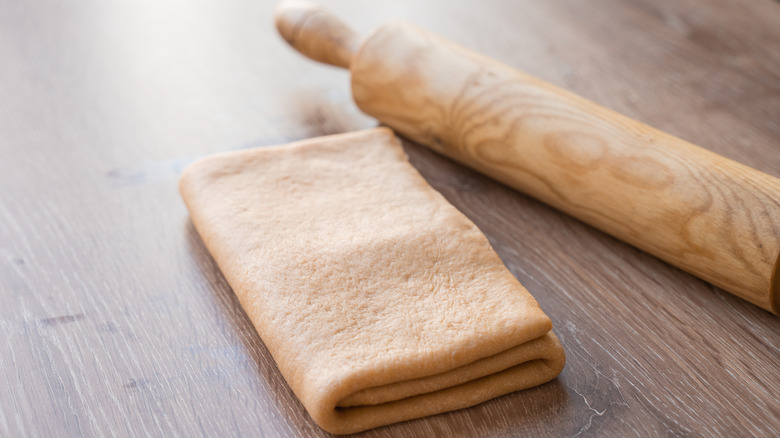
After the dough with the butter enclosed has cooled down in the refrigerator, you can start laminating it. Two common ways to do so are the book fold method and the three-fold method, also called a single fold or a letter fold. For the book fold method, begin by dusting the rolling pin lightly with flour, along with the surface you will be rolling it on. Place the cold rectangular piece of dough on it and roll it out gently in a single direction until it's roughly four times its original size. Begin folding the dough by picking up each side and bringing their ends to the center, resembling an open book, then pick up one side and fold it over the other, like you'd close a book.
For the three-fold method, mentally divide the dough into three parts, then pick up a third of the dough from one side and fold it over the central ⅓ piece, following that by folding the remaining ⅓ portion over that.
All three parts of the dough should be properly stacked over one another. With the book fold method (better for puff pastry), you'll repeat the process one more time, and for the three-fold method (ideal for croissants) you'll repeat it twice after the first fold. For both methods though, it's important to chill the dough for at least 30 minutes before starting the next turn to prevent the butter from softening.
Patch up tears before proceeding
When you roll the dough out, there's a chance it will tear in certain places. But there's no reason to worry. Depending on how large the tear is, there are a few methods to salvage it. Firstly, if the tear is really small and no butter is oozing out of it, pop the laminated dough in the refrigerator for 20 to 30 minutes, and then continue. This will harden the dough and reduce chances of further ripping. You can also dust some flour over the tear if you're worried about it getting sticky. On the other hand, if the rip is large, simply cut out a small portion of the dough from the side and patch it over the tear by gently pressing it down.
If the dough is torn at odd places and the butter is also unfortunately oozing out, place it back in the refrigerator for 30 to 45 minutes to allow the butter to reharden. Then, dust some flour over the areas where the butter is oozing out, and continue rolling and laminating it. Be extra gentle while rolling it though, as excess pressure can further cause the butter to seep out. If that doesn't do it, you can always patch it up with some excess dough.
Avoid adding flour between layers

Although I've emphasized enough that you shouldn't be using too much flour while rolling the dough out, it's even more vital to altogether avoid adding flour between layers during lamination. The simple reason behind this is the fact that the excess flour between those layers can turn gummy during baking while steam escapes from the baked goods. This gumminess will eventually ruin the final texture and flavor of your croissants or puff pastry.
One more reason you should avoid adding flour between layers is that it will end up preventing the layers from sticking to each other properly during lamination. This can result in your baked goods having large uneven gaps on the inside simply because the layers aren't packed together as well as they should be. So, even if the side of the dough that you'll be folding over appears to be a bit sticky and just seems difficult to handle, it's best to avoid dusting it with flour even if you're highly tempted to do so. I suggest you let the dough chill for a while before working with it in such situations. Additionally, if you notice any flour on the side of the dough you're about to fold over, just brush it off with a pastry brush and then continue the lamination.
Rest the laminated dough overnight before cutting

To be completely truthful here, the hardest part when laminating dough, at least for me, has always been letting it rest overnight before cutting out portions and baking them. Trust me, though, this little step will make a massive difference in how your baked goods turn out.
When you roll and fold the dough during lamination, the gluten strands can toughen up slightly. Letting it rest overnight in the refrigerator will relax those gluten strands to a massive degree. That will, without a doubt, make rolling the dough the next day a lot easier. Plus, letting the dough rest overnight will also chill the butter completely, reducing the chances of it melting during the rolling process, especially if the temperature in your area is usually soaring. Besides that, leaving the dough in the refrigerator will also develop a better flavor in the final product, making the process completely worth it, albeit a test of patience.
Use a pizza cutter for clean cuts
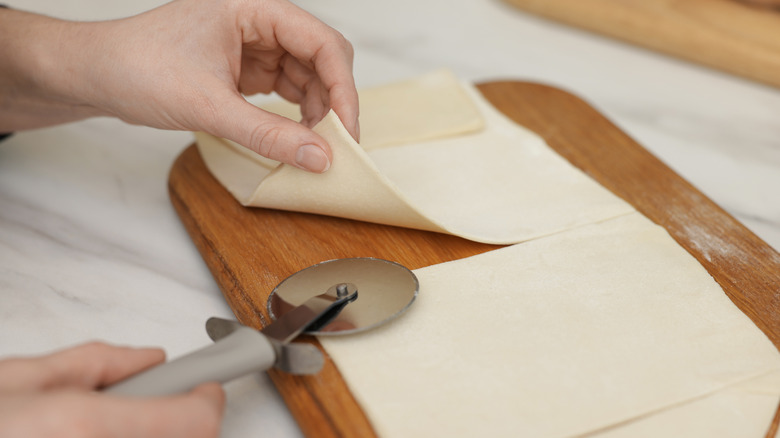
Now that you've rested it overnight, all that's left to do with that beautifully laminated dough is roll it, cut out individual portions, and trim off the edges so it looks pretty. Typically, elongated triangles are cut for croissants, and ideally, rectangles are cut for puff pastry, but even circles work if that's what you fancy.
I highly recommend using a pizza cutter while cutting out single portions, mainly because it glides through the dough a lot more smoothly than a regular knife. Sharing an insight here: Most bakers always keep their pizza cutter handy when they want to effortlessly cut cinnamon roll dough and pizza dough...or in this case, laminated dough. After cutting out the portions, shape them, place them on a greased baking tray, and bake away. Although, keep in mind that croissants will need to rest for about two hours one last time before they are baked, so they can double in size once again. The final resting will also aid with giving them that perfect honeycomb texture on the inside.