Fridge Intervention: 3 Easy Steps To Get Your Refrigerator Organized
We may receive a commission on purchases made from links.
Refrigerators tend to get cluttered quickly, hiding containers of forgotten foods in the back of their shelves and drawers. Besides making it seem as if we have nothing to eat, this results in a lot of waste. In fact, a recent survey indicated that Americans toss $640 worth of food every year.
Click here for the 11 Ways to Clean Your Kitchen slideshow.
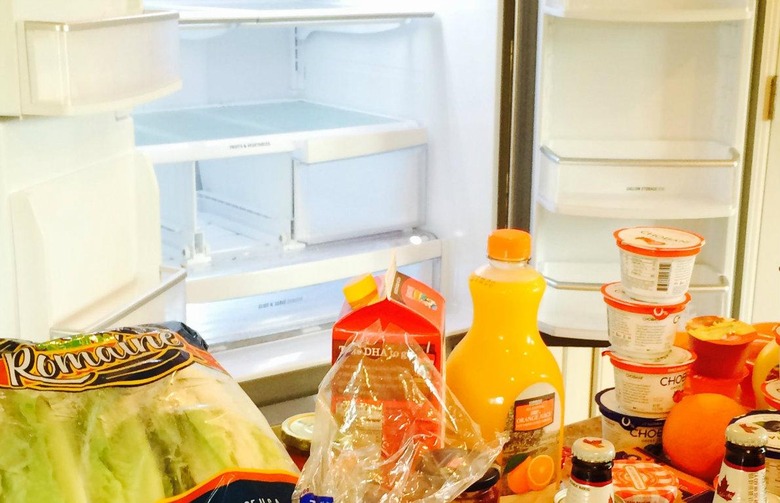
I'll admit that, until recently, my own fridge was in need of a serious intervention. Packed to the gills with snacks, drinks, condiments, and more, it was disorganized and dirty — I dreaded opening it. In my attempt to create a more user-friendly experience for me and my family, I devised an easy-to-follow plan that anyone can use to give their fridge a much-needed makeover.
Step 1: Go Shoppingcleaning

Time for the fun to begin! We'll get to , but first, let's go shopping. Before heading out the door, take a quick assessment of your fridge.
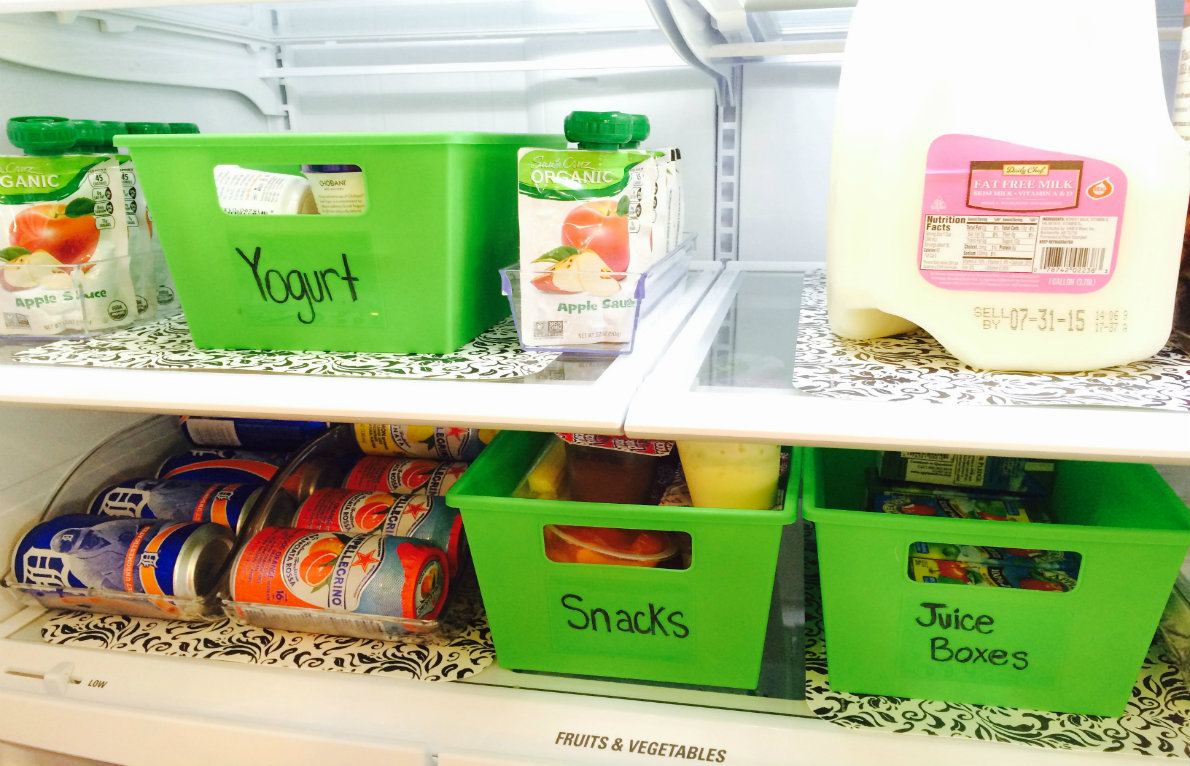
Take note of the trouble spots. Where is the clutter really building? In my case, since I have three kids, I had piles of juice boxes, yogurts, and snacks scattered throughout the fridge. My canned drinks also took up a lot of space. I knew immediately that I would need to buy some storage containers to corral all the clutter and make it easier to find.
Here's what I bought:
- Clear soda can containers
- Large green plastic bins
- Dry erase markers to label green bins
- Clear egg container
- Plenty of different sized containers with clear sides/lids to show food stored inside
- Plastic cutting boards and placemats to be used as fridge liners (I found these plastic black and white damask placemats and thought they would add some style to my otherwise utilitarian fridge)
- Small lazy Susan (not shown)
Step 2: Purge and Clean
This part wasn't so fun—I quickly discovered I had a lot of expired food. Cheese sticks from 2014 were littered throughout the back of the fridge, and we won't mention the date on the jam. Tossing out all the unused, out-of-date food gave me a real wake-up call—it was time to get serious about food organization and storage.
Once I'd cleared out all of the food—good and bad—it was time to clean. Overall, my fridge was easy to clean since a lot of its drawers and containers easily pop out, allowing me to bring them to the sink for a scrub—something you should look for when shopping for a new refrigerator. For cleaning the inside of the fridge, I used this easy, eco-friendly cleaning solution:
- ¼ cup baking soda mixed with 4 cups of water
On the tougher stains, I made a paste of equal parts water and baking soda. The grainy texture of this paste makes caked-on stains a breeze to remove.
Step 3: Get organized

Once the fridge was clean and all the old food was tossed, it was time to devise an orderly way to store what we had left.
I began by placing plastic placemats in areas of the fridge where I noticed the most mess and spills, such as the shelf I store my milk on. This will make future clean-up much easier, allowing me to simply pull out the placemat and clean it, rather than removing or clearing the entire glass shelf.
Remember all the yogurt, juice boxes, and snacks I mentioned? By placing these in labeled green bins, I cut the clutter and made these food items easier to find. Once you clean out your refrigerator, you will notice a theme of certain foods that you have in larger quantities. This is where the labeled bins will really come in handy.
I went ahead and washed and cut all my lettuce, berries, carrots, and cucumbers. I did this because it allows my family to easily grab something healthy on the go, which means we'll eat it sooner and it'll be less likely to go to waste (even though washing and cutting can reduce shelf life). Now, we're more likely to use fresh produce in a quick dinner on hectic weeknights.
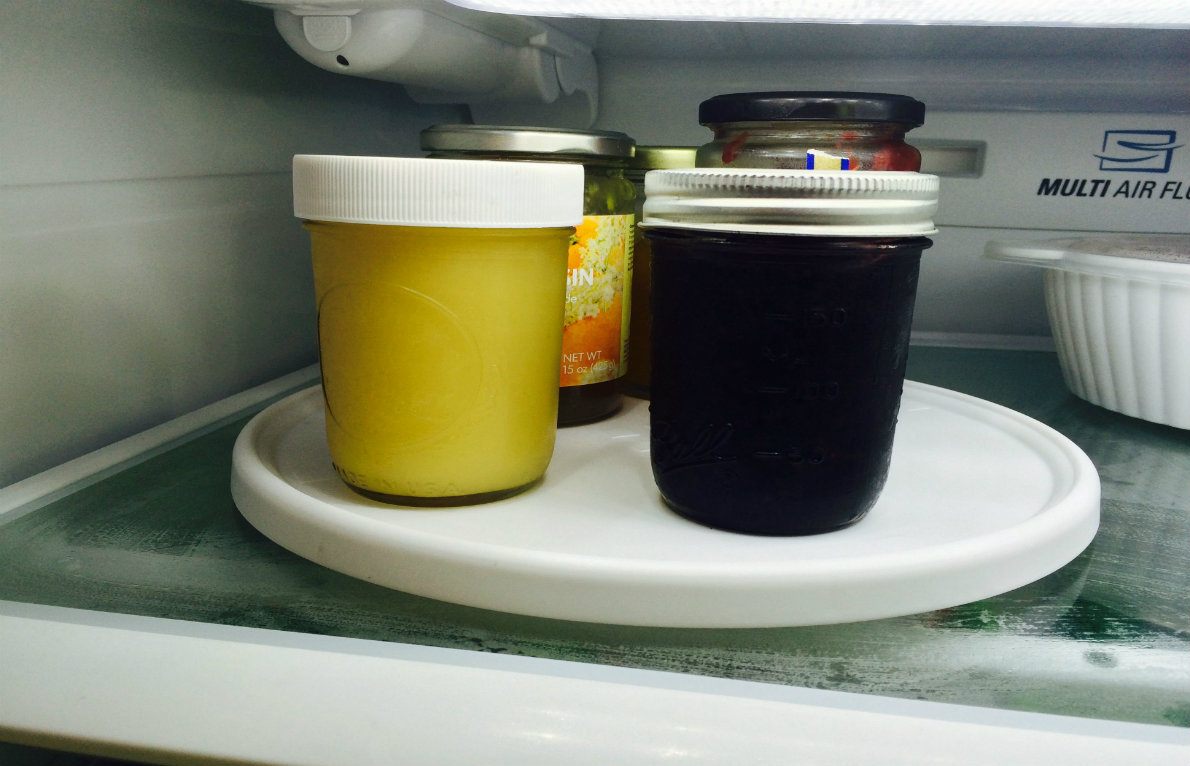
Here's a favorite tip of mine: use a lazy Susan inside the fridge to gather all your jam, jellies, and peanut butters. Like the placemats, it's easy to remove and wash when it gets too sticky.
I placed the clear cutting boards on the bottom shelf, making drips from meat products easier to clean. Take note: Meat should always be stored on the lowest shelf of your fridge to prevent food contamination from drippings of raw juices.
This project took a relatively short amount of time to complete, but the results are dramatic: I feel as if I have a brand-new refrigerator. Best of all, thanks to our new organizational system, healthy foods are close at hand and much less likely to be overlooked and forgotten.
Shelley Little writes on home design and decor for The Home Depot. Shelley provides advice on fridge storage and other kitchen tips based on her own experiences at home in Iowa. Home Depot's selection of refrigerators can be viewed here.