13 Tips For Making The Best Ribs
Ribs are arguably the most iconic of all barbecue foods, but amazingly, the marriage of pork ribs and barbecue flavors is pretty recent. In the 20th century, ribs were transformed from an undesirable cut of meat to a must-try food item, with the increasing popularity of barbecue-style ribs contributing to their rise. In the Southern states, pork ribs became a staple of barbecue cuisine, partly due to their wide availability and the relative cheapness of rearing pigs. The truth, though, is that there are many types of rib preparation, and many of them have evolved from generations of hand-me-down recipes and insider knowledge.
Anyone who's ever tried to make ribs without that insider knowledge will know how badly things can go. Ribs are a fatty cut of meat, with a high proportion of bone to flesh. These two factors can make cooking them tricky, with many people either ending up with chewy, gristle-heavy portions or charred, burnt bones. Nothing can remain a secret forever, though, and we're busting open the lid on all of the insider tips you need when cooking ribs, covering everything from how you select your meat to the best way to cook it.
1. Select the best ribs possible
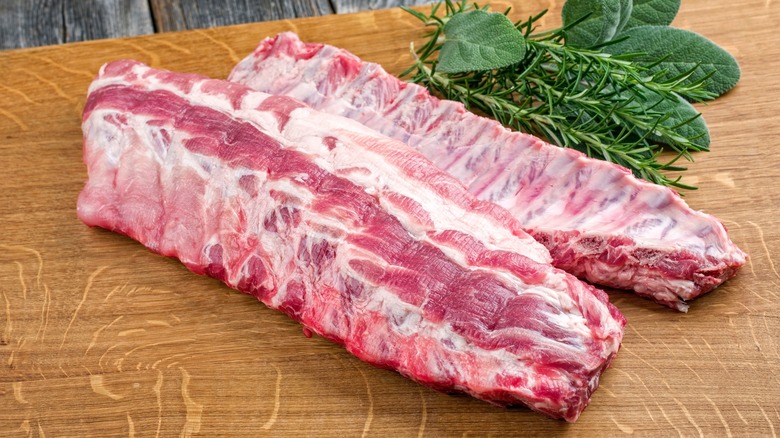
To get ribs right, you need the right ribs. If you're going for a classic slab of pork spare ribs, the first thing you should assess is its fat-to-meat ratio. You need some fat on your ribs, of course, as this will provide flavor and keep them moist, but you don't want too much of it. Instead, try and find a slab that has a healthy amount of marbling.
You should also look for a healthy amount of coverage on the bones. When the slab has been cut too close to the bone itself, it can be exposed, creating "shiners." Not only do shiners not have that much meat on them, thus proving a waste of money, but they also increase the likelihood of the bone burning or becoming brittle. If you want to cut down on your preparation time, you can also look for ribs that have already been trimmed or ask your butcher to do this for you. As a general rule of thumb, too, try and select the freshest meat possible, and always ask your butcher for their advice on which option to choose for your specific needs — after all, they're the experts!
2. Make sure you trim your ribs
If you're making St. Louis-style ribs, you'll need to get your preparation right. This all-time favorite rib style makes eating the meat a breeze, thanks to the trimming process, which removes the tougher parts of the cut and produces a more eye-pleasing shape. While this can be daunting to novices, it's worth the effort, and the truth is that it takes nothing more than a few clean cuts with a sharp boning knife.
To trim your ribs, place the slab of meat down in front of you, with the shortest bone on the left and the breastbone (indicated by a piece of cartilage running lengthways across the meat) at the top. Begin by slicing off the flap of meat to the left of the short bone — this is useful to get rid of as it tends to cook unevenly and ruin the appearance of the ribs. Then, run your knife lengthways above the vertical bones, removing the breastbone in one clean cut. What you'll be left with is a smart-looking rack of meat, the appearance of which you're probably far more familiar with. Make sure to save the pieces you cut off, too, as you can use them for anything from sausage to an ingredient in stock or broth to rib tips.
3. Get your spice rub balance just right
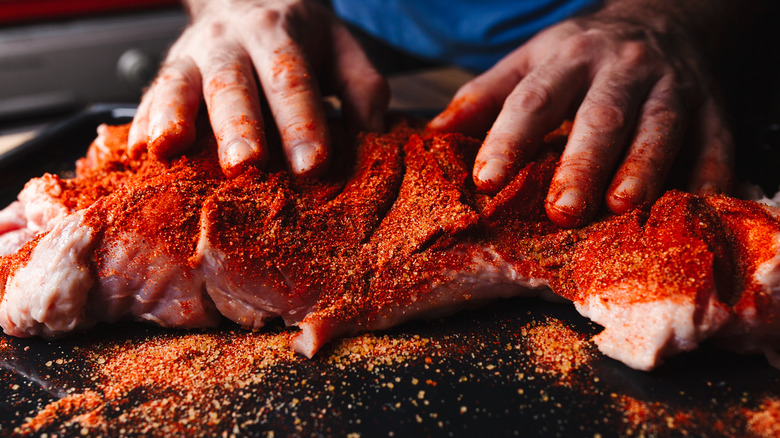
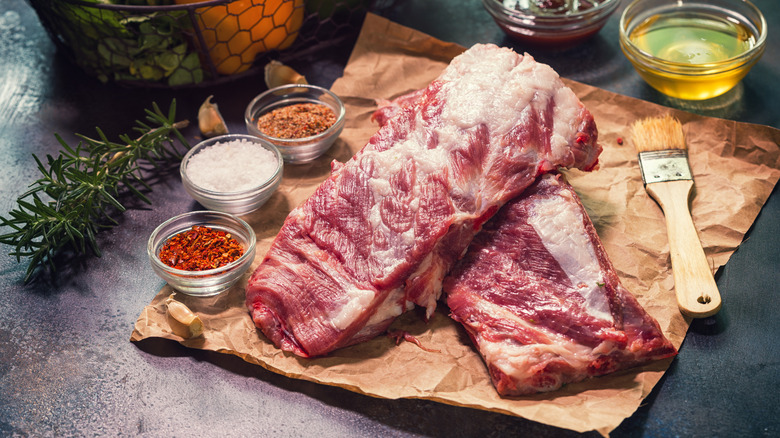
Barbecue ribs are nothing without a spice rub. Spice rubs are made from a combination of dried, ground spices, as well as dried herbs and sometimes flavor enhancers like salt and sugar. The purpose of a spice rub is to imbue your food with maximum flavor, and while they don't permeate into the meat per se, they provide an intensity to the outside of your ribs which is then mellowed by the juices within.
A good spice rub, however, is all about balance — so to up your grill game, aim for a rub that has the perfect balance of smoky, sweet, and savory, and a source of heat. Ground cumin and granulated garlic produce an earthy, mellow base note for any spice rub, with smoked paprika also giving a pop of umami while simultaneously bringing a charred complexity. Cayenne pepper and chili powder, meanwhile, give your spice rub some much-needed fire, with some chili powders also bringing sweetness. For top notes of florality and zestiness, go for some lemon pepper or dried herbs like oregano or thyme. Finally, don't forget to add a good amount of salt and sugar, as these will enhance the flavors of all of your spices, as well as the flavor of the meat itself.
4. Use your oven, then your grill
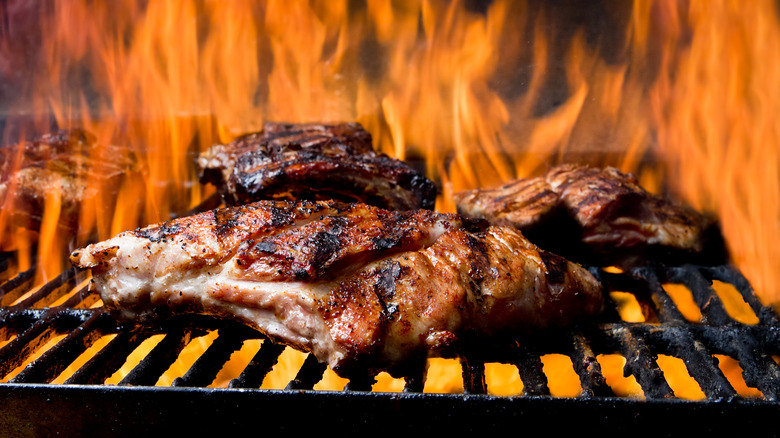
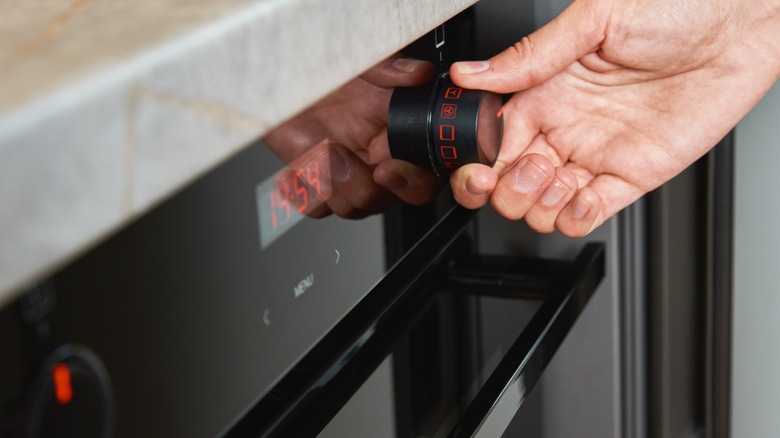
The traditional image of ribs is of them on a grill, achieving a brown-black char. However, to get there, you should be using the oven first. Using an oven is a far better way of controlling the temperature of your ribs, which should ideally be cooked low and slow to produce the most tender result. As ovens operate with consistent heat, they're not subject to the flare-ups that can raise the temperature of your meat suddenly. This can be a particular issue with charcoal grills, which can be tricky to control. Once your meat has cooked and softened fully, you can then transfer it to the grill to generate extra color and flavor.
Bear in mind, however, that the temperature that you set your oven to can sometimes be inaccurate, with temperature sensors and thermostats occasionally causing the wrong heat. As such, it's best not to trust the heat you're setting it to and to test it using an independent thermometer. While you can buy thermometers that you can clip to the inside of your oven, you can get an even more accurate and immediate read by using an infrared thermometer, pointed at the oven's interior walls.
5. Be sparing with your seasoning
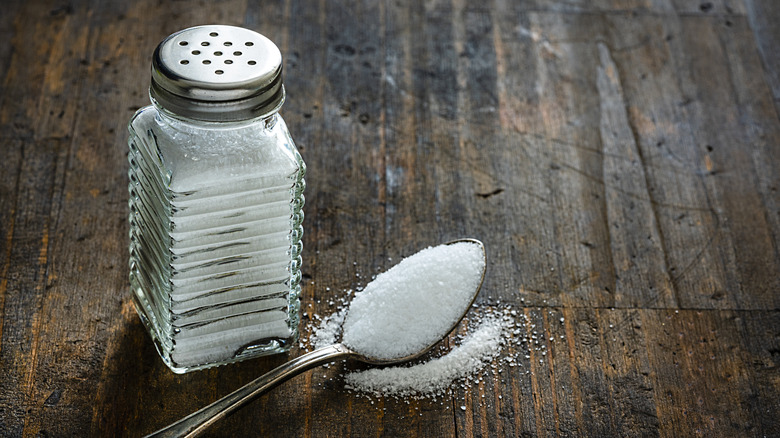
Barbecue is all about using big, punchy flavors, but when it comes to ribs, you may need less than you think you do. Overseasoning ribs is a surefire way to ruin the natural flavor of the meat itself. It's worth bearing in mind that ribs are high in fat, and this fat provides flavor — but the actual flavor of the pork meat itself is pretty mild. As such, you want to balance things out so that your seasoning heightens the flavor of the fat without completely masking the taste of the meat or making everything too salty or sugary. Erring on the side of caution with your seasonings is the way to go.
It's also important to remember that you'll likely be adding a glaze to your ribs at the end of the cooking process, which will add a lot of extra flavor. If you're smoking your ribs, too, tread carefully. Smoking is a great way to add complexity to the flavor of your food, but if you overdo it and use too much wood, your meat will end up tasting acrid and bitter. This can also happen if you don't have a clear air vent for your smoker, or if your meat isn't protected by aluminum foil.
6. Wrap your ribs up

Part of the appeal of a finished portion of ribs is their deep red color, lightly speckled with browned and burned bits. That doesn't happen, though, until the very last moment. In fact, for the majority of your cooking time, your ribs should be wrapped in tin foil, especially when they're being cooked low and slow in the oven.
Wrapping your ribs in foil as they cook is the best way to keep them juicy, flavorful, and aromatic. By wrapping them up, you avoid the meat coming into contact with the hot air of the oven, which can dry out the ends over time. Wrapping the ribs up also helps the meat retain its juicy smell, instead of it being wicked away by the convection action of your oven. As well as this, it also stops the juices from dripping away from the meat. These juices can then be stirred directly into the glaze for your ribs, making it taste extra meaty and adding extra seasoning if you've used a dry rub. You can, of course, cook your ribs without wrapping them in foil, and if you do so, you should aim to crank your oven up a little higher, as they'll have no residual heat around them keeping their temperature high.
7. Keep your ribs out of the water
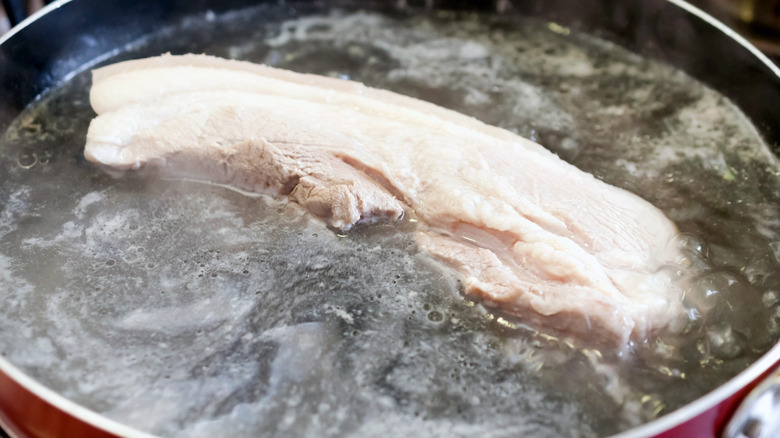
Boiled ribs? It's a thing, y'all. People boil ribs for much the same reason that they cook them in the oven before grilling them, as a way to tenderize the meat. For proponents of this method, this leads to a juicier, more succulent rack, without the need for extended cooking times in the oven.
In our opinion, though, the cons far outweigh the pros. When you boil ribs in water, you're essentially leaching some of their flavor out into the pot, where it's then lost forever. As a result, you end up with a less flavorful cut of meat, which has also lost some of its fat content — and while this may be a bonus for folks who want leaner ribs, it can also lead to a rack that's less satisfying.
Boiling ribs is also way trickier than using the controlled environment of the oven, simply because there's more margin for error. You run the risk of slightly overshooting the temperature of your pot when you boil ribs, and when you do this, the proteins toughen up. As a result, you're left with a hard, chewy piece of meat. Avoid this happening by using your oven and cooking them low and slow.
8. Choose the right type of wood for your flavors
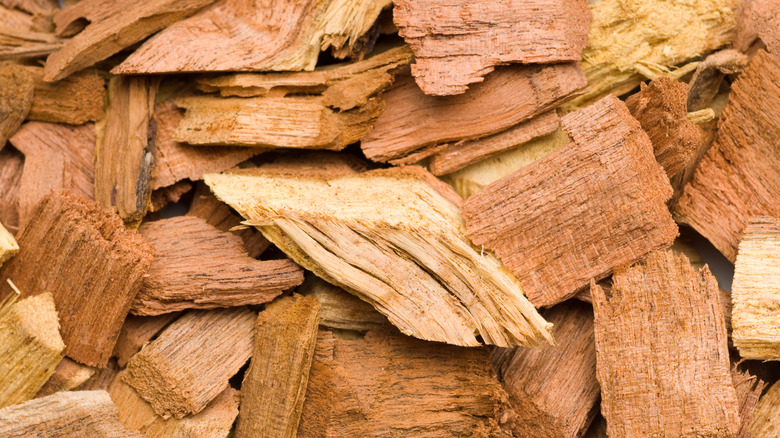
Smoking ribs is probably the ultimate way to imbue them with flavor. When you smoke them, your chosen wood's smoke doesn't just flood the meat with complex tastes, but it also breaks down its collagen, making every bite more tender. You should remember, though, that the type of wood you choose will massively influence the eventual flavor of your ribs. Woodsmoke varies in its intensity and strength, and although it's hard to get things wrong, you don't want to pick a wood type that clashes with your seasoning blend.
If you want a milder flavor and fragrance, fruit woods are generally the way to go. Apple and cherry wood both give ribs a slight sweetness and a floral fragrance that pairs well with lighter seasoning blends. For a good middle ground, pecan wood still has a lightness and fruitiness but also has a nutty, complex undertone. Conversely, if bold, punchy flavors are your thing, mesquite, and hickory smoke will add real intensity to your meat. Remember, you can always mix and match your woods to create a blend or reduce the amount of wood you use to reduce its strength.
9. Don't be afraid of taking your time
Most people have been subject to tough, chewy ribs at some point in their lives, and this is usually because they've been cooked too quickly or at too high of a heat. When ribs are overcooked, they dry out, with the protein seizing up and having none of the melt-in-your-mouth succulence that makes them so delicious. When you cook ribs for long periods at lower temperatures, however, they retain far more of their moisture, with the connective tissue in the ribs breaking down way more effectively and becoming soft, juicy, and tender.
You'll likely need longer than you think to cook them, too. The best ribs take around six to eight hours in an oven set to around 180 to 200 degrees Fahrenheit. This cooks and breaks the meat down ultra-slowly — while you can go even lower and slower than this and will achieve an even juicier result, you might find that the trade-off in time and energy expense just isn't worth it. Once the meat has fully cooked through and softened, you can then transfer it to your grill to smoke and sear it.
10. Use indirect heat
When your ribs hit the grill, things start to heat up — and that's not always a good thing. Grilled ribs can either be cooked with direct heat (where the meat is placed directly over an active heat source), or indirect heat (where the food is kept away from the open fire). Direct heat cooks food more quickly but also more aggressively, and by doing so you can burn your ribs or make them too tough.
As such, you should always aim to use indirect heat when cooking your ribs, for the majority of their cooking time. Using indirect heat allows your ribs to cook lower and slower, and when you do this, they develop additional flavor compounds and soften. It's best to place them as far away from your coals or heat source as possible and close the lid on the ribs to keep your heat contained.
Bear in mind, however, that indirect heat may not be sufficient to get a proper char on your meat. So, to finish your ribs off, place them on a high direct heat, allowing them to darken slightly. Make sure not to do this for too long, though; you want your meat to brown, not burn.
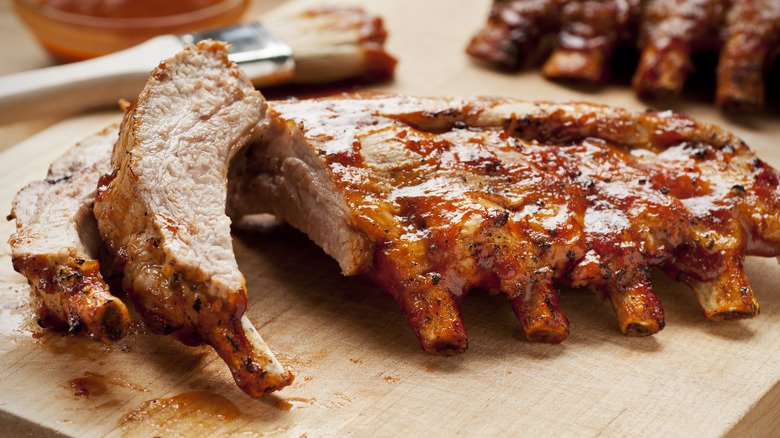
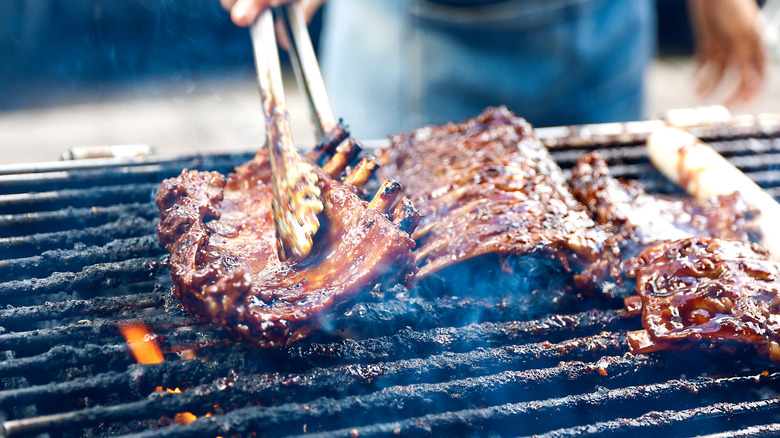
11. Add your sauce toward the end
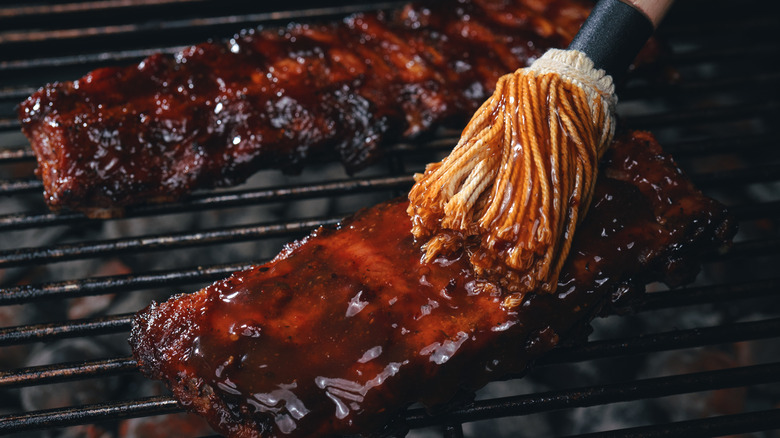
Many styles of rib are served with a thick, glossy barbecue sauce coated over them. The trick to making this sauce pop, though, is adding it at the very end of your cooking process. You should aim to add your sauce to your ribs around 20 to 30 minutes before they're finished cooking. If you add it too early, your sauce can end up burning or drying out. Barbecue sauce burning is especially likely if it's sweet, as the sugar in it makes it more susceptible to charring and turning bitter.
It's also important to be more sparing with your sauce than you think. Pouring sauce straight over the ribs will cause some of it to drip into your grill, potentially causing flare-ups and producing a messy cleanup operation, as well as making things way messier to eat. Remove your ribs and use a brush to lightly daub them with sauce, making sure to cover every edge before you return them to the grill. If they begin to dry out, you can simply add some more — and you can always serve extra on the side of the plate.
12. Let your ribs rest
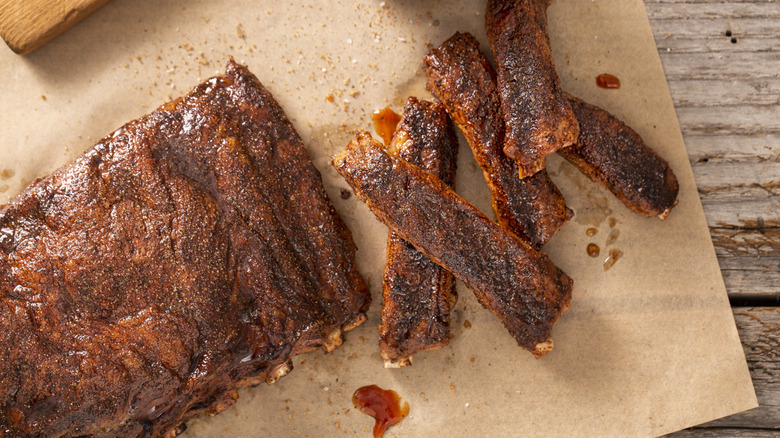
Because rib meat doesn't tend to be as dense as a thick-cut steak or burger, people tend to forget that it needs to rest. However, like all types of meat, ribs need a little time after being removed from the heat to settle before you eat them. Whether you're grilling, baking, or smoking them, when ribs are cooked their moisture is squeezed to the surface of the meat as the protein fibers inside tighten up. Giving them time to rest after you cook them allows this moisture to seep back in, making every bite juicy.
Resting your ribs also allows some of the excess heat to seep away, which is useful if you've just blasted them on an ultra-hot grill. As a general rule, the thicker your ribs are, the longer you'll want to rest them. Generally, though, we would recommend giving them at least 10 minutes, with 15 to 20 minutes for super-thick cuts. It's a good idea to keep them covered while they rest so that they don't lose too much heat: Lightly tent them with thick tin foil to keep them insulated. Remember, though, that if you leave them too long, they'll end up lukewarm or cold, so don't forget about them.
13. Grab a butter knife
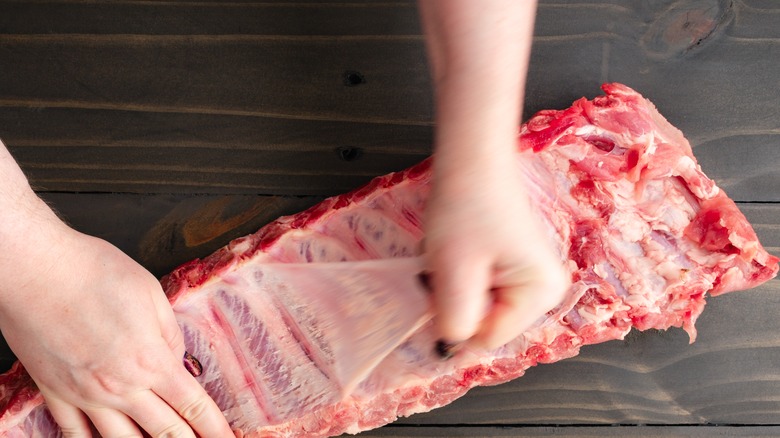
Pork ribs usually come with a shiny white membrane coating their underside. This membrane, though, which acts as a barrier between the meat and bone and the pig's organs, hardly makes for a delicious meal. The rib membrane is chewy and makes eating your ribs challenging, and it also prevents your spice rub from getting to the meat itself, ruining its flavor.
Your membrane should therefore always be removed before you season and cook your ribs — and the good news is that there's an effortless knife tip to get it off in one piece. All you have to do is take a butter knife (or any other blunt knife) and run it under one of the corners, lifting the membrane off the bone. Continue to run it along the ribs, peeling away the membrane as you do so, and it should come off in one easy piece. Butter knives are preferable to regular kitchen ones here since this membrane is pretty thin, and with a sharper object, you run the risk of piercing it. While this isn't necessarily a massive issue, as you can simply pick up where you left off if this happens, it does make the process less smooth.