15 Bread Baking Hacks You Need To Know
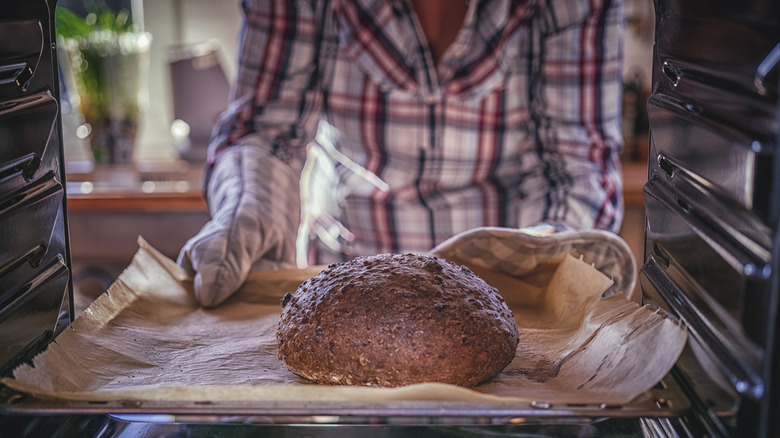
In our books, the act of baking bread is only ever a positive thing. Whether you're a first-time baker or a full-on pro, there's little denying the positives of this culinary activity. Not only is baking a wholesome way to create something totally tasty in the kitchen, but it also may have some powerful positive effects on your mental health.
"Baking actually requires a lot of full attention. You have to measure, focus physically on rolling out dough," explains Boston University's associate professor of psychological and brain sciences Donna Pincus on HuffPost. "If you're focusing on smell and taste, on being present with what you're creating, that act of mindfulness in that present moment can also have a result in stress reduction." Now, that sounds like our kind of way to wind down.
But as anyone who's tried baking knows, it's not always serene and calm in the kitchen. Baking bread is perhaps the most technical of all of the cooking methods out there, and getting the perfect bake can be fiendishly hard to master. But the truth is, there is also a load of workarounds and time-savers when it comes to baking that could restore that sense of tranquility you're yearning for. And we decided that it was time to put all of our favorite bread-baking hacks in one place to make your loaves both perfect and peaceful.
1. Weigh your flour instead of using measuring cups
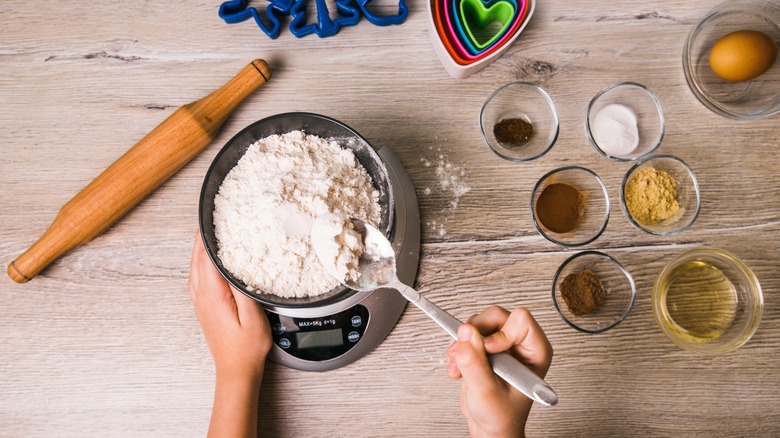
Any baker will tell you that a good set of measuring cups is a must in your bread-making arsenal. Measuring cups allow you to quickly and easily portion out quantities of ingredients and eliminate some of the guesswork from your measures. So it might surprise you to hear that one of our top hacks for getting the best bread possible is to remove these utensils from the equation.
While measuring cups are helpful for some baking needs, when it comes to dry ingredients, weighing them is way more accurate. The main reason for this is that measuring can be an inexact science, with ingredients potentially ending up in inaccurate quantities because of their composition.
"Weight is a direct measure of an ingredient itself. By contrast, the volume taken up in a measuring spoon or cup includes variable amounts of empty space," says "Keys To Good Cooking" author Harold McGee on ThermoBlog. "A teaspoon of granular salt can contain twice as much salt as a teaspoon of flake salt."
This might not seem like a big deal, but even minor variances in your ingredient amounts can significantly alter your result — and because baking excellent bread depends on having just the right balance of ingredients, you'll want to get things right. Weighing your ingredients by using a scale for baking, on the other hand, will give you a precise result every time. And it also means you don't have to worry about washing up a million different measuring cups.
2. If your butter's too cold, use your rolling pin
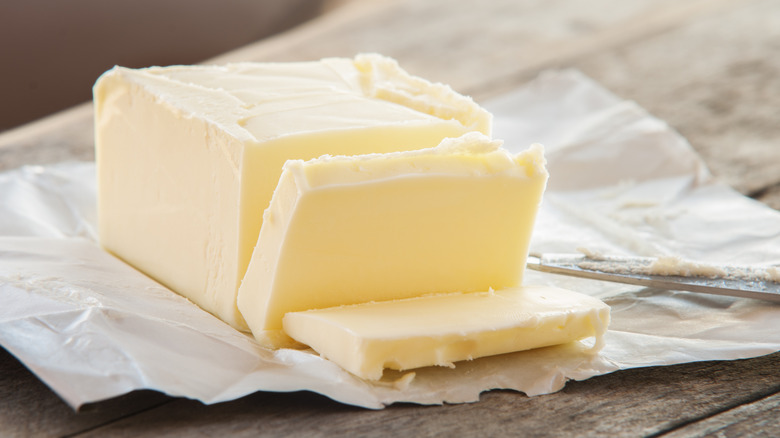
It's a moment that's all too familiar to bread bakers across the globe. You've rolled up your sleeves, you've given yourself just enough time to get started on that new loaf recipe, and you've got your dry ingredients perfectly measured out. Then, you go to add your butter, and it's still in the fridge, rock-hard and completely useless. What do you do?
Well, while you can wait it out or zap it in the microwave, we would instead urge you to consider softening your butter by breaking out your rolling pin. This tried-and-tested method of making your butter soft can make your fat pliable in no time — it's also a fun stress-buster and way less temperamental than zapping it in the microwave or softening it in a water bath.
Take your butter out of the fridge, unwrap it, and then pop it inside a reusable storage bag. Place it on a stable surface, and then grab your rolling pin and give it a bash. You should try and pound your butter until it's a thin, flat disk shape, pressing and shaping it with your pin if necessary. The increased thinness of the butter will allow it to come to room temperature within a few minutes. Then, portion it up and get it into your dough.
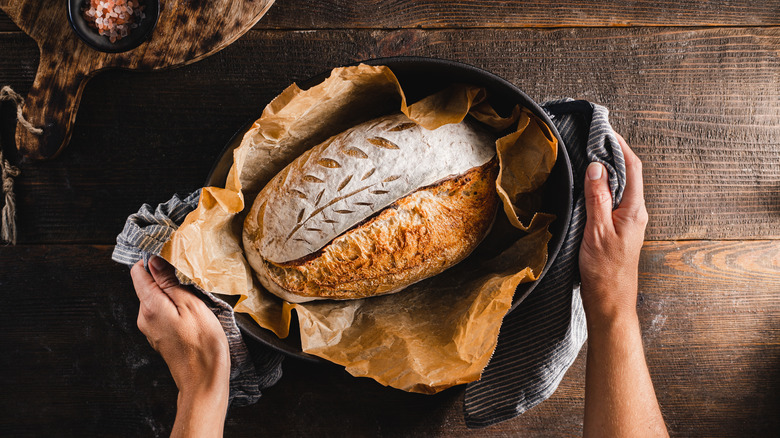
3. Freeze your loaf to score it properly
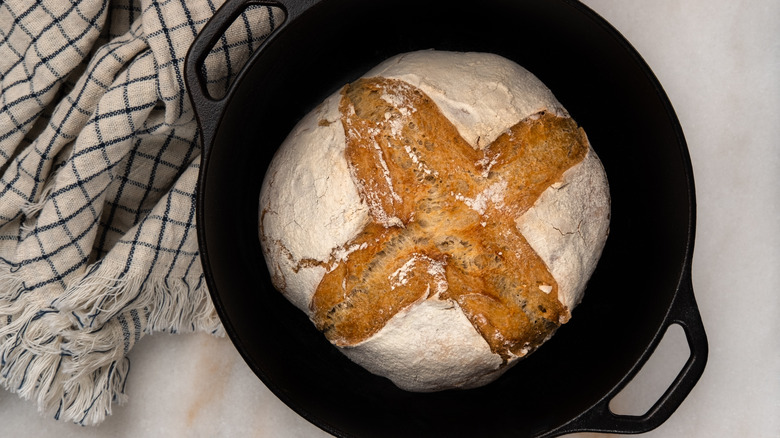
Baking bread allows you to get seriously creative, not just with your ingredients, but with your presentation. And scoring your loaf on its surface lets you do just that. Not only is scoring a loaf essential to let it rise uniformly, but it also enables you to detail your bread with any patterns you want to give you a unique-looking end product.
But scoring your loaf doesn't come without risks. Unless you're incredibly skilled, you run the risk of ripping the top of your bread with your knife or scoring utensils due to the softness of the dough, which will make it look messy and misshapen.
A quick hack to work around this, though, is to utilize the power of your freezer. Once the dough is placed in its banneton, pop it in the freezer for around 30 minutes. This will give it just enough time for its surface to firm up, meaning that you can then score it with more precision and not have to rush the process. This will allow you to get even fancier with your patterns.
4. Master the dough poke to check if your bread has properly proofed
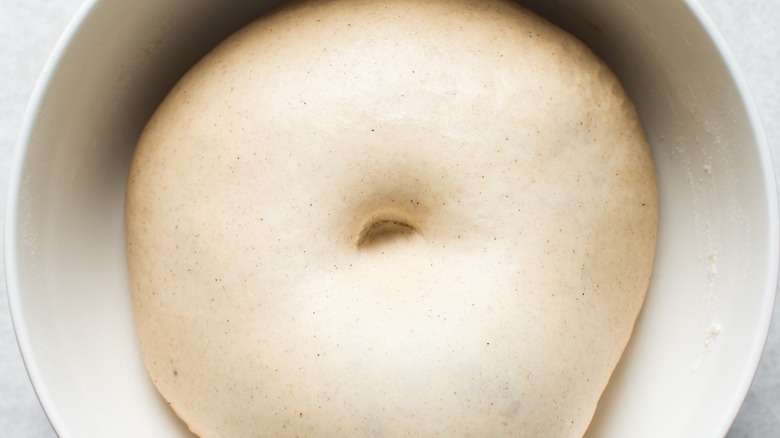
Knowing when your dough is ready to bake is a headache for new and professional bakers alike. Recipes that include yeast may require the dough to proof, which gives it time to rise and expand, giving it a better flavor and texture. But your dough can be either over or under-proofed, both of which will diminish its quality and leave you with a flatter loaf.
But the best way to make sure your dough is properly proofed is also one of the simplest: It just takes a poke. All you have to do is give the dough a light press with one of your fingertips. If your dough has had enough proofing time, it will spring back slowly, not entirely regaining its original shape. The dough will also look and feel soft without being too jiggly.
By contrast, an under-proofed dough will spring back immediately, with your finger leaving no lasting indentation. This is because the dough structure is still tight. Over-proofed dough, meanwhile, will become saggy, meaning that when you poke it, the indentation will remain in the bread and not spring back.
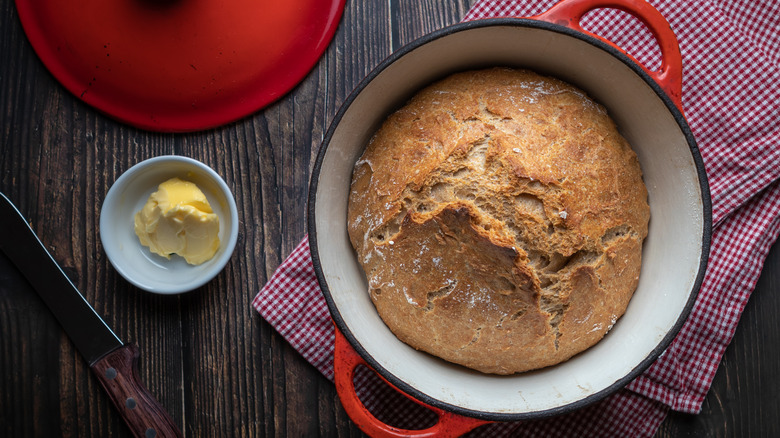
5. No Dutch oven? No problem
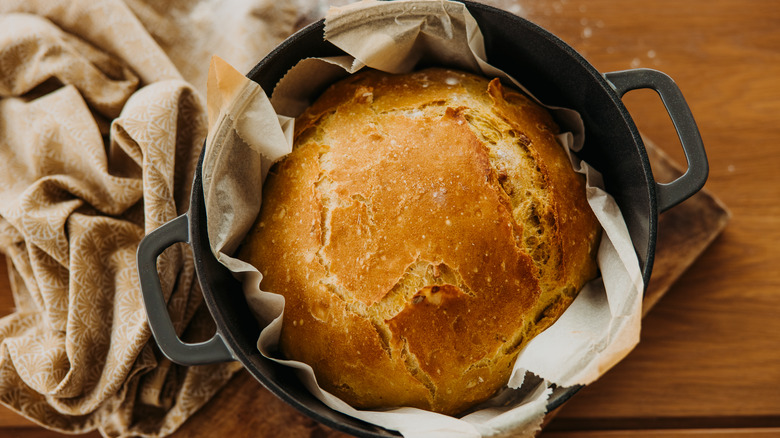
For one of those perfectly round, perfectly delicious-looking sourdough loaves, you'll need a Dutch oven. Dutch ovens not only provide a vessel for baking your bread in, but their lids also make them great for producing steam, which gives your loaf a crunchy exterior, and helps it to rise properly.
But here's the thing: Not everyone has a Dutch oven. And if you're a new baker and you're not really sure whether it's your thing or not, you shouldn't feel the pressure to rush out and spend hundreds of dollars on cookware that you may not use again. Luckily, there are loads of alternatives you can use. Virtually any pot with a lid can be used instead of a Dutch oven, provided that it's ovenproof. Soup pots, crockpots, and even deep skillets with lids are all viable alternatives — just check your manufacturer's instructions first.
If you're not too worried about having a round-shaped loaf, you can also use a square or rectangular casserole dish. And remember, too, that you don't even have to turn your oven on at all. If you have a countertop slow cooker, you may be able to make bread in it that's just as good as an oven-baked loaf. Just make sure you're using a slow-cooker-specific recipe.
6. For the best rise, grab some lava rocks and ice
Any baker worth their salt will tell you how important steam is. Steam is a vital component in your bread's ability to rise well, with the moisture provided by steam keeping the outside of your dough hydrated as it cooks. This then allows your dough to stretch properly as the inside of it cooks, meaning that it doesn't get too brittle or burnt on the outside before its interior is done.
But the issue with steam is that it tends to dissipate pretty quickly, and while you can open and close your oven to continually spray your loaf, this may alter the temperature too much. So, for a consistently steamy oven, get yourself some lava rocks. Place them in a sturdy ovenproof pan at the bottom of your oven, and allow them to preheat.
Then, when you put your dough in the oven, throw a cup of ice onto the rocks. This will create an instant burst of steam, which will continue to generate as the ice melts on the hot rocks' surface. Be super careful here, as steam can be incredibly dangerous. Once your dough has been cooking for around 20 minutes or so, you can then, carefully, take the pan containing the rocks out and leave your loaf to cook as normal.
7. A little flour can keep your fruit and nuts well-distributed
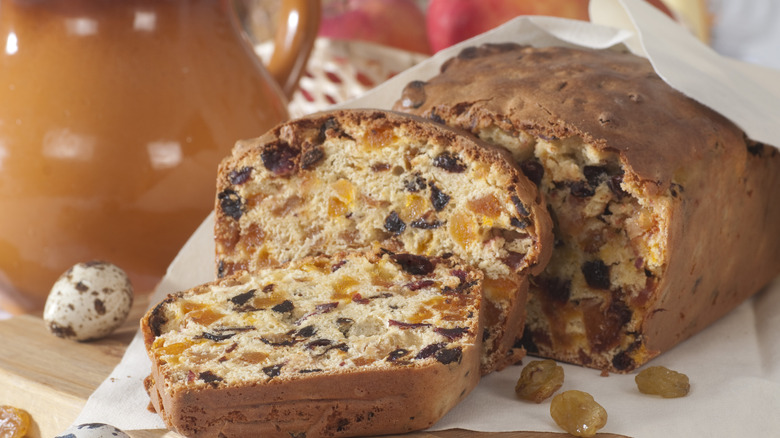
Biting into a loaf of bread and being pleasantly surprised by the addition of nuts or fruit is a total delight. And if you're looking for ways to elevate your regular loaf into something special, it might seem easy enough to toss in a handful of raisins, cranberries, or chopped hazelnuts and produce a delicious result.
But anyone who's done that before might be familiar with slicing into their loaf and finding that any additions have sunk to the bottom during the baking process. This is, quite simply, down to gravity and is a common problem in less-dense doughs. As the nuts or fruit might be heavier than the dough itself, their weight drags them down, and you end up with poorly-distributed ingredients.
But with just a little flour, you'll never have this problem again. All you need to do is give your ingredients a dusting of flour before you mix them into the dough. The flour will help the additions adhere to the dough and remain suspended in it throughout the cooking process. It can also help to chop your ingredients up so that they're a little finer and lighter.
8. For super-moist banana bread, add foil
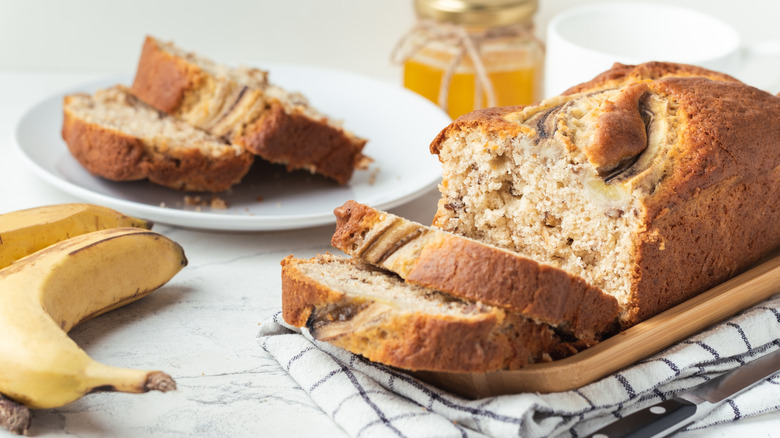
Banana bread is one of those things that can go very right or very wrong. For novice bakers, it's a great way to test your chops and build up some confidence, with a delectable result at the end, but one false move and your loaf will be dry as a bone. Banana bread can dry out for a bunch of reasons, including using an incorrect ratio of ingredients, not adding enough fat, or simply using the wrong pan. Not as easy as it seems, right?
Luckily, there's a secret method for adding extra moisture to banana bread – and you likely have what you need in your drawer already. When your banana bread is almost cooked, take it out of the oven, and cover it with foil. Then, put it back in to bake for the last 15 minutes of its cooking process. By doing this, any moisture that's released from the bread will remain close, working its way back into the loaf and producing a moist, moreish result that's better cooked throughout.
9. Avoid using old baking soda with this quick move
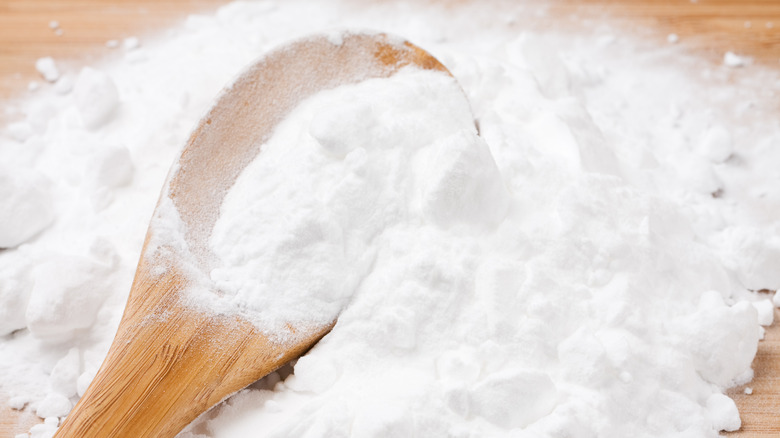
Some ingredients feel like they last forever, and baking soda is one of them. So it might surprise you to hear that it goes off, just like everything else. Both baking soda and baking powder can become less effective the older they get, and while this won't necessarily make them dangerous to eat, it will mean that they're not as good at helping your bread rise. These products can also quickly lose their potency when any moisture gets into their containers.
So, to make sure your baking soda is still good for use, you need to test it first. You'll need some vinegar to do this. Pour a little bit out into a bowl, and then add some baking soda. If it reacts to the acid by fizzing up, it's still in its prime. Remember those science experiments at school where you'd do this and make a volcanic eruption? It's kinda that. Testing baking powder is even more simple. Repeat the same process of adding it to a bowl with liquid — but instead of vinegar, use hot water. A fizzing response means you're good to go.
10. When baking in cold weather, change your water
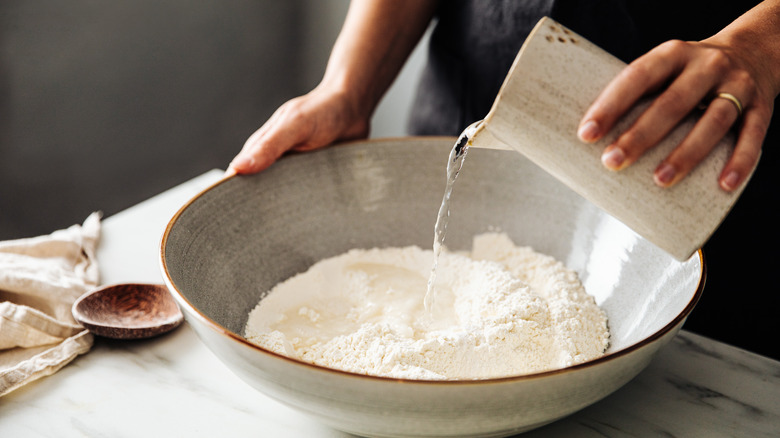
A lot of things that we do in the kitchen are affected by the temperature around us, but perhaps none more so than bread baking. The weather is a huge factor in the success of your baking, and yeast action and the composition of your bread can be affected when it's colder or hotter. In cold temperatures, yeast, and chemical reactions, can be slower, which means that things may take longer to proof and change the eventual texture and taste of your bread.
To balance things out, you might want to raise the temperature of your wet ingredients — and using warm water is one of the easiest ways to do this. By using slightly warmer water than you'd normally use, you'll activate your yeast effectively, leading to the correct speed of fermentation. On a cold day, try to use water that's around 95 degrees Fahrenheit or slightly above to kick things into gear. You might want to grab yourself a thermometer to test the water temperature and make sure you're getting it exactly right.
11. Make bread without any carbs with cloud bread
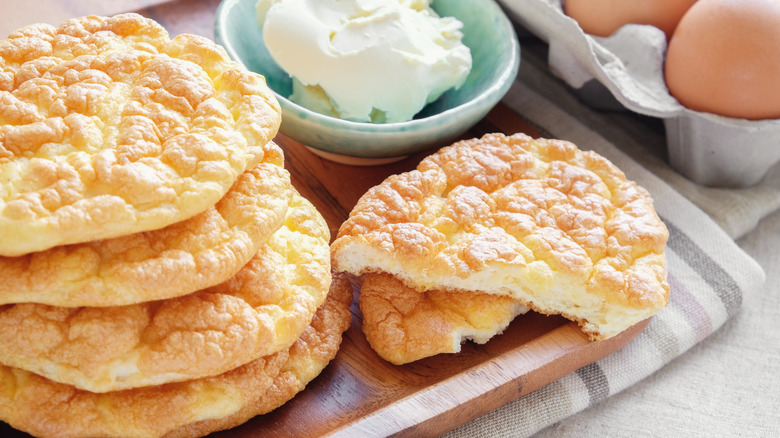
We have yet to meet anyone who doesn't like bread in some form, and thanks to the advent of gluten-free loaves, virtually anyone can enjoy it these days. But what about if you're cutting down on carbs? People who follow certain diets, like the keto diet or other low-carb eating plans, may find the absence of bread in their lives somewhat tricky. The good news, though, is that there's a type of bread out there that's entirely low-carb, entirely delicious, and altogether easy to make.
3-ingredient cloud bread is the work of mere moments and is made using eggs, cream cheese, and a little cream of tartar. Utilizing the whites of the eggs for lightness, this low-carb bread produces light and fluffy slices that can be used to replace regular bread for sandwiches or just as a snack. You just need to whip egg whites and cream of tartar together until the mixture is aerated with stiff peaks. Then, separately beat the egg yolks and cream cheese together, and combine the two mixtures before scooping the mixture out into small patties on a lined baking sheet. Bake for 25 minutes in a low oven, allow to cool, and then eat up.
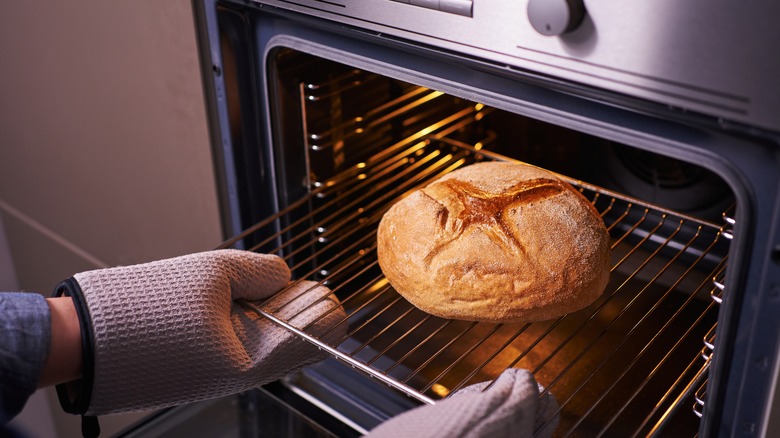
12. To check if your loaf is done, all it takes is a tap
Watch any expert baker in the kitchen, and you'll likely see them pull an interesting, slightly odd move. Upon the loaf coming out of the oven, baking pros will frequently pull their bread out of the pan and give the bottom a tap, with their ear bent towards the sound. Don't worry — they're not trying to commune with their baked goods in some slightly odd ritual. They're trying to tell whether it's done.
Tapping the bottom of your loaf allows you to assess whether the inside is fully cooked or not without having to cut into it and potentially ruin your bread. It's important to know what sound to listen out for, though. Ideally, you're looking for a hollow sound, like the bread is somewhat thin on the inside. This means that the bread on the inside is cooked and has had a chance to develop air bubbles. If, however, you tap the bread and it sounds dense or dull, it means that the dough on the inside is still undercooked and needs longer in the oven. If you want to eliminate all the guesswork, you can also grab a thin probe thermometer and insert it into a part of the bread that's less visible, like the bottom. Once the inside is approximately 210 degrees Fahrenheit, it's done.
13. Has your freshly-baked loaf gone stale? Bring it to life with this hack
There's nothing worse than baking a loaf of bread and then not being able to eat it. But sometimes, that's exactly what happens. Maybe you had a spurt of enthusiasm in the kitchen and produced a loaf that's totally delicious, but you have yet to find time to truly tuck in — and then, once you do come around to it, it's stale, crusty, and inedible.
But never fear; your hard work needn't go to waste. You just need this next-level bread-reviving hack, which involves your tap, your loaf, and your oven. "Take your bread, and run it under a tap, or immerse it completely in water," explains the Good Housekeeping Institute Cookery School's head tutor Cher Loh. Don't be shy about getting it nice and wet — the idea is that you introduce moisture to the bread again so that it can rehydrate.
Then, put the whole loaf in a 400-degree oven, and leave it to warm up for a few minutes. As it does so, the water will help to soften the bread again, steaming it up and making it completely delicious. Bear in mind that this won't work if your bread is sliced into; it has to be whole.
14. If you don't want to knead, this no-knead bread is a time-saving hack
Depending on your outlook, kneading bread can be either the best or worst part of making it. While you might relish the opportunity to get your guns out and work your dough, it can also be time-consuming and tiring to do. So, if you want bread without any of the fuss, a no-knead loaf is the way to go. No-knead sourdough bread is the work of mere moments, and you can still produce a quality slice of bread with minimal effort.
You simply have to combine your dry ingredients and then add your sourdough starter and water, and once mixed, let the whole thing sit for 12 to 18 hours. No-knead bread works because the extended proving time allows the yeast to essentially work the dough from within, causing the gluten development that you'd normally get by kneading it. Once it's had enough time to rest, which you'll be able to spot by its doubling in size, you just have to give it a brief second rise, pop it in a Dutch oven, and let it bake. The result will be chewy, developed bread that felt like no work at all.
15. Use your old sourdough discard to jazz up other recipes
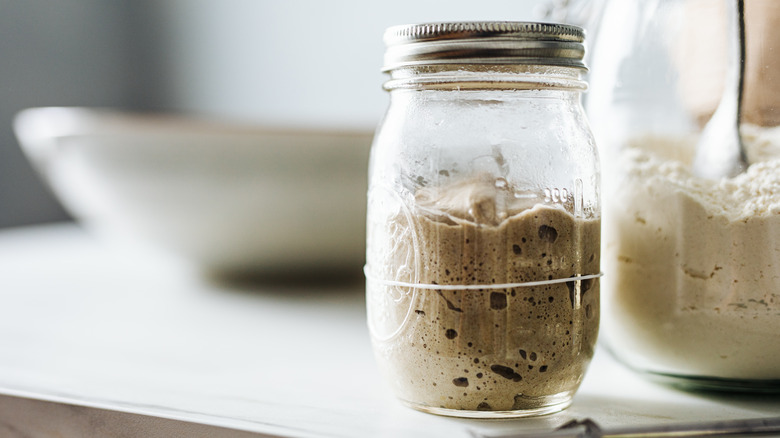
Making sourdough is a skill that bakers need to master. But it can also come with a fair amount of food waste. Figuring out what to do with sourdough discard can be a common issue, especially when you're first starting a starter, as there can be a lot of discard to deal with. And while you can freeze or refrigerate it to use at a later date, you may not have the space to store it long-term.
But thankfully, there are loads of exciting ways to use old leftovers to make your recipes more exciting. Try whipping up some batter with it to deep-fry foods like fish, giving your homemade fish and chips a nuanced, developed flavor. Sourdough discard can also be used to make other baked goods. Muffins, flatbreads, and even Yorkshire puddings are all improved by it. You'll get that supremely virtuous feeling of not having wasted anything, too.