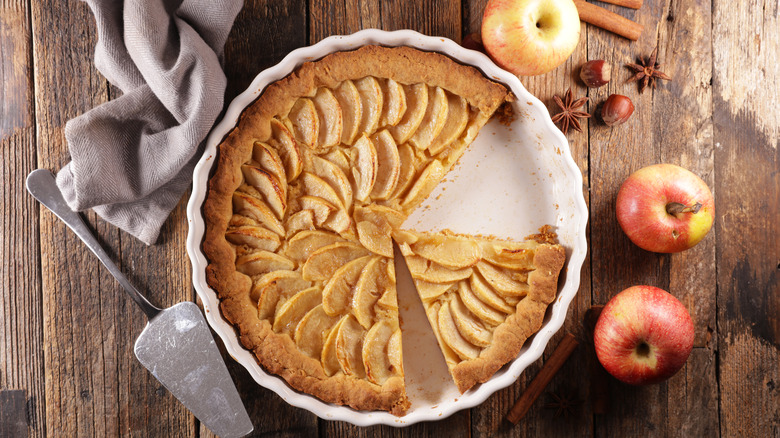
14 Mistakes Everyone Makes When Baking Apple Pie
There's no pie quite like apple pie. According to Google Trends via Pioneer Woman, classic pie flavor is an all-time favorite and is the most searched-for pie online by internet users in the U.S., attesting to its popularity. While the phrase "American as apple pie" is one that everyone knows, it's interesting to note that it originated far before there was a European presence in the country.
The first apple pie recipes date back to 13th century England, with Dutch incarnations appearing long before the dish reached the United States. Despite its origins, though, apple pie has become a staple of U.S. cooking, and virtually every grandparent across the country has their own recipe.
Apple pie may look simple, but it's deceptively hard to nail the balance of a soft, sweet center and a crispy, robust crust. All too often, mistakes made with apple pie can lead to the apples being poorly cooked or overly moist, the dough becoming dense or mealy, or a collapsed or exploded end result. Thankfully, by avoiding the main errors when making this pie using simple fixes, your dessert will be perfect every time.
1. Starting with raw apples
Although apple pie feels like the sort of dessert you can throw together quickly, there's a fair amount of preparation to be done before you construct it. And your apples need particular care. Failing to cook or prepare your apples before you place them in and using raw ones can leave your pie misshapen and wet.
"The nerdy long explanation: Apples contain a lot of water," explains Formento's pastry chef Sarah Howlett, per Southern Living. "When you add raw apples to the pie, that water is released and causes soggy crusts, and the apples will deflate, causing a gap between filling and top crust." Instead, you need to prepare them enough so that they lose some of their moisture and soften slightly.
Macerating your apple slices in sugar can help them break down a little, releasing liquid, which can then be cooked. You can also throw your apples into a pot with some sugar, a little water, any flavorings you desire like cinnamon, vanilla, or nutmeg, and a thickener like cornstarch or potato starch, before simmering the apples until they're fork-tender. Make sure you don't cook them too much, as the mixture will continue to cook in your pie. If you're not careful, you'll end up with apple soup.
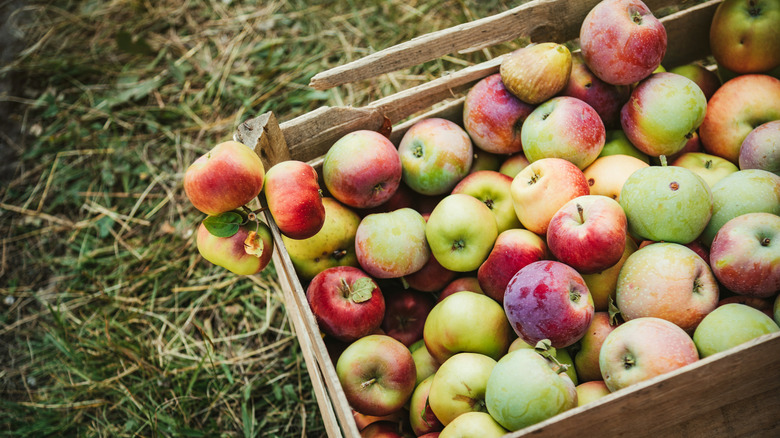
2. Using the wrong apples in your pie

The apples are the star attraction in an apple pie — but not every apple will produce a good result. Apples can vary significantly in flavor and texture, and some types can be overly sweet or overly tart and become too soft or mealy when they're cooked.
Zestar apples, for example, can become too sour when they're cooked and generate a mealy consistency, whereas Envy apples tend to produce a pretty flavorless pie.
The best types of apples for baking have a balance of sweetness and tartness and remain firm once heated up. Golden Delicious apples are a particularly good choice here, as they have a gentle acidity that cuts through their sweetness and a crispness that doesn't retain too much bite once cooked.
Jonathan apples have similar features, with a slightly more developed flavor that pairs well with a dash of cinnamon or nutmeg. If you prefer your pie to be on the tart side, Granny Smith apples can be a good choice, although you may want to balance the flavor with a little extra sugar. At the end of the day, though, your choice comes down largely to personal preference as to how sweet you want your pie to be.
3. Kneading your pie dough too much
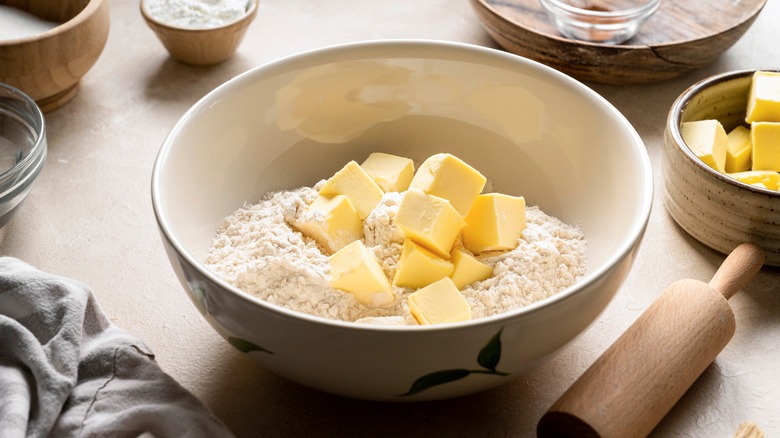
Part of the fun of making an apple pie is forming your own dough, but it can get all too easy to get carried away. Unlike other types of baked goods, like yeasted bread or food items that rely on developing a gluten structure, pie dough does not need kneading very much. If you over-knead the dough, your crust will end up too tough and chewy, as the more that you work it, the more that the gluten strands will tighten.
To avoid doing this, quit while you're ahead. You should only knead your pie dough until it's combined and holds its shape without falling apart. Then, ensure you are working gently and not forcing the dough together too much. You can do this on your work surface or mix the ingredients together in a bowl — there is no right or wrong way to do it.
Just make sure that you stop once everything is fully combined. A good way to keep accountable is to time yourself. If you're working with your dough for longer than two or three minutes, you're likely over-kneading it.
4. Forgetting to add a thickener to your filling
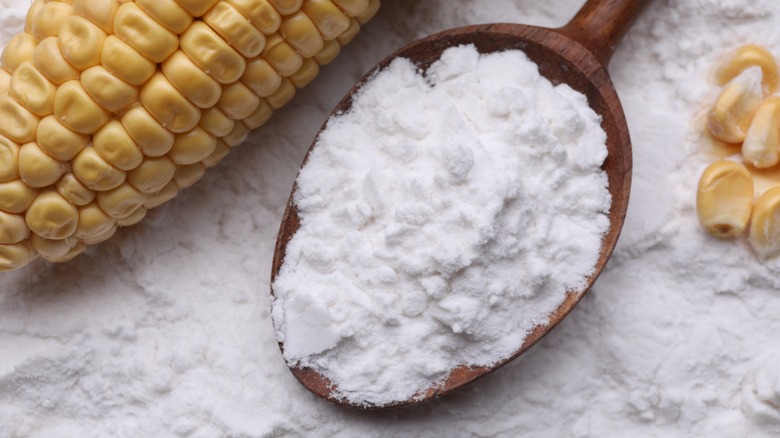
A syrupy, velvet-smooth filling is the key to a top-notch apple pie. But that probably won't happen unless you're adding a thickener. Apples have a high amount of pectin, a soluble fiber that is also used as a thickener, and when they're cooked, they provide thickness to the sauce they produce.
However, some apples may not release enough pectin to make the filling thick enough. If that's the case, you may end up with an interior that's watery and spills everywhere when you cut into it. The good news, though, is that you don't need much thickener with apple pie — and as your thickening options are flavorless, you won't even know it's there.
Flour or cornstarch are usually the easiest options when baking at home, as most people have some in their kitchens already. For each cup of fruit, add 1.75 teaspoons of all-purpose flour or ½ teaspoon of cornstarch. You can also use other types of starch, like potato or tapioca starch, if you have those to hand.
Add it to your apple mixture as you're cooking it by mixing your starch or flour with a little water and pouring it in to avoid any clumping. Take the mixture off the heat once it's thickened, as continuing to cook it can break down the starch and make it watery again.
5. Failing to cut your apples properly
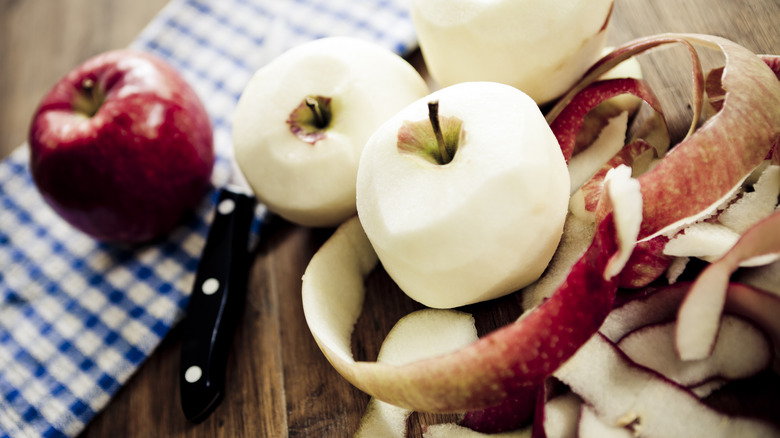
It might feel like it can be hard to mess up chopping apples for an apple pie — after all, the whole point of the pie is that it's rustic and homely, so it can't take that much thought, right? Wrong. Cutting your apples incorrectly can leave you with a filling that's chalky and hard or too mushy.
If your apple pieces are too large, they won't cook through properly, and you'll end up with chunks that are crunchy inside and mushy outside. Cutting them too small, on the other hand, will mean they turn to sludge and disappear as the pie cooks.
In addition to nailing your size, you'll also want to cut your apples so that no tough parts of the core or seeds end up in the pie. To do this, peel your apples and then slice down the sides of the core until you end up with four semicircular pieces.
Lay the pieces with the flat side down, and cut them into moon-shaped chunks roughly ¼ inch thick. Don't discard those peels, either. You can easily use them to make fruit-infused water, boil them down into apple syrup, or bake them to make apple chips.
6. Working with warm butter for your crust
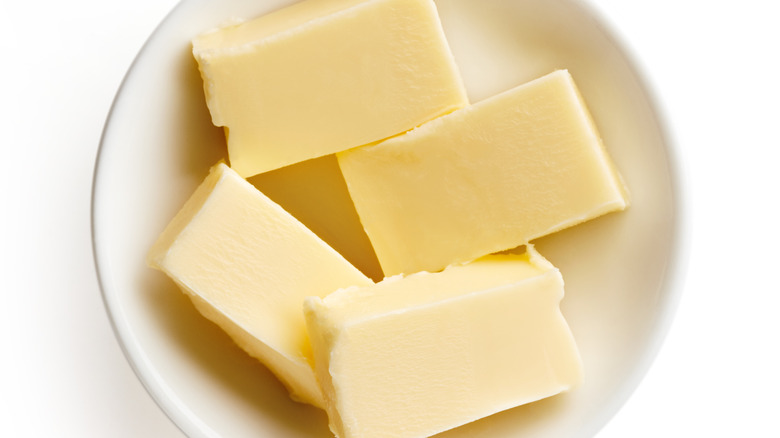
Butter plays a vital role in a pie crust, giving it smoothness and a rich flavor and tenderizing the dough. Butter also plays an important role in browning your dough, giving it an attractive color. But when making an apple pie crust, the temperature of your butter is vital.
If you use butter that is too warm, it will incorporate with your dough too much, making it greasy. Instead, the butter needs to remain distinct from the dough so that when it's cooked, the water evaporates, creating small air pockets that give the crust its flakiness.
Working with cold butter is a time-pressured affair, as the more that your hands come into contact with it, the more that it will warm up and start to melt. So, try to work quickly once the butter is out of the fridge. If your butter isn't flexible enough due to being too cold, try cubing it up into smaller pieces using a sharp knife. Alternatively, pound your butter with a rolling pin, which will flatten it — making it easier to slice — and soften it without warming it up.
7. Forgetting to chill your dough
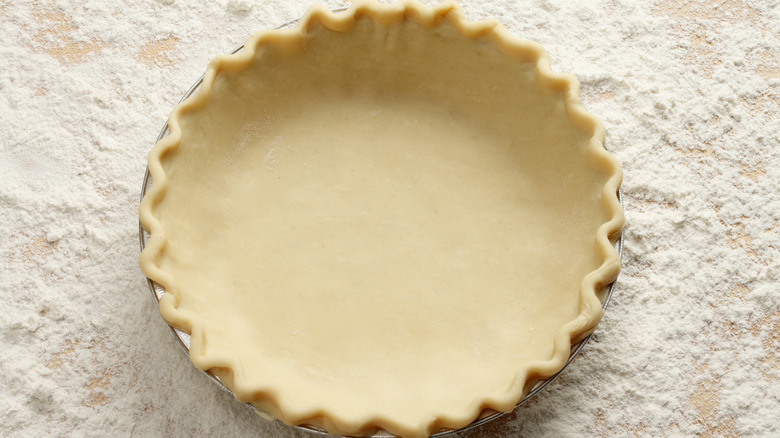
Once your dough is formed, it's natural to assume that you can start cooking your pie instantly. However, there is one more important step: Leave it alone. Chilling a dough before you put it in the oven allows the butter — which will have warmed up slightly when making it — to cool down and harden again.
This means that when you come to cook the crust, it will have a better structure and a flakier consistency as the super-cool fat quickly melts. Importantly, though, there's no need to chill your dough overnight or even for several hours. It simply needs a quick blast in the fridge or freezer before it is ready to go.
Using your freezer is usually the best choice, as it can drop the temperature of the dough way more quickly. If your dough is still unshaped, flatten it into a disk, cover it in plastic wrap, and put it in the freezer for about half an hour.
Flattening it will mean that it cools through to the center more quickly. If you have already rolled the dough and placed it in your pie tin, pop it in the freezer for slightly longer.
8. Skipping your egg wash
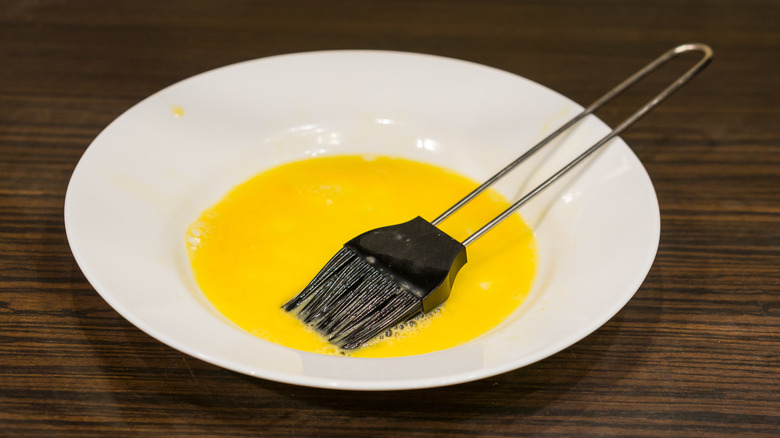
If you have ever pulled a pie out of the oven to find that it's cooked through, but ugly and pale on the outside, you may well have skipped your egg wash. "Don't forget to brush your apple pie crust with an egg wash before baking it to get a golden crust. This is an important step every time," says Hazel's pastry chef Olivia Rinke, via Southern Living.
Egg washes produce a golden color on a pastry crust because of the protein that is in the egg mixture. This reacts with the heat of the oven, prompting the Maillard reaction that creates its brown tones. Egg washes are also useful for adhering the top crust with the bottom one and act as a glue for any pastry decorations or sugar sprinklings you put on top of your pie.
Making an egg wash is incredibly simple: Begin by beating one egg with 1 tablespoon of water. Then dip a pastry brush in it and paint the top of your crust with the mixture. If you don't have any eggs, you can also use heavy cream or melted butter on your crust. Just keep in mind that while these ingredients may provide flavor, they won't provide much color.
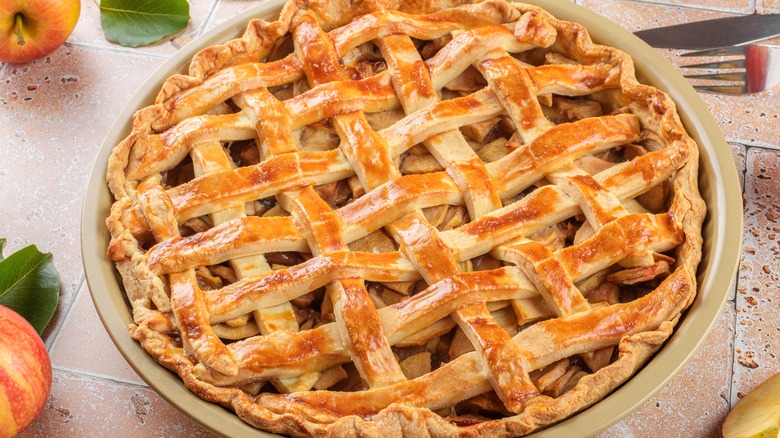
9. Failing to vent the top crust

Have you ever wondered why or how apple pie crusts have lattice effects? It's not just for aesthetics. Creating a vent in the top crust, either by giving it gaps or poking holes in it, allows for the release of steam as the pie cooks. This serves two functions.
The first is that it stops the top crust from doming, as the steam is able to escape instead of collecting inside the dough. This prevents a gap from forming between your pie crust and your filling, leaving your pie densely packed. The second function is to stop it from leaking.
If your steam has nowhere to go, it will force its way out through any weak spots in the pie, including the seal between your top crust and your bottom one. When this happens, the apple mixture will explode out of the hole created, leaving half the pie on the bottom of the oven.
Thankfully, you can vent your top crust in any manner you like. If you're artistic, you can cut small apple shapes into the top to indicate what's inside. If you're short on time, though, you can slash or prick the top crust all over.
10. Using a disposable pie dish
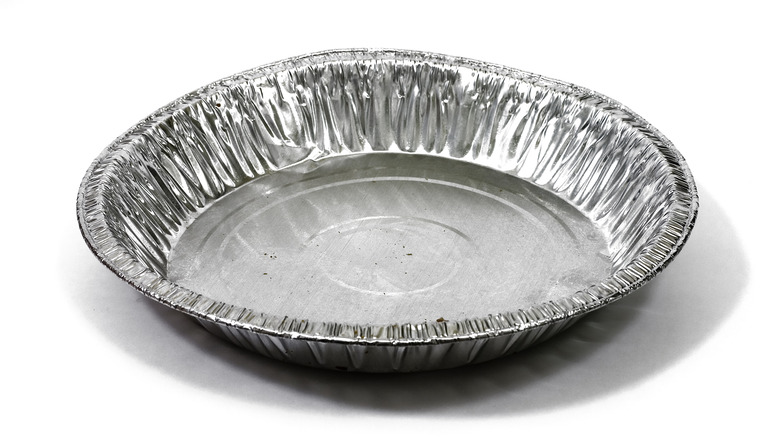
For people who don't bake very often or just those folks who hate doing the washing up, a cheap, disposable pie dish can seem like a great choice. But when it comes to making apple pies, they're best avoided. Disposable pie plates, frequently made from aluminum, are generally thin and flimsy.
Not only does this make maneuvring into the oven and out a little dangerous, with the risk that your pie will go tumbling any moment, but it also means that they retain heat poorly and will not cook the pie as effectively. Aluminum disposable dishes are also non-transparent — and while this might not seem like a problem, it may well be.
Being able to see the bottom of your pie allows you to assess the color of the bottom crust, which gives a good indication of how well it's cooking. It's for this reason that we recommend using a see-through glass dish made of ovenproof glass, like Pyrex. You can also, of course, use a standard metal or ceramic dish, but make sure that it's sturdy and is able to transfer heat well.
11. Over-greasing your dish

Many baked goods will struggle if they're cooked in a non-greased pan. But apple pies aren't the same. The dough used to make your apple pie crust will be a butter-rich affair, and that fat will largely prevent it from sticking to the dish as it cooks. If you grease your dish too much, it will leave the bottom of your pie greasy and covered in oil.
Having said this, if you have a pie dish you know is particularly prone to catching on your dough, then a light coating of cooking spray may not go amiss. This may also be useful if your pie has leaked while it's been cooking, which can cause the bottom of the pie to stick.
You should also avoid flouring the bottom of your pan to stop it from sticking. Not only is it unnecessary, as again, the pie dough is fatty enough to self-lubricate as it cooks, but it will also just leave the bottom of your pie tasting chalky and dry. If you're particularly paranoid about your pie sticking, we suggest you invest in a quality nonstick pie dish.
12. Putting your pie on the wrong rack
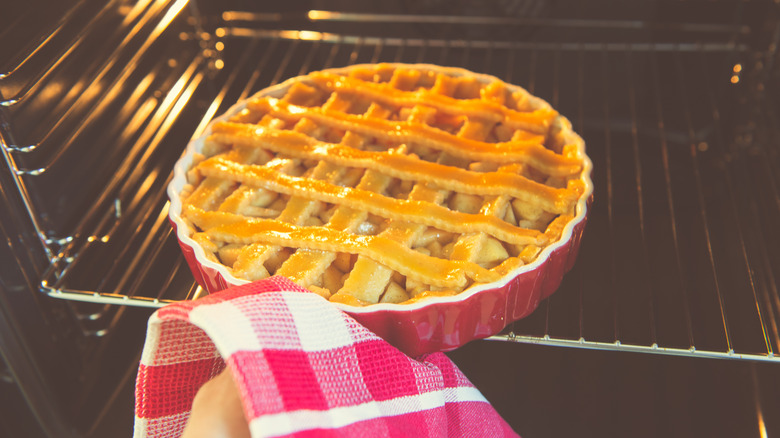
Placing your food items on different oven shelves can result in drastically different results. When items are on the top shelf, they tend to brown quicker on their top surface, as the heat is concentrated towards the top of the oven. When food is on the bottom shelf, on the other hand, it gets more heat on its lower side, leading to more browning underneath.
You might assume, then, that you want to place your apple pie on the top shelf to achieve a golden-brown top — but the truth is that you should place it on the bottom. Pies have greater difficulty browning on their bottom side due to the fact that it's enclosed in a pie dish. Its top crust, on the other hand, is exposed to the dry heat of the oven and so doesn't need additional help with browning.
If you want, you can experiment with shifting your pie's position halfway through the cooking process. Placing items on the middle rack gives them a more even overall bake. If you find that your pies aren't cooked through enough, try moving your pie from the bottom rack to the middle one to finish it off towards the end of your cooking process.
13. Pulling your pie out of the oven too early
The point of baking an apple pie, or any pie, is typically to eat it — so it makes sense to want to do that as soon as possible. But whatever you do, don't pull your pie out too early, no matter how finished it looks.
"Oftentimes, pies will achieve the golden-brown crust before the apples begin to bubble," says Scott Harris Hospitality Group's corporate pastry chef Erin Mooney, per Southern Living. This, unfortunately, can lead to people assuming it's done and taking it out, leaving the inside cold and undercooked.
Instead, "remove the golden-brown crusted pie, and tent it with a piece of aluminum foil. This will let the pie continue to bake the apple filling, without burning the crust," Mooney advises. A good way to check if your pie is finished cooking is to visually inspect the filling via the vent holes in the top.
If your filling is bubbling, it's a good indication that your pie is ready to go. You can also take a toothpick and stick it into one of the apple pieces to check whether they are cooked through enough. Your toothpick should be able to move through the apple with no real effort.
14. Cutting your pie before it's cool
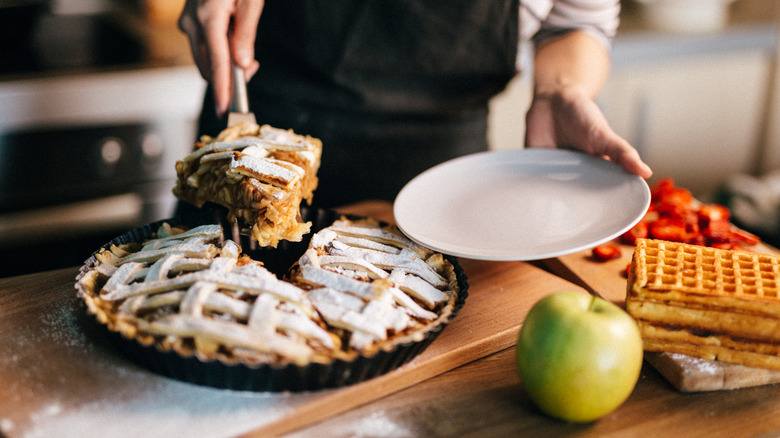
Turns out, an apple pie cooling on a windowsill isn't just something seen in cartoons — it is also something that should be witnessed in your kitchen. Cooling your pie before cutting into it is one of the most important parts of the process and ensures that your pie will be both edible and will maintain its form.
Apple pies get astonishingly hot in the oven due to the sugar content raising its temperature way above the boiling point of water. Serving it straight away will leave you and your guests with burnt mouths.
Additionally, slicing it straight away will mean that you're cutting it when the filling is at its thinnest. As it cools, it will thicken, turning into a syrupy mass that will hold its shape and won't spill everywhere. Unfortunately, you may be in for quite a wait while your pie cools.
It's advisable to leave it for at least a few hours to make sure that the interior has been set fully. Leave it at room temperature instead of in the fridge, as doing so will produce a huge amount of condensation from the pie's steam.