11 Unconventional Cooking Tips Chefs Use

When humans stumbled on cooking, everything changed for us. Millenia later, when we can no longer imagine a world without this discovery, and things are still changing for us as a result of cooking. The art and science of making a meal are so indescribably diverse that there's no knowing it all. A single ingredient can add multiple flavors to different meals, while one tiny tweak can change the entire direction of a dish.
Like all art tips, cooking hacks don't always follow a logical sequence. The only way to find out what does or doesn't work is by experimenting with these ideas. While experimenting with cooking sounds fun, it's a lot of work when you're trying to figure out the best methods on your own. Instead of having to tweak every detail in your personal kitchen, some experts have found unique tweaks that work magic when done right. In some circles, these cooking hacks are closely-kept trade secrets among the chefs that created them. Others, however, just need a little bit of dedicated searching to discover.
As you'll soon find out, the unconventionality of cooking tips may range from strange, fairly acceptable hacks to genuinely otherworldly ideas. The important thing, though, is to keep an open mind as you learn and experiment with these tested techniques. Remember, cooking is an art, and it doesn't always follow your regular rules. The beauty is in experiencing and enjoying its unpredictability!
1. Slow-roast white chocolate
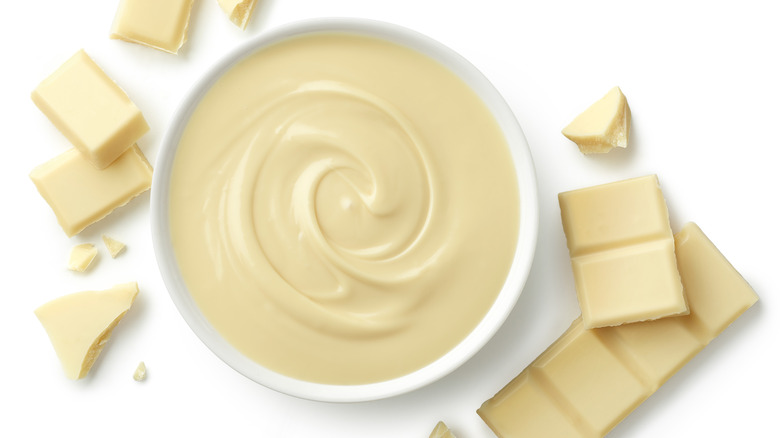
When most people think of chocolate variants, white chocolate is the last to come to mind. From its inception, white chocolate has been the sidelined sibling of dark and milk chocolates. It uses a lot of expensive cocoa butter and little cocoa beans, creating a milky product with a subtle flavor that may feel bland to the palates of people who are used to the strength of dark chocolate.
More adventurous chefs, however, have unlocked a gem in it. With a simple roast, the creaminess of this pale hunk can be amplified to a flavor that's somewhere at the intersection of toffees, toasted marshmallows, and caramel.
Roasting white chocolate is pretty simple, but according to food photographer Sheri Silver, there's a caveat: No variant with less than 30% cocoa butter will work. Once you have high-quality white chocolate, chop it into small chips and spread them out on a baking sheet. Preheat the oven to 480 degrees Fahrenheit, then bake the chips until they melt enough to be spread out on the sheet with a spatula. As you smoothen and stir the chocolate under heat for about an hour, its creamy tint should turn light brown, releasing a delicious caramel aroma.
Roasted white chocolate tops the regular type for nearly every use case. You can even add a pinch of salt while roasting to sharpen its flavor. Add the roasted chocolate to white chocolate macadamia blondies and you'll have an elevated dessert that won't last long.
2. Add some red wine to your pasta sauce
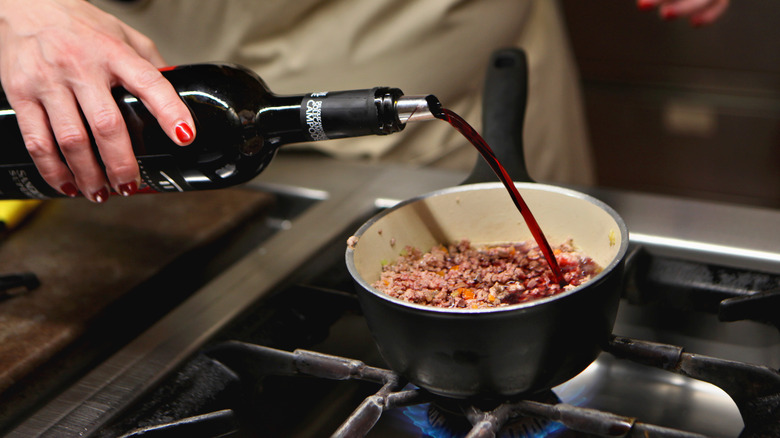
Save for the days when you just need to privately chug wine straight from the bottle, it's usually a sign of the finest elegance. With a history dating back thousands of years, red wine has made a name for itself across generations. While the drink is an extensively studied accompaniment for meals, that's not the only purpose it serves.
Cooking with wine as an ingredient has also been a popular idea since the time of ancient Roman cuisine. Among contemporary chefs, it has made a much-needed resurgence and it's easy enough to incorporate it into your regular cooking too. All you have to do is grab a wine with an acidity high enough to balance pureed tomatoes — save your Merlot and Cabernet for making steaks, not this. Be sure to select a wine you'd enjoy enough to drink if you weren't cooking with it. Add some wine to the sautéed vegetables to simmer for a short while, then add the pureed tomatoes, and you'll end up with a dramatically distinct pasta sauce.
According to Science of Cooking, the alcohol in the wine reacts with the flavors and aromas of the other ingredients, boosting the overall flavor profile of your sauce. With all this acid, make sure to exclude your delicate utensils like cast-iron or non-stick cookery when trying out this tip.
3. Toast a peanut butter and jelly sandwich

A PB&J is more than a meal — it's a national symbol. Unlike many foods that we just assume to be common, the popularity of the peanut butter and jelly sandwich isn't backed merely by word of mouth; it had enough influence that Peter Pan Simply Ground Peanut Butter found in a survey that the average American will eat 2,984 peanut butter in their lifetime, according to Food World News. That's a PB&J stack that's about as tall as the Statue of Liberty!
A regular peanut butter and jelly sandwich is a brilliant classic, no doubt, but the essence of a classic is to serve as a foundation for improvement, isn't it? To make a toasted peanut butter sandwich, simply make the sandwich as you normally would, then toast it in a toaster oven, under the broiler, or in a skillet on the stove as you would a grilled cheese. The heat toasts the bread, opening up the spaces in it, then melts both the peanut butter and jelly. In the melted form, they make a delicious mix that seeps into the core of the underlying bread slice.
In an interview with Insider, Chef James Furnish of Maui Brewing Co. recommends toasting one side of the bread for extra texture and flavor, and then assembling the sandwich together with the toasted sides inward. An added bonus: By putting the sandwich together this way the roof of your mouth will be protected from the scratchy toasted bread.
4. Prep your barbecue by spreading mayonnaise on it
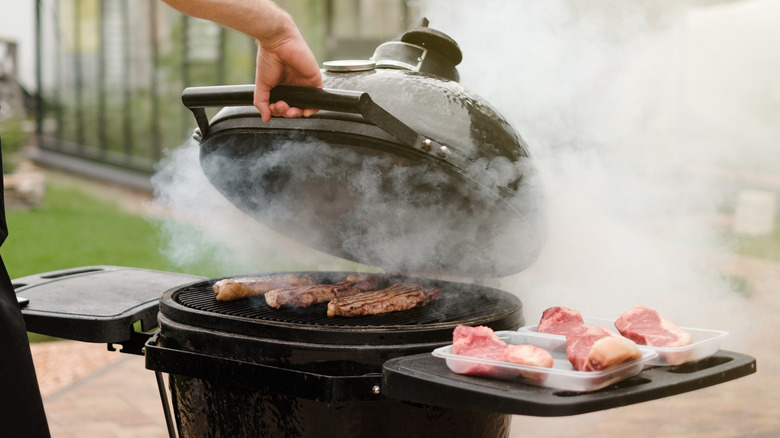
Barbecues paint a vivid picture of laughter, companionship, and carefree eating, but that's hardly the case when you're the one burdened with working the grill. Unless you're a part of the 1% with unreal dexterity, you'll have to deal with food sticking to the metal, smoking up the entire grill, and causing difficulty during cleanup. Anyone who's had to deal with a sticky grill knows just how much of a nightmare it can be, so it's no surprise that people turn to every possible fatty option to avoid it. Many people oil their grills, spread butter on them, and even add excess grease to their food, only to have it stick to the grill yet again.
The foolproof solution that Chef Michael Cimarusti uses, according to the Los Angeles Times, is to coat the grill with a light layer of mayonnaise instead of the usual greasy options. Mayonnaise isn't a widely-popular choice with barbecue, but it's functional for a couple of reasons. First, the spread has a high melting point, so unlike butter, it's less likely to melt off while you're grilling. Second, mayonnaise has a jelly-like emulsion from fat, vinegar, and acidic lemon juice. Even under heat, this emulsion adheres more strongly to food than metal. Regardless of what you're grilling, the mayonnaise slides off easily with the food, then forms a coating to cover and protect it from the direct drying effect of the open flame.
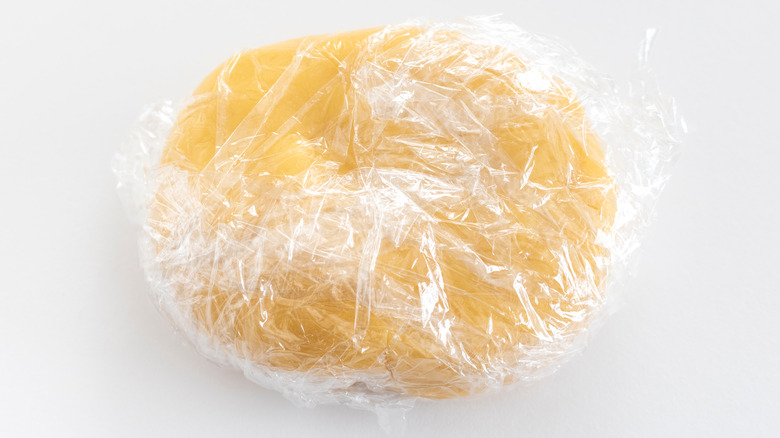
5. Leave your cookie dough to rest for at least one day
Great cookies start with great cookie dough, and great cookie dough starts with...great cookie dough-making? Dough can be of multiple forms and varieties — it can be crumbly, firm, sweet, flavorful, and so on. Most of these results are fine, but only if that's what you were going for.
Refining your cookie game to create the exact baked good of your dreams will inevitably require practice. However, there's an essential tweak to keep in mind as you experiment: Always rest your dough before baking it. Every cookie recipe worth its salt has this instruction, but it's often so inconvenient that bakers skip it and get on with the rest of the process in a hurry. Well, if you want chef-level cookies, you'll have to let that dough sit.
The essence of the resting phase is to allow the fluids from other additives to soak into the flour and hydrate it. This hydration makes the dough look drier overall but gives it a better texture, deeper flavor, and smoother consistency. According to world-famous pastry chef Jacques' Torres, a resting period of no less than 24 hours or up to 72 hours is required for his chocolate chip cookie recipe (via New York Times Cooking). If you really want those chef-style cookies, they won't get made in less time than that. Make the dough ahead and let it rest overnight for the best results.
6. Take your scrambled eggs the extra mile by poaching them
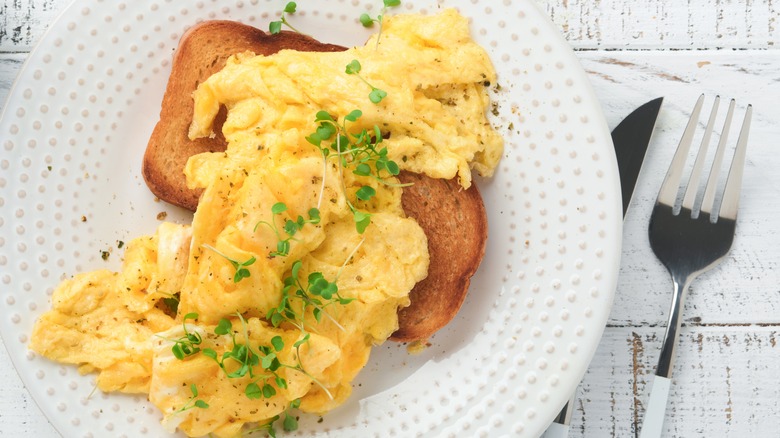
Anyone can make scrambled eggs, but the trick to making perfect scrambled eggs is a topic of debate. Since the dish first made its appearance, each culture has created its own variant for making them.
According to Fine Dining Lovers, the English claim that scrambled eggs should have a silky texture, so they stir them thoroughly while cooking. The French, on the other hand, like their eggs filled with pockets of air, so they don't whisk them at all until they're nicely heating under slow heat. American cuisine, ever the contrarian, claims that scrambled eggs should be thick and filled with medium-sized lumps, so Americans only stir their eggs minimally.
An increasingly popular opinion, however, is that we take the eggs beyond variations of the same process. The perfect scrambled eggs needs more than scrambling — they need poaching too. In a video with Everyday Gourmet, Australian cook Justine Schofield demonstrated a technique for both scrambling and poaching eggs in one fell swoop.
The trick is simple: Salt some water and set it to a low boil like you would do for poached eggs, but crack and whisk the eggs as you would for scrambled eggs. Stick a spoon into the water and stir it to create a whirlpool, then pour the eggs in while it's still whirling. Cover it up, and the magic happens in about 15 seconds. The finished result is a dish of creamy, perfectly-cooked scrambled eggs.
7. Melt butter into tomato sauce
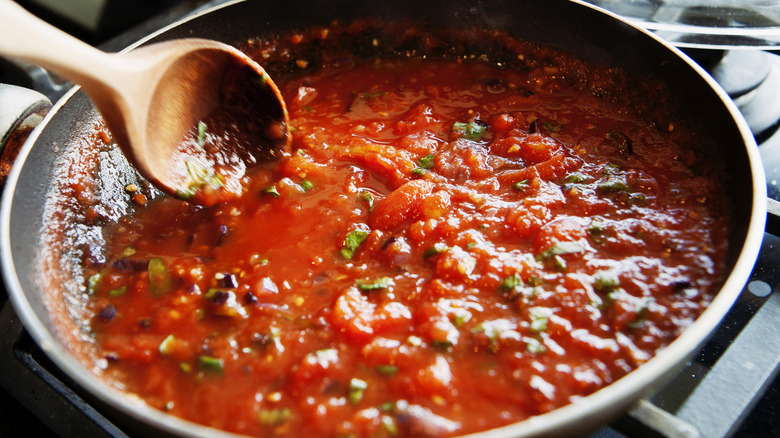
Everyone wants gourmet-standard food, but let's be practical, it takes so much time and effort to make everything from scratch, so that's not always possible. The good news, though, is that there are cooking techniques to upgrade store-bought, artificial-tasting instant ingredients and make them taste fresh.
If you've ever ended up with a sharp, searing acid taste in your tomato sauce, you're not alone and you didn't cook it wrong. Clemson University reports that fresh tomatoes have a slightly strong acidity with a pH between 4.3 and 4.9. The acid gets more concentrated as the fluid in the tomatoes decreases. According to Baptist Health, a long processing chain that drains out a large part of its organic buffers and adds extra acidic content through preservatives, packaged tomato sauce often has an even higher acidity. This acidity is great for preservation, but bad for your sauce, and it's usually impossible to drown out the strength without cooking the sauce for ages.
What do you do when you're stuck with acidic tomatoes and little time on your hands to make tomato sauce? Legendary Italian chef Marcella Hazan, in her book titled, "The Essentials of Classic Italian Cooking," says to add tablespoons of butter. Butter is an amazingly powerful neutral food, and melting some of it into tomato sauce instead of oil douses much of the tomato's acidity. The butter also adds a distinct creaminess that improves the overall taste of the sauce.
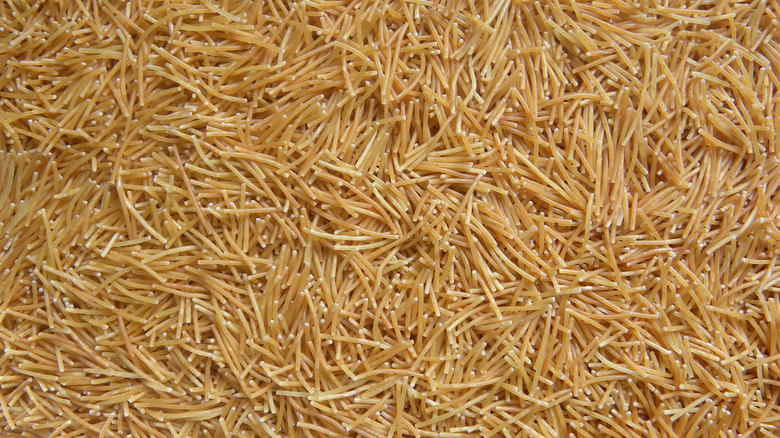
8. Roast pasta before boiling it
Pasta often seems ridiculously simple to make until you have to do the cooking. When you're the one wielding the spaghetti spoon, whipping up food that doesn't fall into the world's wide selection of unremarkable meals gets even more difficult. Despite how thin the line is, though, professionally-made pasta usually crosses the bar, turning out excellently different from "regular" cooking.
How the chefs pull off this great pasta is, in fact, not very different from how you make yours. The most important distinction is that they give more thought to each stage of the process, even the ridiculously simple bits like preparing the uncooked pasta and boiling it properly. Simple hacks to these steps can set up your pasta for greatness before you even begin to touch the first pot.
Pasta has little flavor, but you can create a taste infusion of your own by roasting the uncooked pasta. This is an age-old trick among chefs, but it's simple enough to be easily incorporated into amateur cooking too.
Spread out the pasta in a wide pan or bowl, then evenly drizzle a couple of teaspoonfuls of oil over it. Toast the pasta on medium heat in the skillet, oven, or microwave until it's deliciously browned and releasing a distinct roasted aroma. That's all. You can then cook the pasta as usual, but you'll end up with a better flavor and firmness.
9. Make popcorn in a stovetop pan instead of a microwave
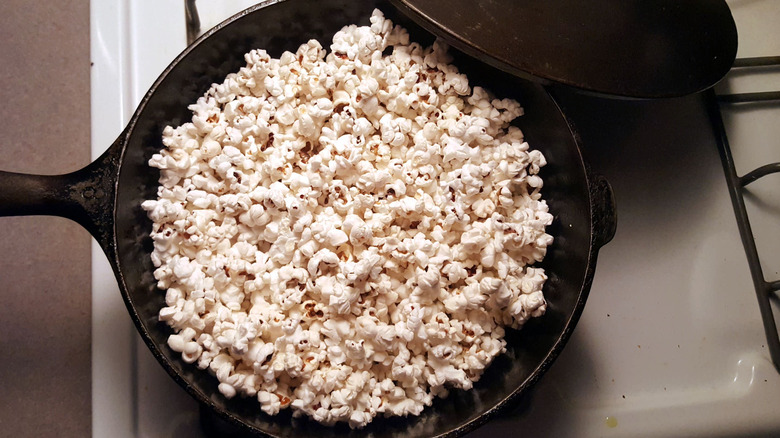
We have lost so much food to the cold process of automated, artificial cooking, and popcorn may be the most significant of the bunch. With a 2,500-year-long history within the Americas, per PBS Food, Americans are born into a nation that adores these crunchy corn snacks. When popcorn made its commercial debut circa 1820, it was made in frying pans with corn that had been mixed with butter or lard. The popcorn was great, but the fast-melting butter and thick, greasy lard made the entire process inconvenient.
Popcorn makers and microwaved popcorn now make the process of popping kernels a breeze, however, it doesn't taste nearly as good as the original version. When we switched from stovetop to automated and microwave popcorn, we gave up considerable flavor and taste for the sake of convenience. If the pressure of making tons of popcorn for sale isn't a factor, you should sit back and make it the way it's meant to be — on a stove.
To use the stovetop method, gather some plain popcorn kernels and virgin olive oil. Dry the pan and add oil to thinly cover it. Sprinkle enough kernels to make a single layer in the pan, cover it up, and let 'em pop.
10. Tenderize meat with baking soda or teabags
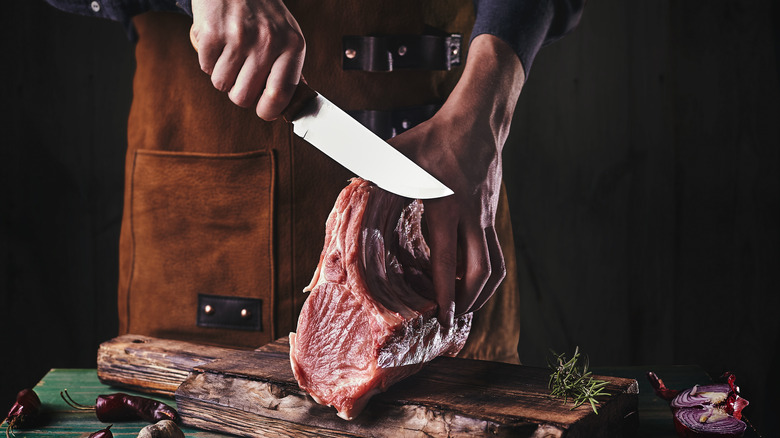
Tenderizing meat not only makes for a more tender cut, but it also enhances the flavor. This is because the tenderizing chemicals soak into the meat and break down collagen, which is the main material suspending the connective tissue within the flesh. With the bulk of the tough connective tissue gone, the meat absorbs seasonings more easily, becomes easier to chew, and breaks down into a form that's easier to digest.
There are plenty of ready-made tenderizers, but baking soda and tea are natural alternatives that do an equally great job. All you have to do is dissolve the baking soda in about twice its weight in water. For teabags, dip them in hot water to release the tannins then remove them. Next, cut the meat into medium-sized chunks, put them into the baking soda or tea solution, and let the mixture sit for 15 to 30 minutes. Rinse the meat, and voila — uncomplicated tenderized meat. If you'd rather not soak the meat, an alternative method is to rub the baking soda directly on the surface of the meat. If using baking soda in a dry rub, you'll need to let the chunks sit for three to five hours, according to Arm & Hammer.
11. Prepare vegetables by blanching them in seasoned water
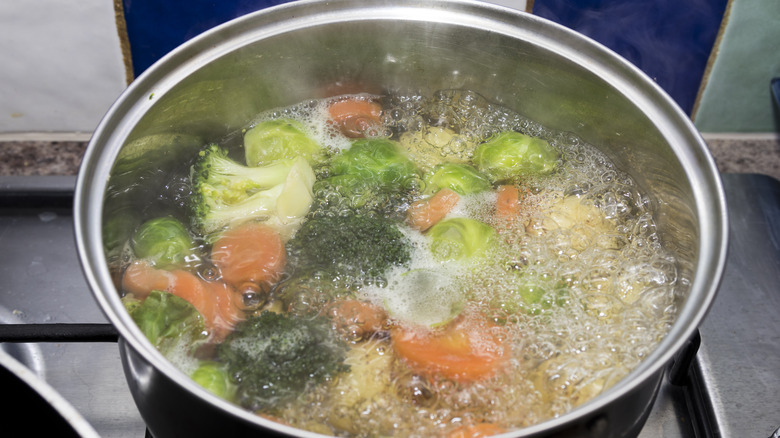
Whether you love a full plate of vegetables or simply eat them for their nutritional value, it's important to know how to make the most of them. Not only should they taste great, but they should retain their nutrients and create a unique accompaniment to the rest of your meal. Blanching is the technique of choice for preparing stem vegetables because it breaks down their intrinsic sugars while opening up space for extra seasoning.
Wash the vegetables thoroughly, then cut them into large, medium, or small sizes depending on how long you intend to keep them in boiling water. It's important to monitor the heating vegetables relative to their size because, according to the University of Minnesota, too little blanching time will stimulate enzymatic reactions and then stop them halfway, leaving the vegetables worse off. Too much time, on the other hand, can drain out all the nutrients, flavor, and color, offering an equally undesirable result.
Boil water in a large, wide pot and add seasonings and a pinch of salt. At the peak of boiling, throw in the vegetables and leave the pot uncovered. The boiling water will break down the starches into sugar, making the veggies sweeter as the salt and seasonings find their way into the newly-opened spaces and boost the natural flavors. Boil the veggies until they are sweet and crispy, then run them under cold water to stop the cooking process.