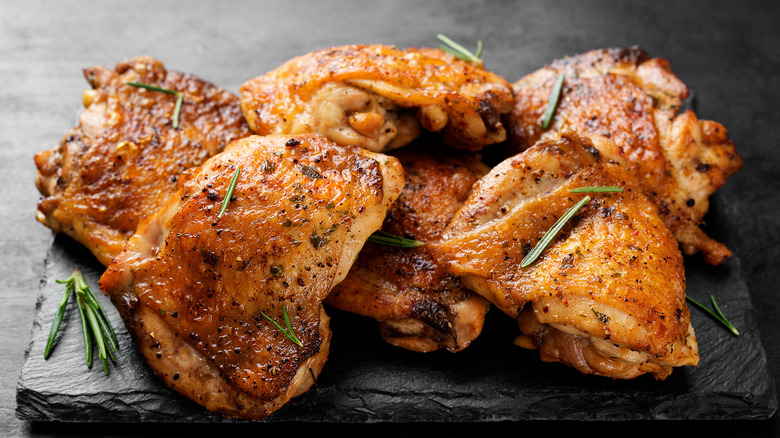
14 Tricks For Making The Most Crispy Chicken Thighs Ever
We may receive a commission on purchases made from links.
There are few things as satisfying as a perfectly cooked chicken thigh, crispy on the outside, juicy and rich on the inside. Chicken thighs have overtaken the once mighty breast in popularity, according to the Los Angeles Times, with both home cooks and restaurant chefs favoring the cut. A majority of chicken consumers in recent years have begun to appreciate dark meat for its succulence and flavor — not to mention the fact that it's easier to cook and harder to overcook compared to white meat.
But even with that said, getting the perfect balance of flavor and, especially texture, can still be quite a challenge. A bland, limp hunk of meat can ruin any meal, but luckily, there are some simple steps that will boost your chicken thigh game to the next level. Whether you're pan-frying, deep-frying, air-frying, baking, or grilling, following these pro tips can help ensure your chicken thighs come out perfectly crispy every time.
1. Brine or dry brine the chicken thighs overnight
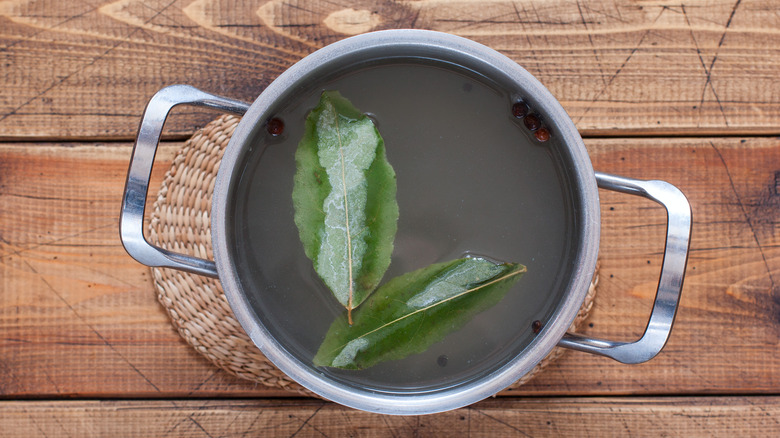
One of the secrets to cooking tasty, well-seasoned chicken thighs is brining the meat beforehand. In addition to boosting flavor, brining also helps with texture, and contributes to the finished chicken's crispiness. So what is brining, exactly? At its most basic, a brine is a solution of salt and liquid, though usually other elements like aromatics and sugar are added as well. When meat is submerged in the mixture over a period of time, the salt soaks in, seasoning the meat all the way through. Dry brining achieves the same end but instead of using liquid, the salt mix is rubbed on the surface of the meat and left to penetrate it over time, per Bon Appetit.
As Cook's Illustrated explains, brining forces the meat's protein to rearrange into a different pattern that holds in liquid better, keeping the meat juicier when it's cooked and making sure those juices don't interfere with the formation of a crispy exterior. Sugar in the brine mix helps with this, too — when sugar reacts with heat, it caramelizes, so your chicken will be browner on the outside.
For chicken that's thoroughly seasoned and ready to crisp up, brining it for 24 hours is ideal, per Self. The next time you're planning to cook chicken thighs, make sure to plan ahead.
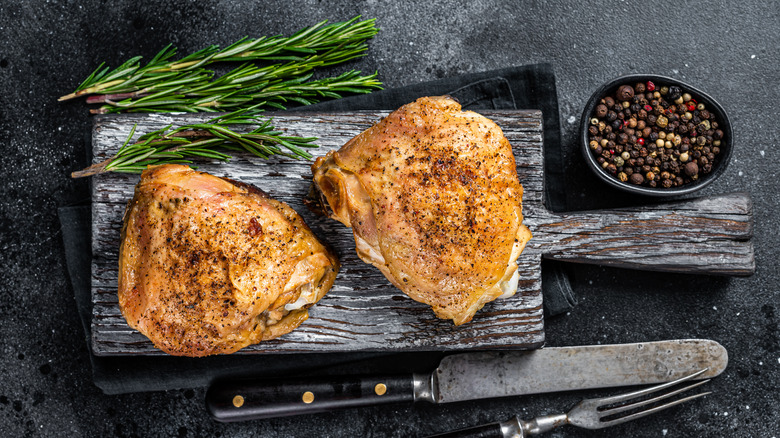
2. Use bone-in chicken thighs with skin
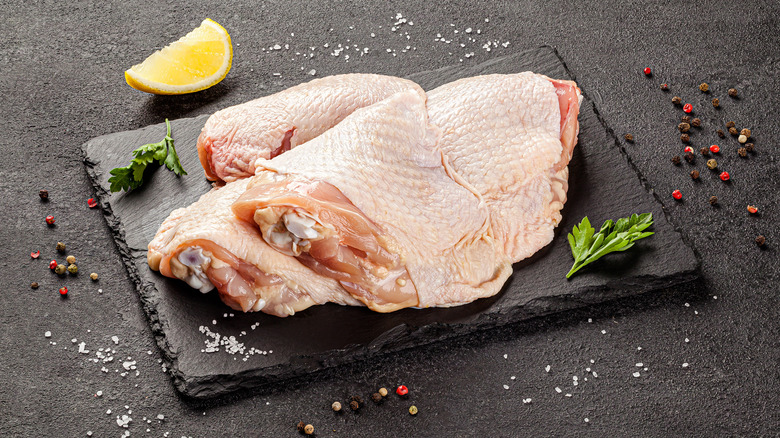
For the crispiest, tastiest chicken thighs, you're going to want to skip over the boneless, skinless hunks of meat and get yourself some proper poultry. While chicken with the skin and bones removed may seem more convenient, any way you prepare it, it's going to lack critical flavors and texture as it's missing two key elements that will take it to the next level.
According to Bon Appetit, there are many reasons to opt for bone-in, skin-on chicken thighs. The flavor is better, thanks to bone marrow that adds depth and intensity when cooked, and it's richer, thanks to the added fat that comes from the skin. The texture is better too, especially if you follow our tips to get that skin perfectly crisped and golden brown. And the price is typically better, too, since deboning and skinning the meat takes more time and effort, which means the higher cost gets passed on to the consumer. So for best results all the way around, make bone-in, skin-on your chicken thigh mantra.
3. Make sure the chicken thighs are dry before cooking
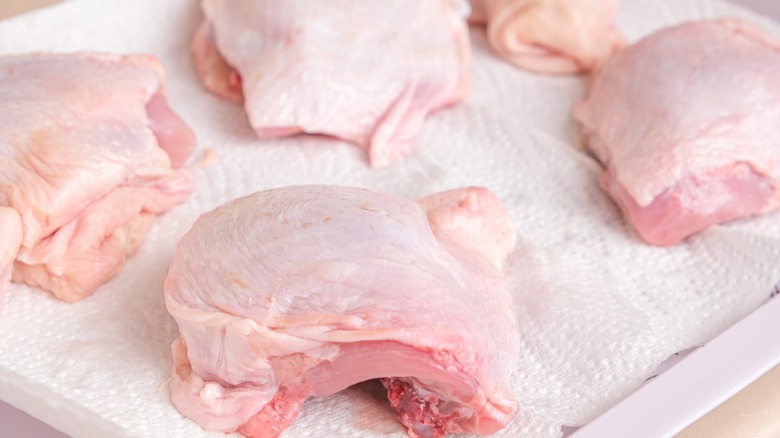
When you're going for crispiness, moisture is the enemy. That's why it's crucial to make sure your chicken thighs are as dry as you can get them before you start the cooking process, per Self. This is especially important if you've had your meat in a brining solution, as you'll have lots of liquid to contend with.
Drying the chicken is as simple as patting each thigh with a paper towel to soak up any residual moisture. If you really want to go all out, leave the thighs uncovered (refrigerated at a safe temperature, of course) overnight or longer to let as much moisture as possible evaporate from the surface. And be careful of the fat you use when cooking the chicken, too –- the moisture content in butter can create steam as it cooks, as the Institute of Culinary Education points out, and you don't want your chicken thighs to look like they've just spent a day hydrating at the spa. Oil is a better choice for a crispy, golden exterior — just make sure that before your chicken comes in contact with it, it's completely dry to the touch.
4. Use an egg wash

This tip is especially useful if you're roasting or baking your chicken thighs. The Modern Proper purports that brushing an egg wash over the skin of your chicken thighs before putting them in the oven is all but guaranteed to result in a crunchy, crispy, browned exterior.
What is an egg wash? As MasterClass explains, it's basically a mixture of egg and liquid. The egg portion can involve the yolks, whites, or a combination of the two. The liquid can consist of water, dairy, or pretty much whatever else you can find in your fridge. Egg washes are commonly used to create a golden color and glossy effect on the surfaces of breads and pastries, and they cause a similar reaction when brushed atop meats like chicken.
You can also use the stickiness of an egg wash to add another coating to your chicken thighs, whether it's seasoned flour or breadcrumbs, or a combination of both. But in a pinch, or if you're trying to avoid gluten, just the egg wash itself can be enough to ensure a crispy chicken bake.
5. Use baking powder or baking soda
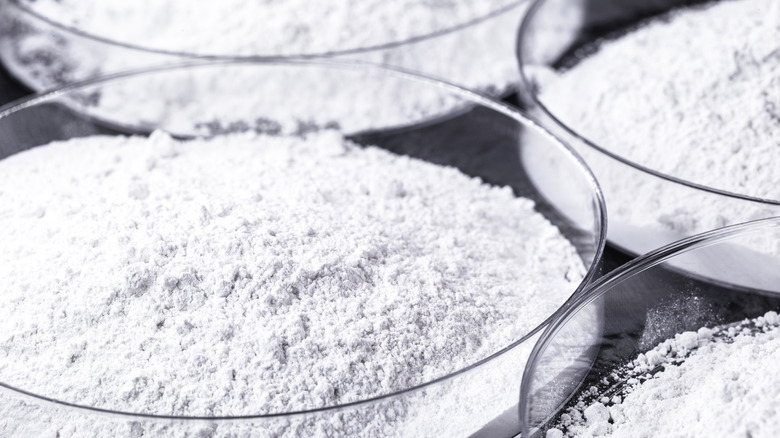
Baking powder and baking soda are mainstays in everyone's kitchen, especially those who do a lot of, well, baking. Both items are used for similar purposes — mainly, to give a rising effect to baked goods. But did you know that they can also make your chicken thighs crispy?
America's Test Kitchen explains how to utilize baking powder in fried, baked, and roasted chicken recipes. Both baking powder and salt, when rubbed onto the dry skin of a piece of chicken, pull liquid out, creating an extra-dry surface that's primed for crispiness when cooked. When used together, the reaction is doubled in intensity, giving chicken an ultra-crunchy, gorgeously golden-brown exterior.
Bon Appetit breaks down the use of baking soda to emulate the deep-fried crunchy effect on chicken, without the hassle of turning your kitchen into an industrial frying station. Similar to the above technique, take a small amount of the substance, mix it with salt and other spices, and coat your chicken with it. The alkaline nature of baking soda reacts with the skin to rapidly create a crunchy, crispy surface. Make sure to measure the stuff properly, though — a surplus of baking soda can create undesirable flavors.
6. Bread your chicken thighs

One way to all but guarantee crispy, crunchy chicken thighs is to bread them. Giving your chicken an extra outer surface of crunch is almost like using a cheat code to get it crispy, although it does involve a fair amount of work to get it right.
Breading is a three-step process, as Insider explains, with each step adding a coating to your chicken that builds upon the previous layer. The first coating is flour, which should adhere to the chicken's skin provided it's been properly dried. (Cornstarch can be used as a gluten-free alternative.) Next, the chicken is dipped in an egg wash. This melds with the first coating, either flour or cornstarch, creating an adhesive substance that acts like glue for the third coating, the actual bread part of the breading process. There are plenty of options for what to use here, depending on your taste — traditional breadcrumbs, panko, cornflakes — you can even use pulverized pretzels.
Once the last coat is done, the chicken and the breading need time to get to know each other. A short rest in the fridge, at least 15 minutes, will ensure the breading layers stay put during cooking, whether you're frying them up or throwing them in the oven.
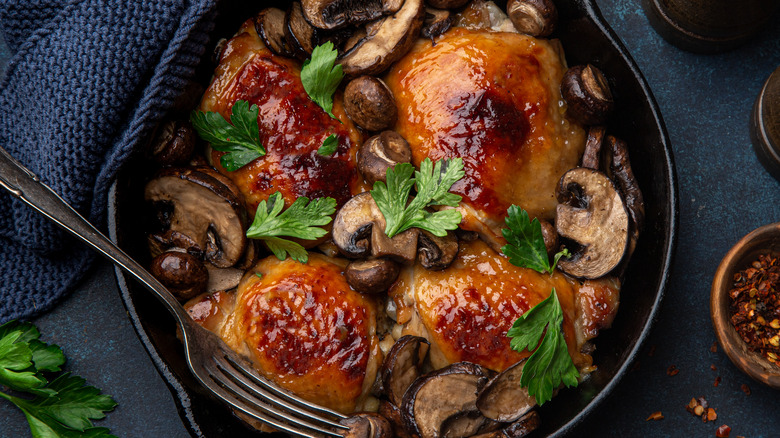
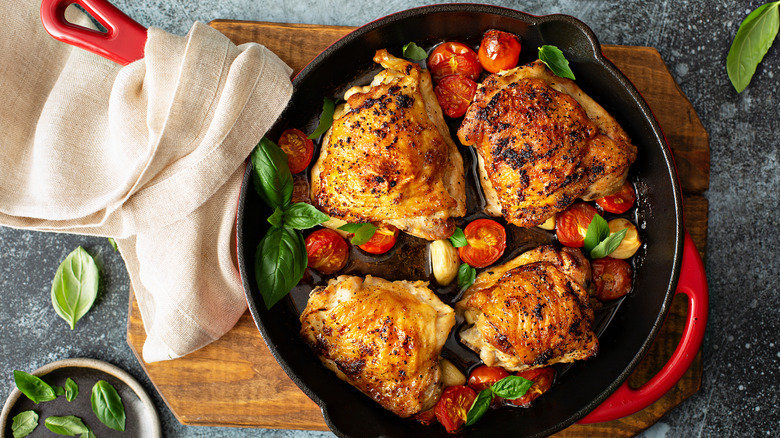
7. Use a cast iron pan
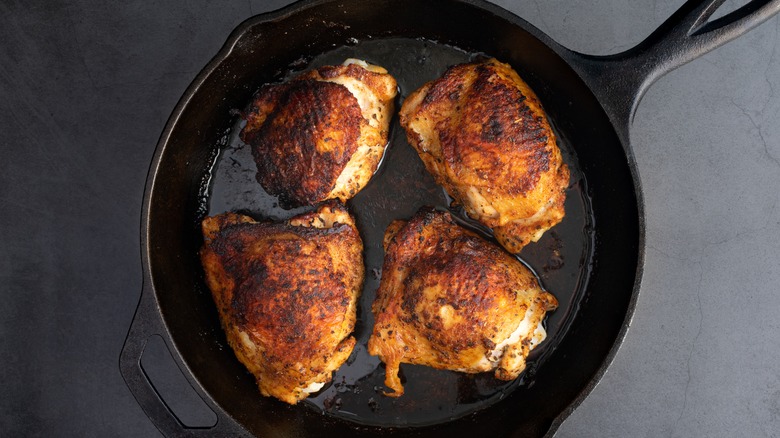
Using and caring for cast iron cooking vessels may seem daunting to the home chef. It can be hard to know how to properly use these pans amidst the rumors and tales about them. Does cast iron really need to be seasoned? Will soap and water ruin them forever? If so, how do you keep them clean?
It's worth examining these questions and getting to the bottom of them once and for all, because cast iron is the best type of pan to use if you want to get your chicken thighs crispy, per Self. Most pans on today's market come pre-seasoned, which saves modern cast-iron users a step. As for cleaning, soap and water is fine to use, as long as the pan is properly dried afterward, as water left in the pan can cause it to rust. Cast iron pans may occasionally need to be re-seasoned to keep food from sticking, but the process isn't too much trouble, and the more you use them the less this step will be necessary.
The benefits of cast iron outweigh any inconvenience when it comes to cooking crispy chicken thighs, as the meat experts at Butcher Box attest. Cast iron can handle and retain high heat, which is great for getting a nice crispy sear. And it's oven safe, allowing for versatile cooking. A properly seasoned pan at the right temperature will easily create a crispy golden crust without the need for secret ingredients or complicated techniques.
8. Make sure the pan is hot before cooking
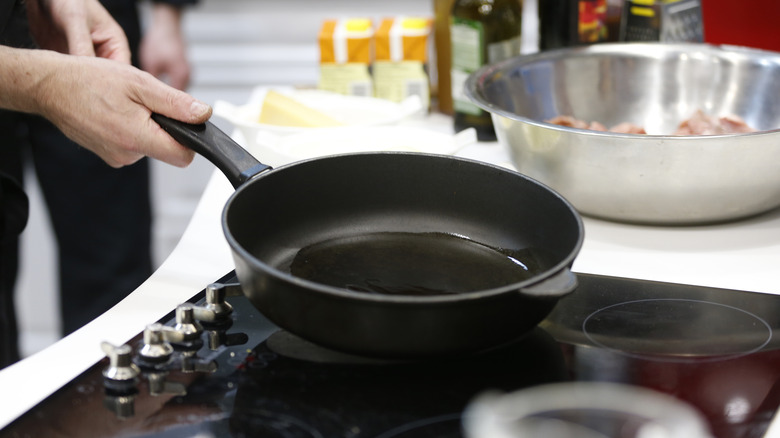
As the saying goes, you only have one chance to make a first impression –- and when chicken thighs are introduced to a hot pan, they've got one chance to get that perfect, crispy sear. That means the pan has to be heated just right in order for that magical crisping reaction to take place.
Chef Lachlan Sands of the Institute of Culinary Education says to heat your pan at a medium-high temperature –- anything cooler and you won't get that magical interaction between fat and a hot surface that creates a crust. High heat works too, as Self and Butcher Box recommend (just make sure to lower it if you smell burning).
A well-seasoned cast iron pan shouldn't need much in the way of cooking fat, since its surface is naturally non-stick, so a small amount of oil should do. Make sure you're using an oil that's compatible with high heat though, like refined avocado oil, or it could start to smoke.
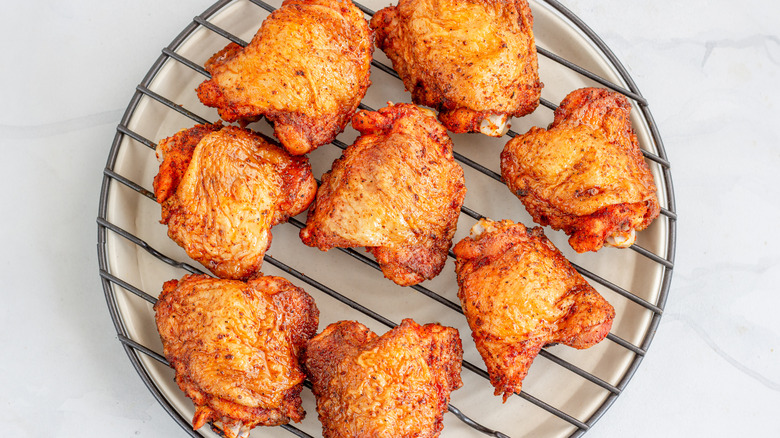
9. Don't overcrowd the pan
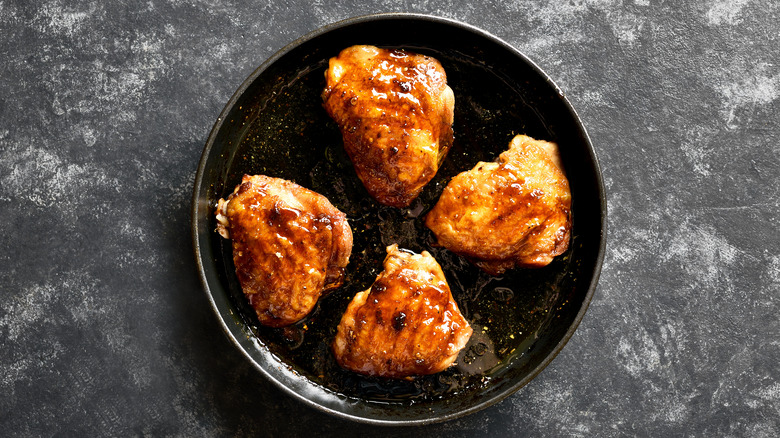
When cooking chicken thighs in a pan, it's important to make sure each piece of chicken has its own space and avoid crowding them together, says Insider. This may mean cooking in batches, which can be time-consuming, but throw too many thighs in a pan at once, and you risk them all coming out mushy, limp, and even dangerously undercooked.
For a crispy exterior to form, the chicken thigh needs to be in contact with the pan's hot surface. If the chicken pieces are crammed together and touching each other, those surfaces have no chance of becoming browned and golden, and the pieces won't cook evenly. Too many thighs in the pan will end up steaming instead of searing — think of it like having too many people crowded into a small, hot space and starting to perspire. We know that moisture is the enemy of crispiness, and no one wants a limp, sweaty chicken thigh that looks like it just came out of a packed subway car.
This concept applies to frying chicken, too. As America's Test Kitchen tells us, adding too much chicken to your frying vessel at once will cause the oil's temperature to steeply fall, and you want it to stay as constant as possible for even cooking. So even if it means spending a little extra time at the stove, cook in small batches for your thighs to reach their full crispy potential.
10. Don't flip or move the chicken thighs too much
Understanding a little bit of the science behind cooking can help us know what steps to take to ensure chicken thighs come out crispy every time. One important concept to delve into is the Maillard reaction. This chemical reaction, similar to caramelization, is responsible for the browning effect that occurs when meat is cooked at higher temperatures. As the amino acids in the meat are altered by heat, the surface of the meat darkens and takes on new flavors.
The Maillard reaction begins once the chicken comes into contact with high heat. You want to interfere with this process as little as possible, letting science work its magic and form that crispy brown crust undisturbed, as Chef Lachlan from the Institute of Culinary Education explains. That means when cooking chicken thighs in a pan, leave them as-is for as long as it takes, no matter how tempting it is to flip them or scooch them around. Once the crispy crust has fully formed, you'll know –- the chicken will release easily from the surface, telling you it's fully browned and ready to flip.
11. Don't cover the chicken while cooking or resting
Moisture is best avoided when trying to get your chicken thighs to get crispy and stay crispy, so one major thing to avoid from start to finish is a humid environment, as Southern Living points out. Whether you're using a stovetop or oven method, keep the chicken uncovered and open to circulating air. Placing a lid over your hot chicken is like putting it in a steam room, and that dampness is going to destroy any crispiness your chicken has developed during the cooking process.
Resting is an important step after cooking meat, so don't dive into your thighs too fast. They're going to need a good five to 10 minutes to sit undisturbed. This resting period lets the juices inside settle, resulting in a more succulent bird. Cut into the thighs too soon, and that juiciness will end up on your cutting board.
Resist the temptation to keep the meat hot as it rests by covering it. The residual heat from the cooking process will continue to raise the temperature of the chicken even after it's been removed from the pan, fryer, or oven, and a few degrees of warmth isn't worth losing all that crispiness anyway.
12. Use a combination of stovetop and oven
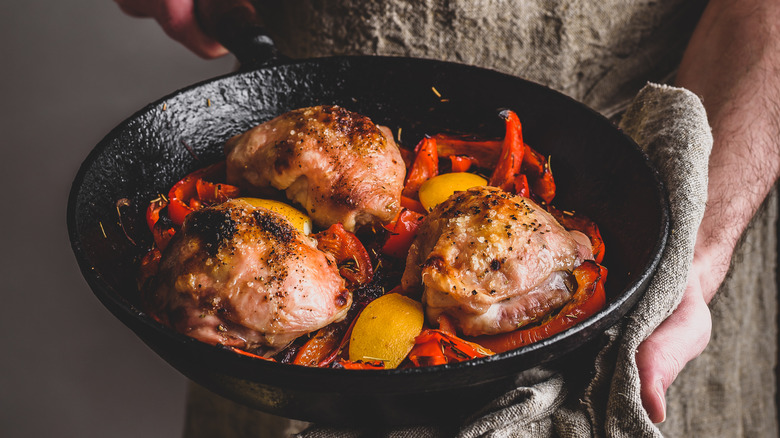
Searing chicken thighs in a pan on the stovetop is a great way to get the outsides crispy and browned, but the best way to ensure that all of the meat is juicy and cooked evenly inside is to use an oven, as Southern Living tells us. If you're struggling to decide which method to use, don't -– the best method, it turns out, is both.
Getting that crispy, crackling crust that comes from direct skin-to-pan contact is the first step. Once the thighs are properly browned on both sides, place them in a preheated oven and let them cook the rest of the way. A cast iron pan makes this transition a snap since it's oven-safe; otherwise, you'll need to transfer your chicken thighs into different cookware first. Doubling down on these two cooking methods lets you reap the benefits of both without sacrificing a thing, ensuring your thighs will achieve that ideal balance of tender, juicy insides and satisfyingly crispy exteriors.
13. Deep fry or air fry your chicken thighs
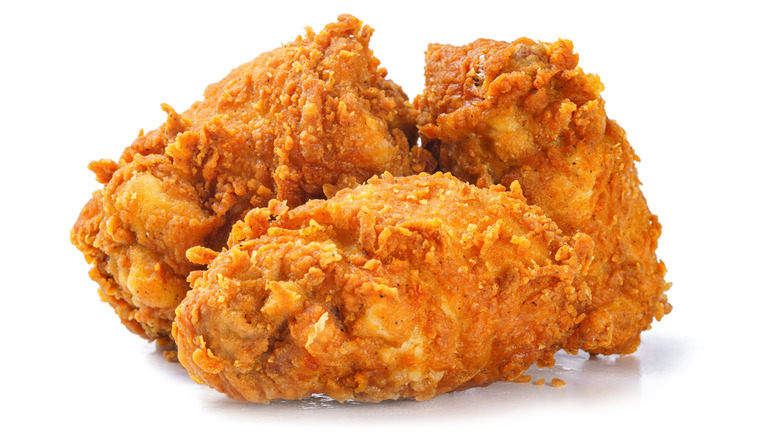
It's tough to beat fried chicken when you're looking for maximum crispiness. There's a reason deep-fried chicken's crunch is so spectacularly satisfying. We all know that oil and water don't mix, and we've learned that moisture is the enemy of crispiness. MasterClass explains that as foods are fried in oil, a unique process occurs that starts with dehydration, pulling moisture out of the food while at the same time instigating that wonderful Maillard reaction that creates a browning effect on the outside. This combination of reactions results in chicken that's amazingly crispy on the outside, cooked through evenly on the inside, and full of deep, concentrated flavor.
If you're looking for an easier, lighter way to achieve the same crunch, using an air fryer to cook chicken will do the trick. Using hot, circulating air instead of oil to produce a similar effect to deep frying, air fryers are a great, low-maintenance option for making sure your chicken thighs come out extra crispy.
14. Cook chicken thighs under a brick
One of the most unusual methods to cook crispy chicken thighs comes from Italy, with a technique that's been around since the Roman era, as Taste tells us. Pollo al mattone, or chicken under a brick, is exactly what it sounds like: A weighted object, traditionally a terracotta brick, is placed directly atop the chicken as it cooks. The pressure pushes more of the chicken directly against the cooking surface to create an extra crispy, crackling and crunchy skin.
While most pollo al mattone recipes call for a whole chicken, spatchcocked and cooked over an open flame, the same technique can be easily adapted for use with chicken thighs and pan-searing. And if the idea of cooking with a brick doesn't thrill you, any similarly heavy object will produce the same effect, even another skillet. Wrapping the brick in foil works too, if you want to avoid any potential contaminants from getting in contact with your chicken. Once you experience how incredibly crispy a brick can make your chicken thighs, you'll forget how odd the process sounded at first, and you may never go back to another technique again.
15. Use the boiling water trick
As discussed earlier, moisture is the enemy of crispy chicken. Thighs should be as dry as possible before cooking, or they can become limp and soggy instead of crunchy and golden brown. However, if used right, moisture can be your friend — and that's where this boiling water hack comes into play.
First, place your skin-on chicken thighs on a rack that drains into a sink or other receptacle that can handle boiling liquid. Pour or ladle boiling water — carefully, of course — over the chicken pieces, and you'll see the skin tighten and shrink. Once this is done, pat the chicken dry with paper towels as you normally would.
This technique works basically like a first round of cooking, as the heat from the water renders some of the fat ahead of time, so that during the main cooking process there's less released from the chicken that can interfere with the crisping process. The skin will brown more quickly and thoroughly using this method, and you'll get extra crispy skin every time.