For A Well-Designed Charcuterie Board, Organize Your Ingredients First
Charcuterie boards may seem like a new trend in light of their explosive popularity over the past few years, but they've been in style for decades — and thankfully they don't seem to be going anywhere anytime soon. This increase in charcuterie boards' popularity could be attributed to millennials, who often joke that the boards are just grown-up Lunchables. However, the adult versions have evolved. The traditional combination of meat, cheese, crackers, and something sweet is no longer enough. No more plastic slotted trays either. Instead, presentation is everything.
Crafting a well-designed charcuterie board boils down to preparation. It's helpful to gather all of the ingredients beforehand so that it can be planned out thoughtfully. Any prep work — such as slicing salami, chopping veggies, or filling ramekins — should also be done before you start loading the board. That way you're not playing Tetris with blocks of cheese after the board has been covered in sliced cured meat, or scrambling to fit forgotten preserves at the very end. By lining everything up you'll have a visual of what needs to go on the board first, and what should be placed last.
Start with the biggest charcuterie ingredients
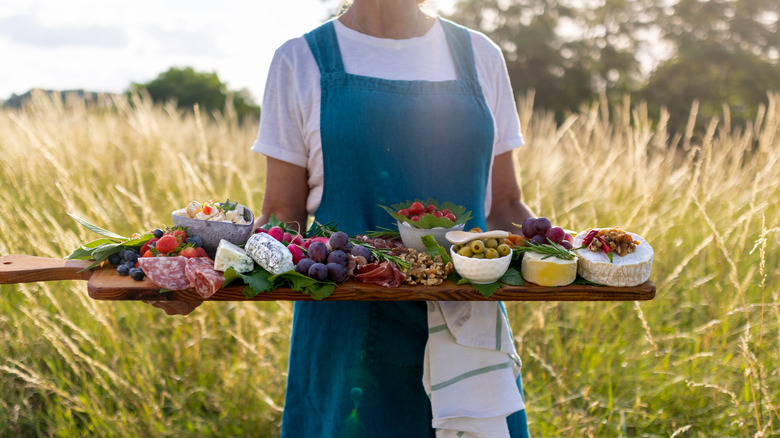
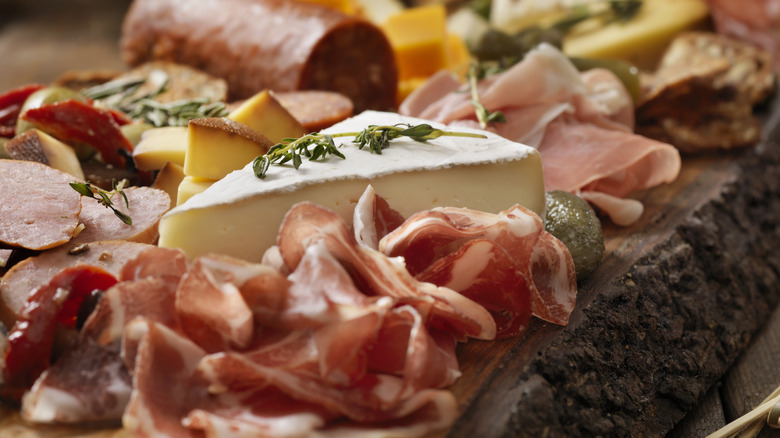
Once you've gathered all of your charcuterie board ingredients, start by placing the largest items. This will primarily be whole wheels or large wedges of cheese, especially soft cheeses like Brie or Camembert. If you're using any ramekins or small vessels, you'll also want to arrange those right away.
Next, reach for those sliced meats and cheeses and fan them out across the board. Try to spread them out evenly so that it's not all meat on one side and cheese on the other. Lay prosciutto down in one corner, and salami on the opposite diagonal corner, for example. Do the same with any sliced cheese. Crackers can also be distributed evenly across the entire board, plus any chunks of bread. Now, place any sliced veggies or fruit. These can be placed in piles, or arranged in different designs (celery sticks fanned out in a circle, for example).
Lastly, smaller items can be scattered throughout the remaining space on the board. Drop a handful of popcorn, dates, pretzel sticks, chocolate-covered raisins, wasabi almonds, and whatever else you have. It's okay for there to be some overlap, just be sure not to hide the meat and cheese. You want people to see all of the different options right away so they can mix and match their favorites from the start.
Small charcuterie items can add huge flavor
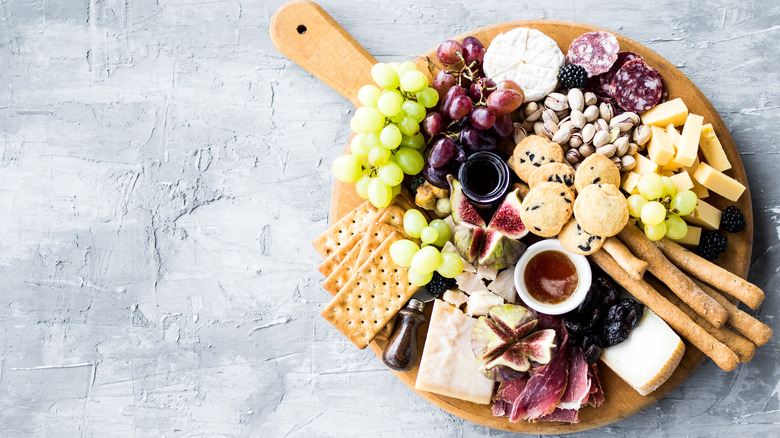
A good charcuterie board goes beyond just meat, cheese, and carbs. It should satisfy various flavor profiles including savory, salty, fatty, spicy, sweet, and sour. There should also be multiple textures. Crunchy, creamy, and chewy are all important — as are condiments like infused olive oil, honey, caramel, chocolate sauce, jellies, and jams. Plan to include flavors and textures that pair well when eaten in succession, not just items that are mouthwatering in the same bite. For example, a handful of wasabi almonds tastes great after eating sweet dates, because of the contrasting tastes and textures.
While accouterments can be spooned or drizzled directly on meats, cheeses, fruits, or veggies, there is a benefit to using ramekins instead. Not only will your board stay cleaner but guests who love Brie but not fig jam won't be disappointed, for example. Keeping condiments and preserves separate allows for more creative mixing and matching. In the same vein, ramekins are great for displaying olives, cocktail onions, or anything with a brine that might soak into other foods.
Most of all, remember to have fun! Charcuterie boards are meant to be an enjoyable and social way to elevate simple finger foods. By following these easy guidelines you'll be able to create one that is as aesthetically pleasing as it is tasty and satisfying.