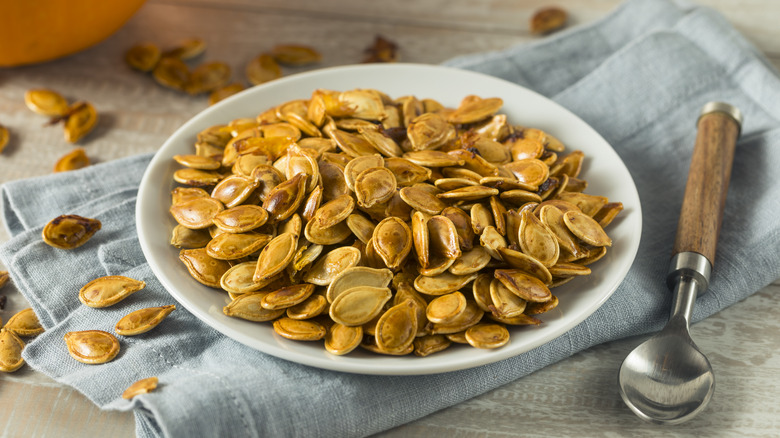
13 Tips And Tricks For Getting Perfect Roasted Pumpkin Seeds Every Time
Next time you buy pumpkins, don't make the mistake of tossing all of the seeds into the garbage. If you've never saved and roasted them before, you might assume it's a hassle. Well, the good news is that it isn't at all! For a start, it's safe to eat pumpkin seeds with the shells left on, so you don't need to worry about removing them (although you certainly still can if you prefer to). If you aren't a fan of plain pumpkin seeds, that's no problem either, because you can season them to transform their flavor into something much more profound and delicious.
Whether you're a first-timer or just looking to upgrade your recipe, this guide has all the information you need. It includes tips on how to choose the right pumpkin, prepare the seeds, and cook them to achieve a perfect crunchy texture and charming golden brown color. When you put these tricks into practice, it makes the whole process run smoother, while giving you an ideal fall snack.
1. Choose a nice pumpkin

When you go to the pumpkin patch, it's entirely understandable to pick a pumpkin that's perfect for carving or looks like a great porch decoration. However, when you pick them specifically for their seeds, there are some tips for selecting a high-quality one. For instance, in general, the larger the pumpkin, the more seeds it has. Tiny pumpkins do indeed contain seeds, but they don't yield many. You'll either have a small amount to snack on, or you'll have to use multiple small squash to get the desired amount.
Also, make sure the pumpkins are ripe. Although the green ones are adorable, they haven't reached their full potential. Luckily, pumpkins do continue to ripen a bit after you harvest them so, if your pumpkin is green on one side, you can store it in the sunshine to aid in the ripening process. With that said, for pumpkins you plan to use immediately, definitely go for the classic orange ones. Another trick is to use your finger and tap on the pumpkin. If it feels heavy and full, it's not quite ready. On the flip side, if it seems hollow, it's a good indication that you'll have success with it.
2. Use a bowl of water to easily separate seeds and pulp
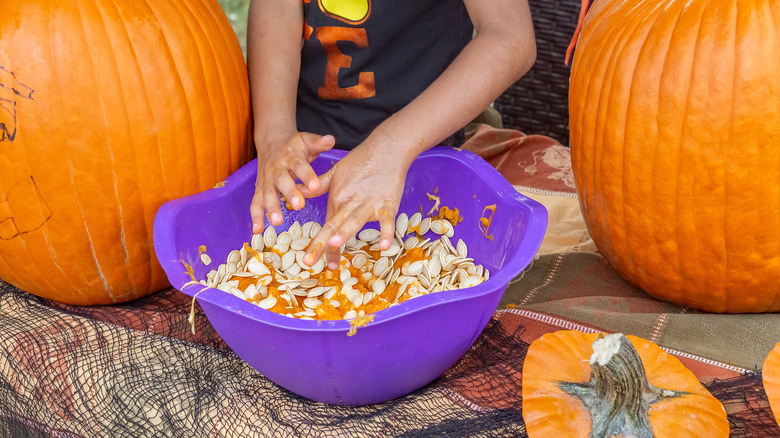
Instead of spending time rummaging through piles of seeds with pumpkin guts, there's a much easier way to separate the two. Let's face it: It's extremely time-consuming to pick off the pulp with your fingers. Instead, you can put everything into a bowl and fill it with water for a hassle-free process. This clever idea was posted in a TikTok video which showcased just how easy it is with the water trick. To try this yourself, leave some room when you fill the bowl so that the water doesn't spill over when you mix everything. Once it's full, use your hands to loosen the fibers from the seeds before picking them out.
Conveniently, the seeds float to the top so you can grab them without too much trouble. On the side, get a mesh strainer and place it over another bowl to drain any excess water off the floating seeds as you grab them. If your bowls or strainers are small, you might have to work in multiple batches, depending on how many seeds you have. With this neat trick, you can spend more of your time on the important things, like seasoning and baking the seeds to perfection.
3. Make sure to clean them
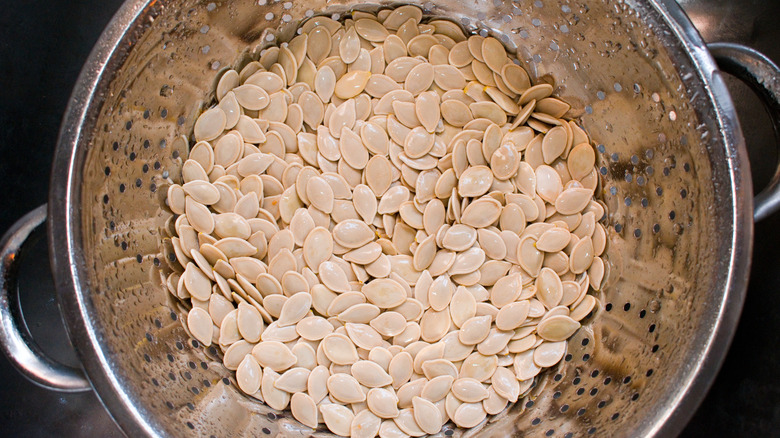
Although it doesn't necessarily hurt when you leave some pumpkin pulp on the seeds, they look more polished and appetizing when you clean them first. It also allows a clean slate for the fat and seasonings to stick. Whether you use the water bowl trick or not, putting them under running water until they look nice and shiny is still a good idea. The pressure from the water releases any pesky stringy bits that are still attached.
When you do this step, use a fine strainer because some strainers designed for pasta or other food have large slits which the seeds can easily fall through. Run your fingers through the seeds as the water hits them so that any near the bottom can have direct contact with the liquid too. Once you feel you've done a sufficient job, give the colander a few shakes to toss everything and drain any excess water. It's important to note that even after you do this, they might still have residue that feels slimy — this is perfectly okay, and it doesn't mean they aren't clean.
4. Soak them in salt water
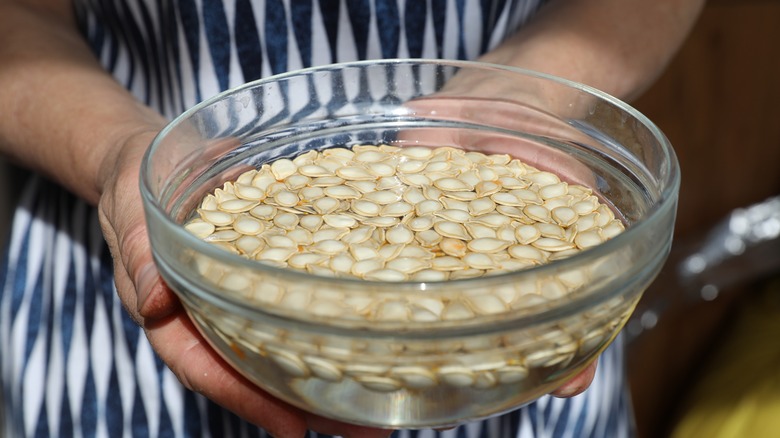
It's helpful to soak raw pumpkin seeds in salt water for more than one reason. First, when they sit in water for a while, they soften, which makes them easier to digest by making it less work for your body to break them down. Pumpkin seeds contain a lot of fiber that isn't digestible, and can cause some people discomfort if you simply roast them without any other preparation.
Secondly, the salt in the water thoroughly seasons them — but don't worry, the seeds won't turn overly salty. It's more of a subtle effect that enhances the overall taste. Moreover, this method makes the roasted seeds extra snappy because the salt extracts some natural moisture before you cook them. It's essentially the same concept as when you soak potatoes in salt water to make crispier french fries. Use ½ tablespoon to 1 tablespoon of salt for every 1 cup of water for ideal results. The best time to do this is before bed, giving them the entire night to soak so the brine can really penetrate into the shell.
5. Try the pre-boiling method
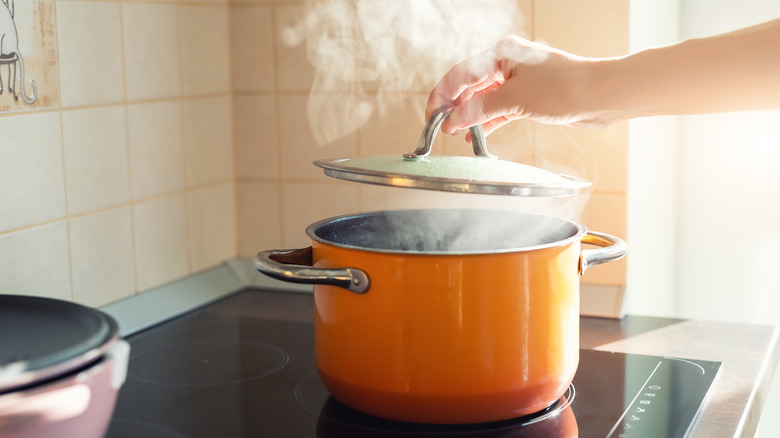
If it's your first time roasting pumpkin seeds, boiling them beforehand might be new to you. Fortunately, it's not only quick but easy, too. Even so, if you're in a rush, you can forgo this step, but it does improve the overall texture of the final product when you make it a priority. Essentially, this process helps to cook the seeds internally, meaning the final product is crisp both inside and out. Sometimes, the oven only cooks them on the outside, which makes the seeds chewy and tough.
To try this out, fill a pot of water at least halfway full and get it boiling. Then, gently pour the seeds in. Let them cook for roughly 10 minutes before you drain them. One thing to be aware of is that this slightly extends the cooking time when roasting seeds. Soaking and boiling the seeds both achieve similar results, so you can choose one or the other. If you go with the boiling route, you can always add some salt to the water. Give or take, add ½ tablespoon of salt for every 1 cup of water in the pot. Be cautious since this can make them overly salty if you don't measure the salt and use too much.
6. Dry them before roasting

If you go straight from soaking or boiling the seeds to roasting them in an oven, you won't get the best results. The seeds should be dried first for maximum crunch and a quicker cooking time. An easy way to do this is to simply plan ahead. One option is to clean and soak them in the morning, then let them sit for a few hours to dry before you return to finish them in the evening. You can also dry them overnight and then bake them the following day.
Either way, allowing them to naturally air-dry takes little effort because you can simply put them on a baking sheet and let them sit on your counter (of course, make sure they're not in an area where other food can come in contact with them). On the other hand, if you don't have that much time on your hands, simply transfer them to a linen. Spread them out in a single layer and use the cloth to dry them. Avoid using paper towels — it just ends up messy since the seeds tend to stick.
7. Toss them in fat and seasonings
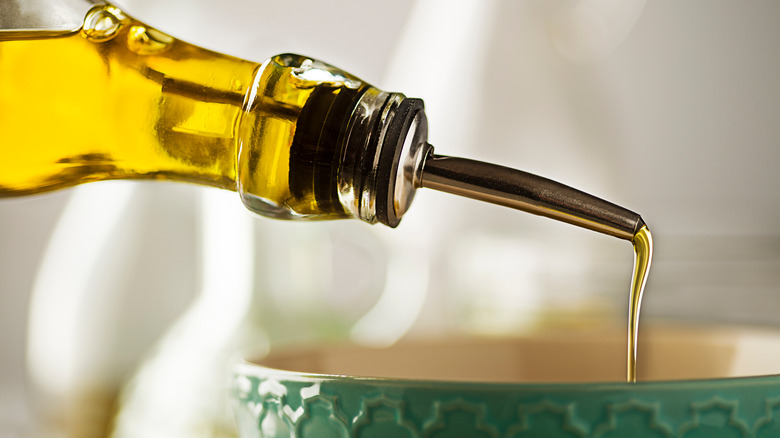
When you season the seeds, coat them with some type of fat first, which helps the spices stick. For example, some popular options are melted butter, vegetable, canola, or olive oil. You can also use clarified butter or ghee that has a higher smoke point compared to regular butter. Another option is to use coconut oil — the refined stuff is a better choice because it withstands higher temperatures and has a milder flavor than unrefined.
After you thoroughly coat the seeds with fat, you can then toss them in spices or herbs of your choosing. Although some recipes tell you to simply sprinkle the seasonings atop the seeds once they're already on the baking sheet, that method isn't as effective, leaving heavy spots of seasoning on some seeds, while others might not have much at all. In other words, if you toss them, you evenly coat them so they have the perfect level of flavor in every bite.
8. Use a moderate to high temperature

Some people might think that if they bake the pumpkin seeds low and slow, it helps to dry them out, but that's not necessarily true. If you use too low a temperature, it gives the seeds a poor texture, making them difficult to chew. Definitely avoid cooking them between 150 to 275 degrees Fahrenheit. This will create dehydrated seeds, which are something entirely different and require several hours in the oven to reach the correct texture.
While there's no magic number for roasting, the best temperature range to use is between 350 and 400 degrees Fahrenheit. Any higher than that, and they'll burn (or the seasonings and oil burn while the seeds stay undercooked, which is just as bad). Of course, every oven is different, and you should have an oven thermometer to ensure the appliance reaches the correct temperature you need. Lastly, when you cook them, consider what type of oven you're using. Convection ovens circulate the air, which can make them hotter than conventional ovens, even if you set them to the same temperature.
9. Experiment with flavors
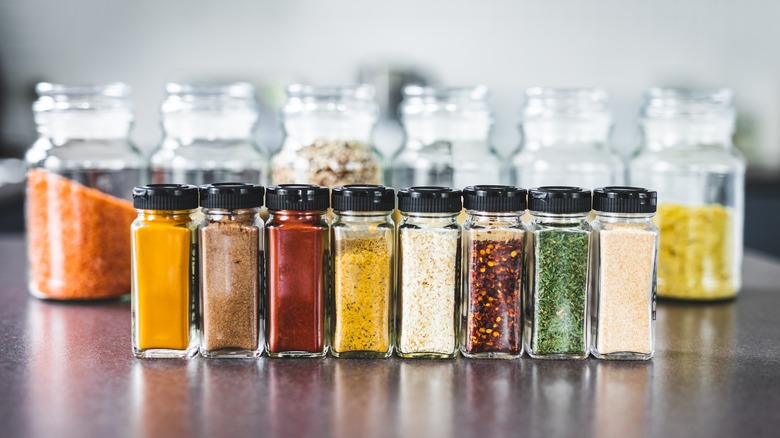
Pumpkin seeds have nutty and earthy undertones. Luckily, their flavor is quite mild compared to other types of seeds, so it doesn't limit how you can season them. This is good news since both sweet and savory ingredients pair very nicely with them. For instance, you can make maple cinnamon pumpkin seeds cooked with a mixture of melted butter, pure maple syrup, cinnamon, and other baking spices to create a warm and comforting flavor for fall.
Some people might stick to the pumpkin theme and make pumpkin spice-flavored seeds by using a premade seasoning mix or making their own blend to coat the seeds. Additionally, you can experiment with spicy or tangy flavors. Use Cajun seasoning with olive oil for a simple yet spicy snack. Also, did you know that vinegar powder is a thing? You can use it to make salt and vinegar-flavored pumpkin seeds reminiscent of the classic potato chip flavor. If you don't have the fancy powder, no worries. Simply use regular white vinegar and soak the seeds for an hour before you drain and toss them with fat and sea salt.
10. Be cautious when cooking them
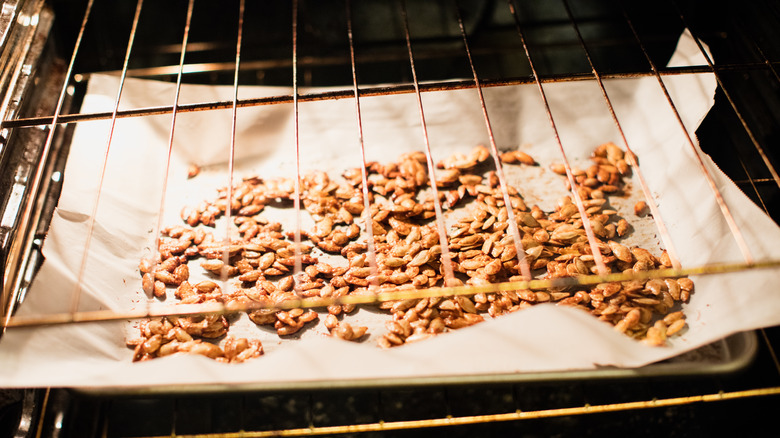
It's not necessarily rocket science to roast pumpkin seeds, but there are still some tips to follow and mistakes to avoid. For instance, depending on how you season them, the seeds might stick if you cook them straight on the pan or with foil. A better option is to line the baking sheet with parchment paper or a nonstick material like a silicone baking mat. Spread the seeds onto the tray so that they're in a single layer with some space in between. If you have many seeds, working in batches is much better than piling them all on one tray and ending up with some burnt and some undercooked.
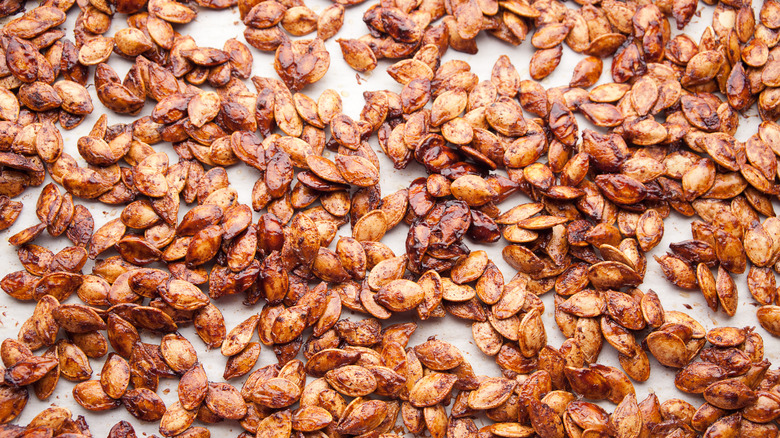
Also, when you bake them, occasionally remove them from the oven and give them a stir to guarantee they cook evenly all over. This is especially helpful if your oven has hot spots and one side of the tray's contents cooks faster than the other. Lastly, keep an eye on them towards the end of the cooking time just in case they're done early. Be careful, because if you cook them too long, they'll have a bitter taste. They just need to turn lightly golden, and you can remove them from the oven; don't wait until their edges are dark brown.
11. Use the roast setting on an air fryer
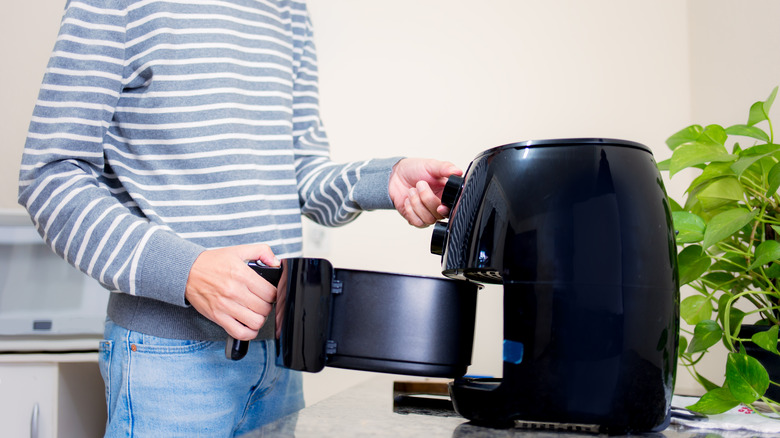
Some air fryer models have different cooking modes that allow them to do more than just frying. For instance, your air fryer might have roasting, dehydrating, baking, or broiling options, depending on the model you have. Take a look at your specific appliance, and if it has a roast function, use it to make perfect roasted pumpkin seeds. Simply prepare the seeds like normal, then put them in the air fryer basket. As you probably know, these machines sometimes cook faster than a standard oven, so the seeds might not take nearly as long before you can eat them.
Find a recipe designed specifically for making seeds in the air fryer to get a general idea of how long to cook them. Make sure to check them periodically, shaking the basket between cooking increments to promote even roasting. Lastly, don't fret if you have an air fryer but can't find a roast function. Read the user's manual for tips on replicating roasting in your machine to ensure beautifully cooked seeds. For some appliances, it's as simple as adjusting the temperature.
12. Allow them to rest after cooking
When you remove the tasty pumpkin seeds from the oven, it's hard to resist eating them immediately. Like baked treats, they taste incredible when warm, but they're best when you allow them time to rest on the baking sheet. Although you can start snacking at any point, you'll be happy if you wait it out. This is because, after roasting, excess moisture still needs time to evaporate.
Giving them ample time for resting guarantees that the seeds have a much snappier bite to them rather than having a leathery mouthfeel. Most importantly, don't put them in an enclosed environment too soon because it will do the opposite of what you want. Any moisture attempting to escape becomes trapped, which results in the pumpkin seeds turning soggy. Then, all your hard work with preparation and cooking will instantly go down the drain, which would be disappointing.
13. Store them correctly for the best quality
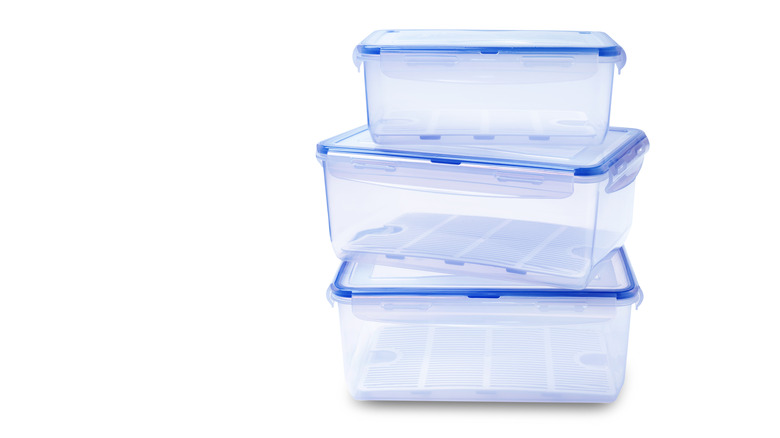
If you leave the roasted seeds uncovered for days at a time, they'll end up with a stale consistency. It's okay to leave them on a tray when drying them, but after that, you need something to store them in. Ensure the container has a tight-fitting lid or, at the very minimum, use a fitting layer of plastic wrap or foil to seal it. You can also store your seeds in a freezer bag if needed.
Don't worry about refrigerating them. They're perfectly safe to store at room temperature but must not be left in a moist environment, in direct sunlight, or near any heat sources (yes, that includes storing them near the oven). Keep them in a cool, dark place like the pantry. Otherwise, there's a chance they'll go rancid quickly. Luckily, it's quite easy to spot signs of rancidity, such as an off odor or discoloration. If you store them correctly, they'll last about two weeks and remain fairly crisp. Once they approach the end of their shelf life, examine their appearance and smell before you eat them, just to be certain.