15 Stove Cleaning Hacks You're Going To Love
Your stove is one of the most crucial appliances in your kitchen, and without it, it's pretty difficult to make food properly. But it's also a particularly high-traffic area, and with that comes a lot of potential for mess — and for illness.
"Stoves tend to be somewhat neglected. Splatters or spills of food that aren't promptly cleaned up can become a good medium for the growth of microbes," says professor of microbiology and pathology Philip Tierno Jr. to NBC News. The most common kitchen bacteria, like E. coli, salmonella, and norovirus, all have the potential to make residence on your stovetop. And remember, it's not just food waste that can cause bacterial growth: Unwashed hands fiddling with stove knobs can do that, too.
Dirty stoves can also present fire safety issues, with dirty cooking areas being more likely to create a hazard or produce excess smoke. And if you let your stove get too dirty, you run the risk of stopping it from working properly at all. But when cleaning your stove is such a chore, how do you make it easier on yourself? We'd recommend giving a few of our next-level hacks a spin.
1. Use your vacuum for a quick clean
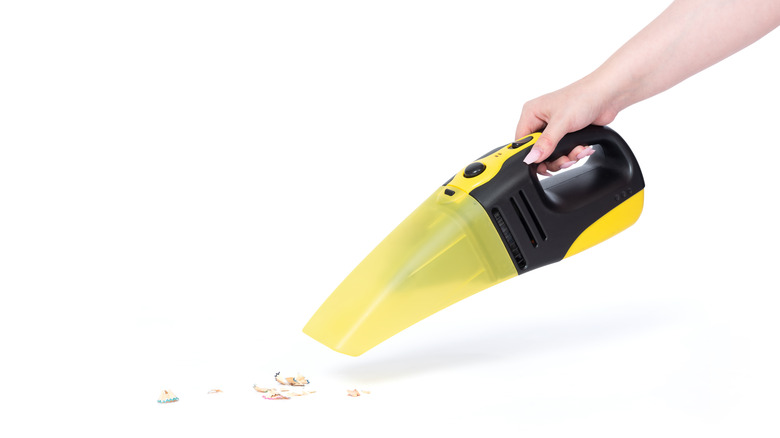
Stovetops are especially prone to collecting small flecks of food and grime, which then work their way under your burner rings or into corners. Trying to wipe these flecks up can be pretty annoying: They either get knocked further into the machine, making them unreachable, or just get pushed around instead of picked up by the cloth.
While you can dismantle your entire stovetop and do a deep clean to get rid of them, a vacuum cleaner might do the trick. The vacuum's suction power will be able to pick up tiny pieces of unreachable dirt that, over time, can start to diminish the ability of your stove. While handheld vacuums might have better maneuverability, you can use a regular vacuum with a stick attachment very easily.
Make sure you remove your grates before vacuuming your stovetop so that they don't get in the way. It's also recommended that if you are using a stick attachment, you use one with a brush on the end so that you don't unintentionally scrape or chip the surface. You can also use your vacuum to get into any gaps in the stove, like around its knobs, in any hinges, or in any grates.
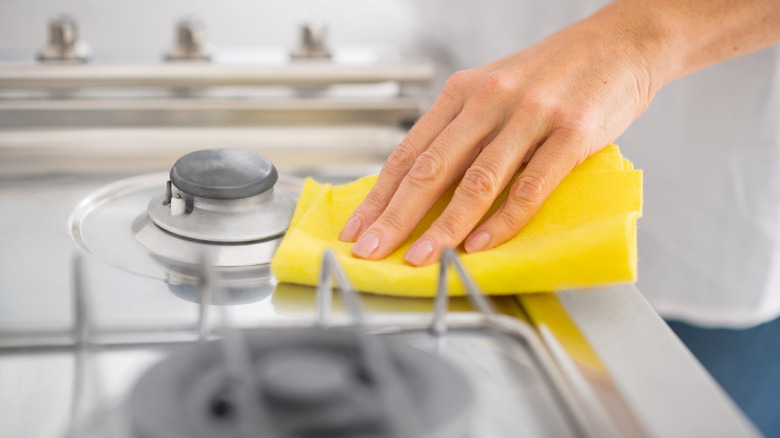
2. Lay a towel over your stove to loosen dirt
Stubborn dirt on your stove can be a nightmare to remove, and too much elbow grease can be counterproductive. If you scrub too hard, especially with an abrasive cloth, you risk scratching the stove's body or one of its burner heads, which might result in you having to replace it sooner than you thought. Sometimes, though, leaving your stovetop to soak in a cleaning solution doesn't do the trick either. So what do you do?
All you need is a towel. Apply baking soda to any baked-in grime on your stovetop, and then cover it with a hot, wet, soapy towel. Then, leave it for around 30 minutes. The heat and moistness of the towel will create, in essence, a steam bath for the baking soda, which will help it to activate more effectively and loosen the dirt. The soap, meanwhile, will provide even more cleaning power.
Once the baking soda has had a chance to permeate the grime, lift the towel up, and use it to wipe it all away. As baking soda has a mild abrasive effect, any leftover dirt should be gently scrubbed away — but with any luck, the steaming action has done the trick. Finish everything off with a wipe with a dry cloth to avoid leaving any water or soap marks.
3. For your grates, grab some ammonia and a bag
Stove grates can be surprisingly tough to clean. Not only are they awkwardly shaped and hard to move around, but they also commonly have food burnt onto them, which is then difficult to shift. If your grates have got to the point where they need a full clean, some ammonia should do the trick with a hands-free hack. Place each of your grates in a large, thick plastic bag, and pour a ¼ cup of ammonia into each one. Tie them securely, ensuring there are no gaps in the bag for fumes to escape, and then leave them outside overnight.
As it's a corrosive substance, the ammonia and its fumes will cut through any grease, fat, or grime that's attached itself to your grates. Once you remove the grates from each bag, the dirt should be easy to shift with a quick wipe. It's crucial to remember the strength of ammonia while you're doing this and the risk of inhaling the fumes, which can cause burns to your airway, according to the CDC. Skin contact with ammonia can also cause burning and irritation, even in minor quantities. It's highly advisable that you wear thick rubber gloves and a face mask while working with your ammonia-covered grates and rinse them thoroughly after they've been soaked.
4. Use your dishwasher for certain items
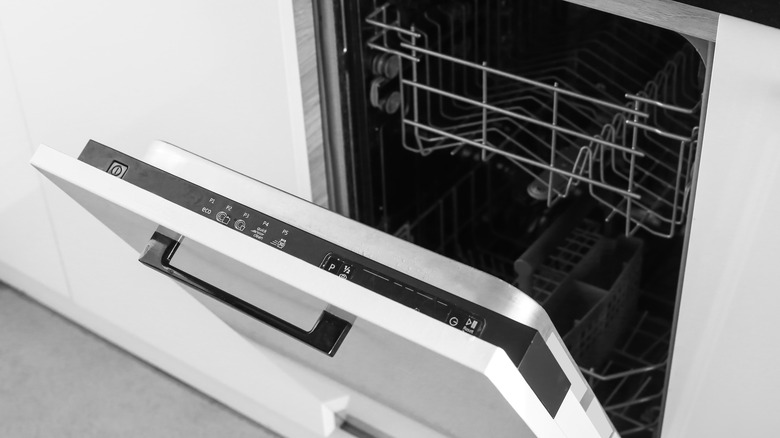
If you're only using your dishwasher for dishes, you've been missing out. This handy appliance makes cleaning parts of your stove a breeze, with minimal effort required from yourself. Stove knobs are a useful item to run through your dishwasher, as they're frequently abundant in corners and edges that can be hard to clean properly. Just pop them off your stove, place them in the glass rack, and wash them alongside your plates, before leaving them to air dry.
The metal parts of your stove may be able to go through your dishwasher too — but crucially, not all types can. Burners made of brass are safe to go through the dishwasher, as it doesn't rust, although you may not wish to risk it due to the metal's ability to tarnish. If your burner heads or any other part of your stove is made of cast iron or aluminum, however, you should leave them out. Cast iron pieces are highly prone to rusting, and aluminum can be heavily affected by the chemicals in your dishwasher detergent, discoloring it and making it unsightly. If you have any doubts about what material your stove's parts are, check your manufacturer's instructions.
5. Baking soda and vinegar are your best friends
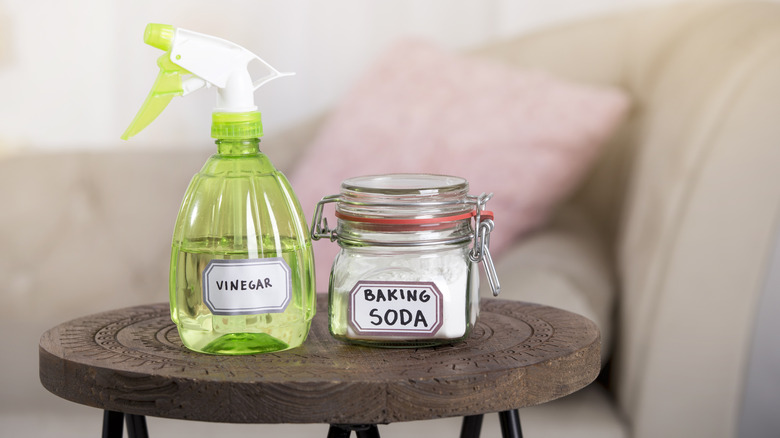
Sometimes, the best hacks are the easiest. And this one involves nothing more than skipping the cleaner section in your store and grabbing a pair of cleaners that are not only environmentally friendly and affordable but powerful. A combination of baking soda and vinegar is arguably the best cleaning solution for heavily-grimy stoves, and both metal and glass stovetops can be cleaned with these two items. Simply spray your stovetop with some distilled white vinegar from a spray bottle, and sprinkle baking soda over the stubborn stains. Leave it to work its magic. If you want to make things even more powerful, cover it with a damp cloth for 15-20 minutes, and then wipe it all away, taking the stains with you.
"When you are cleaning using baking soda or vinegar, you are actually doing very complicated manipulations of molecules," explains professor May Nyman, per Live Science. Both substances live at opposing ends of the pH scale and work together to complement each other's strengths. While baking soda, which is alkaline, takes care of grease and dirt, vinegar, which is acidic, dissolves minerals. Baking soda also provides an important, slightly rough texture, which helps to shift things even further.
6. A razor might work wonders — but be careful

Sometimes, there are pieces of dirt that no amount of wiping can lift. And if you've tried every cleaner under the sun, it might be time to use slightly more force. A razor blade can be a useful tool to work under harder-to-lift dirt and physically remove or scrape them away. These blades' super-thin edge is well-suited to gently dislodging grime from underneath without leaving any lasting marks. Simply slide it carefully under any dirt, gradually chipping away at it until the stove is clean.
However, it's highly important to be very careful when using this tool. Razor blades are, after all, incredibly sharp, and if you slip, you can end up cutting or chipping your stovetop. This is more likely to happen if your stove doesn't have a smooth surface, but it can also happen with glass stovetops. Remember that a chipped glass stovetop can be highly dangerous to use and increase the likelihood of electrocution. There's also, of course, the very real risk of causing yourself harm with a razor blade. Make sure to always read the manufacturer's instructions before using a razor blade on your appliance, and practice proper safety precautions when using one, always pausing if you're unsure about whether to proceed.
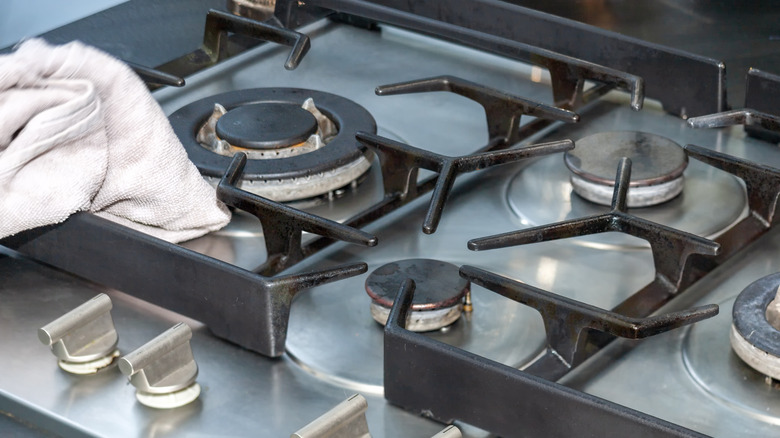
7. Soak your burner heads to save time
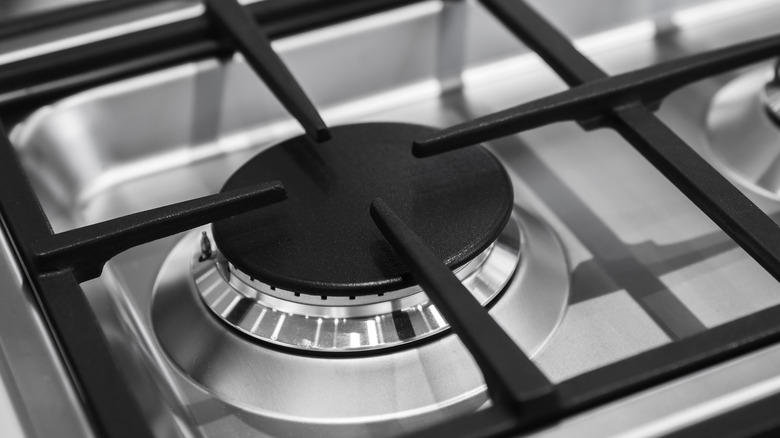
Burner heads are one of the areas of the stove that get the dirtiest and also one of the most annoying to clean. Their cumbersome round shape can make giving them a deep clean challenging, and trying to get into every rivet and corner can take forever — and can leave you bashing them about on your stove.
But in truth, a quick soak is all they need. Disassemble your burner heads, taking all the attachments off and separating them. Then, place them in a solution of hot water and dish soap, and leave them to soak for 20-30 minutes. As they soak, the grime will start to soften and come off, including any grime that's worked its way into any hard-to-reach places.
Once they've soaked, take them out, and rinse them. With any luck, any dirt that was previously on there should come right off under a powerful-enough jet of water. If they don't shift, try using a cloth or stiff-bristled brush. Once the burner heads are fully clean, allow them to air-dry completely, ideally overnight, before you reattach them to your stove.
8. To get in the nooks and crannies, use a paper clip

Both gas and electric stovetops are riddled with nooks and crannies that can make cleaning them challenging. With gas stoves, these nooks and crannies are often important to keep clean on a purely functional basis: If the small holes in your burner heads aren't clear, for example, your stove simply won't run. Electric and glass stovetops also face these small areas being clogged up by dirt, most notably in between knobs and buttons, which can be unsightly.
But don't rush out and get expensive cleaning tools you don't need when what you truly require is in the stationery drawer. A paper clip is perfect for dislodging any pieces of dirt that you otherwise can't get to with a cloth. Just unbend it, and poke the metal into any holes or gaps, gently scraping away any grime while being very careful not to scratch any paintwork or glass. With burner heads, it's best to remove them before you do this, as you may end up pushing the dirt further into the appliance. And if you're using the paper clip to get between knobs or gaps that you can't get to the other side of, it might be useful to bend the edge of it slightly and create a hook shape to draw the dirt towards you.
9. Oven cleaner and plastic wrap will shift burnt-on stains

While regular cleaning is the best way to keep a stove spick and span, there are some situations where grime is allowed to build up pretty significantly. And if you find yourself in a scenario where your stove needs a full makeover, oven cleaner and plastic wrap will help. Remove any detachable parts from your stovetop, and then spray the whole thing generously with oven cleaner. Cover the whole stove with plastic wrap, and leave it for 24 hours. During this time, the oven cleaner will work its way through even the densest grime. Remove the plastic wrap, and wipe everything away, before cleaning it with a soapy cloth.
It's worth bearing in mind that this cleaning hack is pretty heavy-duty, and will stop your stove from being usable for a pretty long time. This hack is also better for close-top stoves made of glass, as getting any of the spray down any pipes or in grates could create issues. Crucially, the oven cleaner you use is also very important. Caustic oven cleaners, like those containing sodium hydroxide and butoxydiglycol, can not only be highly irritating to the skin but can also release hazardous fumes. You should always read the label of the product you're using, and it's very wise to avoid using any oven cleaners that have harmful chemicals in them. If that's your only option, ensure that your kitchen is well-ventilated, and avoid any physical contact with the chemical.
10. An old toothbrush will do the trick

The stiff bristles of a toothbrush make it a perfect tool for shifting surprisingly stubborn pieces of dirt and grime, and the long-necked design of them makes them ideal for accessing hard-to-reach locations. That's why they're an excellent tool for cleaning a stove, which is an appliance that's frequently made up of weird angles and awkwardly-shaped pieces.
Toothbrushes are especially good for cleaning around burner heads and in the corners of your grates. They're also great for cleaning around your knobs and buttons, particularly if they're not easily removable. Make sure you apply your cleaning solution directly to the tip of your toothbrush, as this will help you control the amount you're using. Just be wary of flicking too much grime or dirt around as you're cleaning, especially into your appliance itself, as this can prove troublesome to remove. If you want to keep things eco-friendly, try using a bamboo toothbrush. Just use a pair of tweezers to pull out the bristles, and then place the biodegradable handle into your recycling or directly into a compost bin.
11. If you're short on cleaning liquids, use Tide
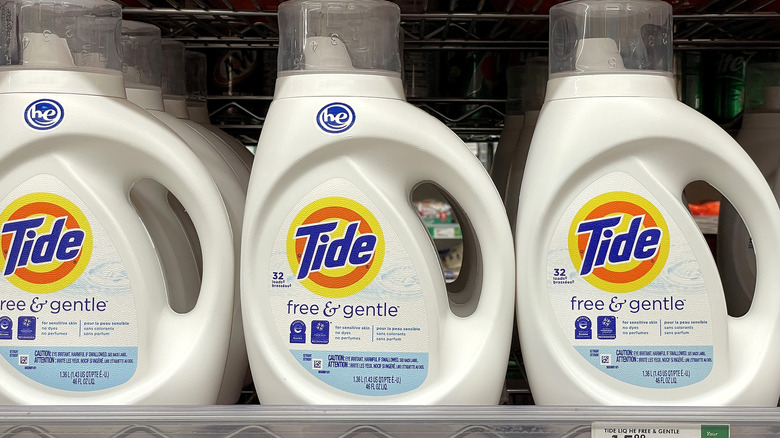
You should never let a lack of specific stove-cleaning products get in the way of a clean cooking area. In a pinch, using Tide, or any other powdered laundry detergent, works just as well. These products are packed full of cleaning enzymes, which make them so effective at getting stains out of clothes — and which also makes them perfect for cutting through the dirt on your stove.
Powdered laundry detergent also has the advantage of being mildly abrasive, like baking soda. This gives it added cleaning power, as it works to scrub away dirt if you're using it in higher quantities. For a simple clean, though, you really won't need that much Tide at all. Just dissolve a small amount of it in a tub of hot water and then wet a cloth with the solution before using it to wipe down your stove. If you have grime that's hard to shift, you can sprinkle a little bit directly onto the stain itself before spraying it with hot water and then wiping it away. You can also mix a bit of detergent with water and a small amount of bleach in a spray bottle before dousing your stove with it. Just be wary not to breathe in any fumes.
12. Sometimes, all you need is a microfiber cloth
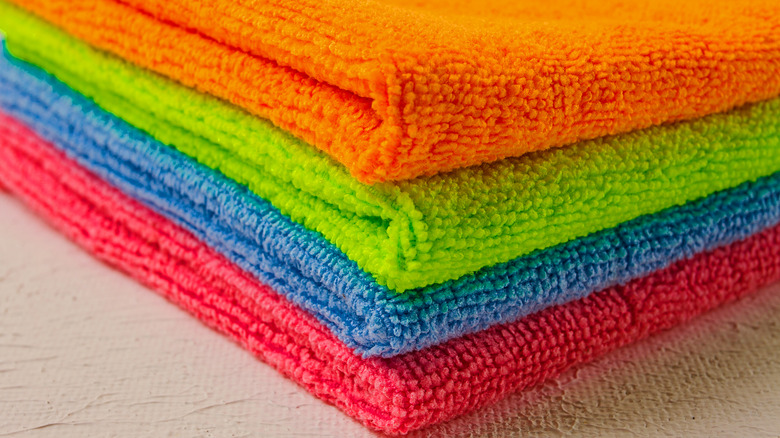
One of our favorite hacks doesn't involve adding things but taking things away. And if you're using heavy cleaning solutions every time you tackle your stove, we recommend just grabbing a microfiber cloth instead. Microfiber cloths are designed to maximize their cleaning power via the creation of an astonishing amount of tiny fibers, which increase their surface area considerably. The bigger surface area gives them more power to pick up dirt and dust instead of just pushing it around.
Microfiber cloths are so powerful at cleaning that for light food splashes, and you may only need a spray bottle full of water and a cloth to remove grime effectively. For added cleaning power, make a solution of white vinegar and water, and use a microfiber cloth to wipe everything away. Microfiber cloths are especially useful for enamel stovetops, which can be prone to be ruined by heavy-duty caustic cleaning liquids which cause corrosion. Stainless steel stovetops, too, are best served by a microfiber cloth and need nothing more than a vinegar-water solution, as they can be damaged by more hardcore cleaners containing bleach or chlorine.
13. To clean your range hood filters, use a dishwasher tablet

Range hoods are an essential part of your stove setup, working to wick away any smoke or food scents that can clog up your kitchen. But just because they're not on the front line of food prep doesn't mean it can't get dirty. Range hood filters pick up grease fast from the steam escaping from your food, and if they get too clogged up, they'll stop performing their key function.
But cleaning a range hood filter can be refreshingly hands-off with this hack. Pour some hot water into a tub large enough for your filter to fit in, and pop it inside. Then, add a dishwasher tablet, give the whole thing a stir, and wait for 30 minutes. The dishwasher tablet will go to work thanks to the surfactants inside it, which essentially work to change the structure and behavior of water to make it more capable of loosening dirt and grease. Here, though, instead of the water being sprayed around as it would in your dishwasher, the surfactants are concentrated solely on your filter, amplifying their cleaning power. Once the time is up, take it out, give it a rinse, and leave it to air dry before inserting it back into your range hood.
14. If the side of your stove is dirty, grab a toothpick and a paper towel

If you have an embedded electric or induction stovetop, it can be a real space-saver — and a real challenge to clean. The top of the stove itself is generally pretty simple, thanks to its flat surface being easy to wipe after each use. But the side of the stove can create challenges. Grunge can quickly build up in the area between the glass top and your counter, and this can be made worse when you're cleaning around it and accidentally pushing dirt further in.
However, all you need to give it a deep clean is a toothpick and some paper towels. Squirt cleaning solution down the side of your stovetop, giving it a minute or two to start to work its magic. While it's doing that, wrap a toothpick in a paper towel so that the end is still pointy but not sharp. This will not only help you pick up the dirt but will stop the toothpick's point from causing any damage or wearing away at any grouting or glue used. Run the wrapped toothpick down the side of the join, repeating if necessary until it looks brand-new. This trick isn't only for glass stovetops, either — any stove that's been embedded into your counter will benefit.
15. For a glass stovetop, slice a lemon in half
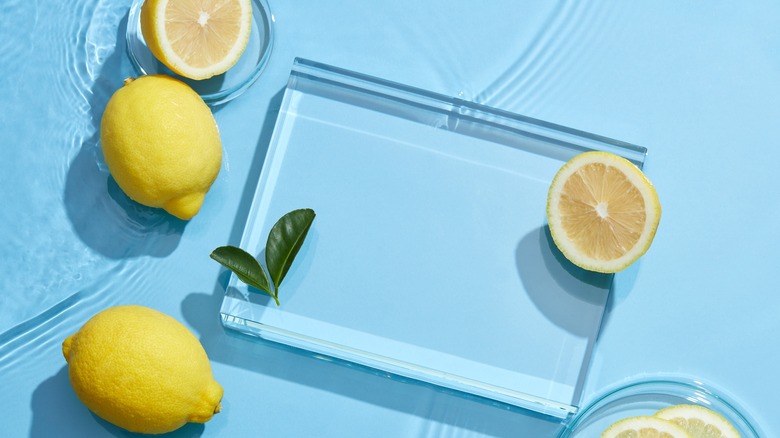
Take a lemon, and cut it down the middle, so you have a round, flat surface to work with. Then, dip it in baking soda, and rub it over your stovetop, squeezing the lemon as you do so. You'll notice that the acidic lemon juice starts to react with the alkaline baking soda, making a powerful natural cleaner that foams up like soap. The gently rough texture of the baking soda will help to shift more persistent spots of dirt and grime.
This hack is useful as it's pretty much as low-fuss as they come. The lemon works as your cloth, so you don't have to worry about finding a clean one or potentially scratching your stovetop with a more abrasive scourer. The lemon juice also operates as a natural deodorizer, giving your kitchen a fresh and pleasant scent. Once your stovetop is clean, wipe it with a damp paper towel to remove any residue.