The Loaf Pan Hack For Serving Homemade Ice Cream To A Crowd
Frozen desserts were made for summer; they're guaranteed to taste delicious while helping you cool down and feel relaxed and refreshed. If you're looking to avoid the added sugar in store-bought desserts, making your own perfectly creamy popsicles from homemade ice cream is a great solution. Not only are homemade popsicles easy to whip up, but you can also control what goes into them, and you don't even need fancy tools to do it. In fact, you can make ice cream pops from the comfort of your kitchen using an average loaf pan.
Loaf pan popsicles are ideal if you don't have a popsicle mold yet or just don't want to buy one and add more clutter to your kitchen cabinets. For this hack, all you need is a standard-sized loaf pan, anywhere from six to a dozen popsicle sticks, plastic wrap, aluminum foil, and your favorite homemade ice cream (or yogurt- or plant-based) homemade popsicle recipe. Simply blend, freeze, and then enjoy with family and friends. Loaf pan popsicles are wonderful for sharing because you can make more by simply adding more popsicle sticks. Then, once frozen, just cut them into the shape and size you need to accommodate everyone.
How to make creamy loaf pan popsicles
The first step of this hack is to make the ice cream mixture. Feel free to use any of your favorite ice cream recipes, from mint chip to peanut butter swirl. Then use the method of your choosing — even if you're making ice cream without a machine.
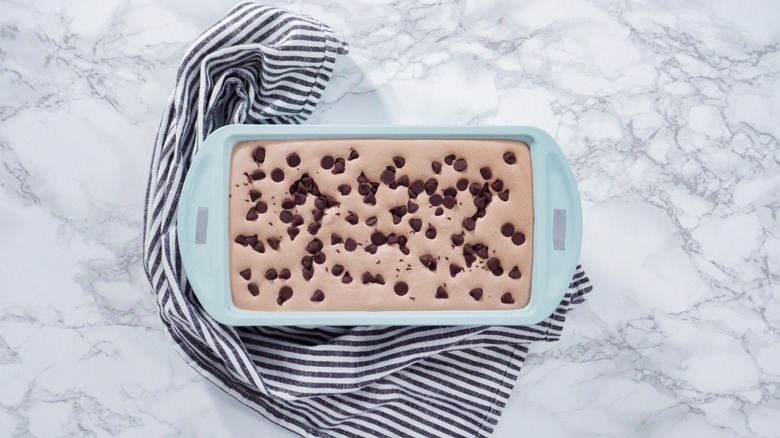
Line your loaf pan with plastic wrap to make removal easier, then pour the mixture directly into the pan and smooth the top out with a spatula. Next, cover the pan with aluminum foil and poke the popsicle sticks through and into the mixture. Make sure to spread the popsicle sticks out evenly (at least 1 inch apart). Next, pop the pan in the freezer for about eight hours or overnight. When ready, take the pan out of the freezer and run it under warm water to help the mixture unstick. Then remove the popsicle block and place it on a cutting board. With a knife, evenly cut through the frozen solid block to separate it into individual popsicles, and enjoy!
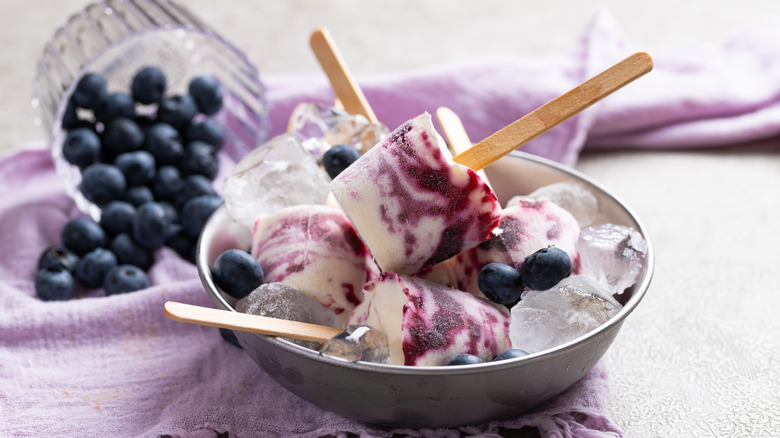
For yogurt-based popsicles, which aren't just easy and healthy, but also relatively soft to cut after freezing, use around 2 cups of yogurt and a couple of tablespoons of a fruit juice of your choice. For example, orange juice and vanilla yogurt make a kind of creamsicle. To prepare the yogurt popsicle mix, add the yogurt and fruit juice to the blender and blend until frothy before adding to your loaf pan.
Getting creative with loaf pan popsicles
The best thing about homemade popsicles is that you can really make them your own. If you're a chocolate lover, try using the loaf pan hack for homemade fudgesicles, which always taste creamier and richer than the store-bought versions.
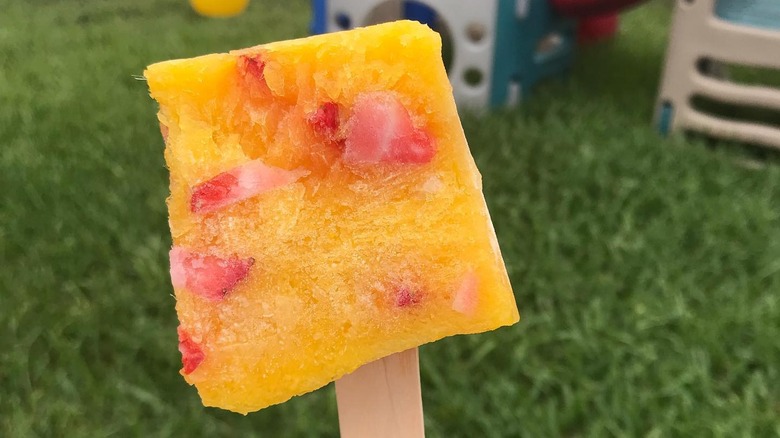
With vanilla or fruit yogurt as a base, you can experiment with adding new juices and flavors. Pineapple juice is always a great choice, as are mango and sour cherry. You can also add bits of fresh fruit like strawberries or blueberries or mix in your favorite fruit or wildflower jam. For a vegan version, try using almond milk and non-dairy vanilla ice cream. You can even make paleo fudgesicles using cocoa powder, gelatin, dates, and coconut milk.
Only have milk on hand? Not to worry. Give ice milk a try. It won't have the same richness as ice cream, but there's no question that an ice-cold milksicle will cool you down on a scorcher.