15 Mistakes To Avoid When Canning Food At Home
Preserving foods by salting, curing, fermenting, and smoking has a long history; home canning, in comparison, is a relatively new form of preserving foods. In the early 20th century, home canning had gained popularity, and the USDA was offering home canning recipes and advice for home chefs. Home canning was considered the norm as a great way to make the most of the garden harvest and save money. Due to the popularity of home canning, the National Center for Home Food Preservation was formed to further research home canning methods and keep safety measures up to date.
Throughout the years, home canning practices have evolved, and some techniques that were once considered safe have been updated to reflect the available research. So before you start digging through your grandmother's and great-grandmother's canning recipes, it's best to brush up on the science and safety of home canning. Home canning is a process, and there are a lot of ways to make mistakes, and those mistakes come with dangerous consequences like botulism and or food-borne illness. So if you are new to home canning or you need to brush up on the current practices, knowing these common mistakes to avoid when canning food at home will keep your family safe and your pantry safely stocked.
1. Not using recipes

Many home chefs don't follow recipes. Once you have been cooking regularly, you start to learn what foods go together and which spices to use for certain dishes making it easy to pull meals together. While creativity is a part of the cooking process, it is not part of the home canning process. Home canning recipes are evaluated and scientifically tested, retested, and eventually approved for the public. But trying to get creative and make your own recipes is a recipe for disaster when it comes to home canning.
Pressure canning has certain time restrictions to ensure that low-acid foods are properly preserved and safe to consume, And water bath canning and pickling rely on high acid levels and heat to keep those jars sealed and safe. Any changes to the amount of acid, like using more tomatoes in salsa or disrupting the vinegar ratio in pickling, can make foods unsafe for consumption. So save the creative cooking and recipe development for other dishes and always follow the home canning recipes to ensure not just quality but safety too.
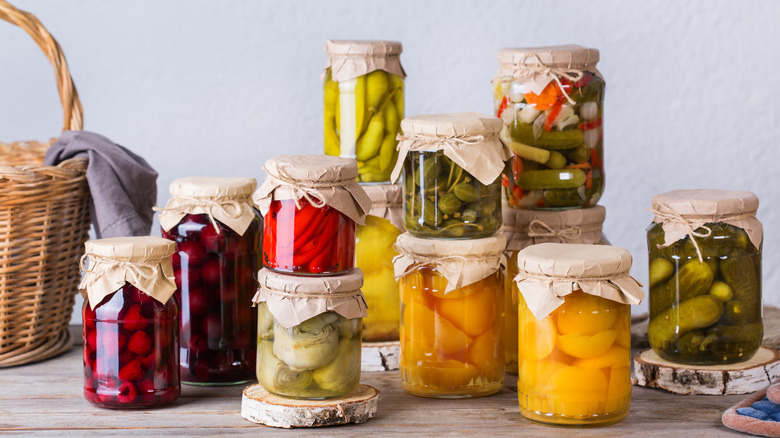
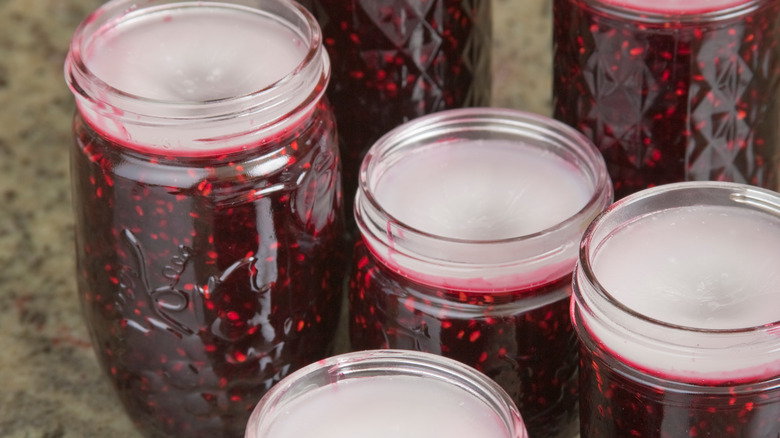
2. Not using the right jars

The first step to starting home canning is to have the right jars. The National Center for Home Food Preservation explains that home canners must use approved canning jars because they can withstand the heat and pressure from canning. Attempting to use recycled mayo or jelly jars is not going to work, So toss your old jars in the recycle bin or repurpose them into art projects, but under no circumstance should you use them for home canning food.
Canning jars come in regular mouth and wide mouth. Regular mouth jars are ideal for salsa, chutneys, jellies, and jams, while wide-mouth jars are better for whole fruits and vegetables because they offer more space. Another thing to consider when choosing canning jars is if you plan on storing your canned goods on the shelf or in the freezer. Freezer-safe jars have straight sides, while jars for pantry storage have shouldered sides.
Next, you need to consider the recipe you are using to make sure you have the right size jar for the volume of canning you plan on doing. If you are reusing canning jars, check before each canning session that the jars are not chipped or cracked. If you find a damaged jar, toss it in the recycle bin, as it isn't safe for home canning.
3. Reusing lids
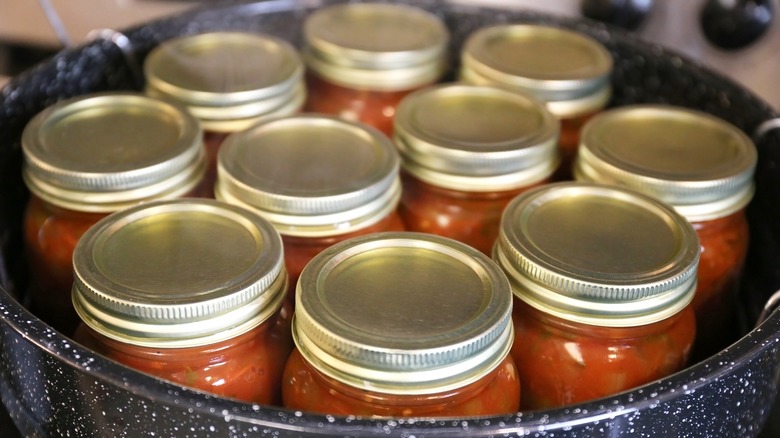
The lid of a canning jar is the flat part that seals and should never be reused. The CDC warns that if home canning jars aren't properly sealed, the food is at risk of contamination with bacteria. Unfortunately, a quick sniff test and a look inside the jar will not let you know if the food is contaminated as the bacteria doesn't have a smell or taste, so there is no way to determine if the food has bacteria. And the bacteria that causes botulism is much more serious than a slight tummy ache. It can be deadly, so it's not worth the risk. Instead, use those old lids on jars to store dry goods in the pantry. Or get creative and repurpose them into something new. Or you can simply recycle them.
The canning experts at North Dakota State University explain that new lids allow air to escape when heated, creating a strong seal. While the gaskets on old lids are not able to create the same air-tight seal ensuring the food is protected from bacteria. They go on to explain that new lids are good for five years from the time they were manufactured. So if you have a box of new lids that have been sitting in your pantry for a while, check the dates before using them.
4. Putting jars upside down to seal
Inversion canning is a type of canning, sometimes called open kettle canning, that is the process of filling jars with hot foods and then quickly sealing the jars with their lids and turning the jars upside down to make a tight seal. This type of home canning was recommended early in the first part of the 20th century but was later proven ineffective at creating a proper seal. The main problem with this canning style is that it's not even canning. Hot foods will cool in the time that a lid is placed on them, and the temperature is not consistent, meaning the foods are not hot for the time it takes to ensure safety.
According to the National Center for Home Food Preservation, the only safe home canning methods are pressure canning and water bath canning. They advise against dry canning and open kettle or inversion canning. However, they have updated their advice on steam canning, admitting it could work with some foods, but the research is still being done, and while it may be a viable option in the future, there hasn't been enough research yet.
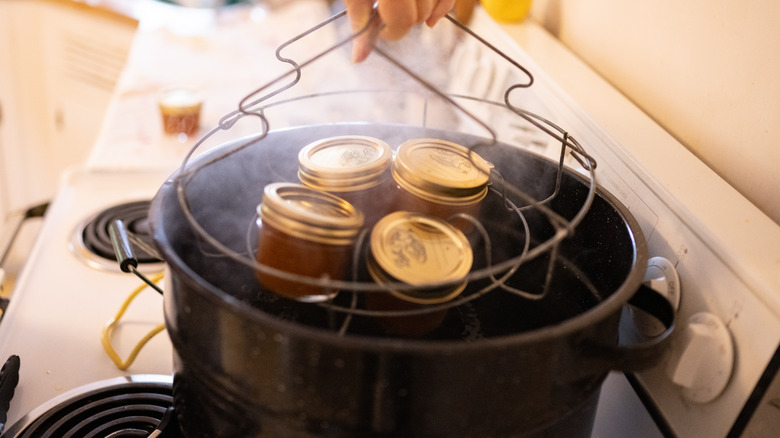
5. Not understanding water bath and pressure canning

Experts approve two types of home canning methods for safe home canning: water bath and pressure canning. High-acid foods like tomatoes and pickled vegetables are safe for water bath canning. Likewise, fruit jellies, jams, and pie filling are also safe with simple water bath canning. The acid from the food or picking salt and vinegar provides enough acid to make water bath canning possible. Once the jars are filled and sealed, they are placed in a hot water bath for a certain amount of time and removed, creating a safe seal. Low-acid foods like non-pickled vegetables and meats need to be pressure canned. Pressure canning ensures they are properly processed and safe to consume.
If you are new to home canning, then water bath canning is a good place to start. You can use a deep pot with a lid instead of buying a canning pot as long as it's deep enough to cover your jars with two inches of water, but you will need to invest in a rack so the jars aren't sitting on the pan directly, and canning tongs so you can safely remove the hot jars from the pot. If you decide that you want to dive into canning and get all of the equipment, most pressure canners double as water bath canners, so you don't have to buy two separate pots.
6. Using metal to remove air bubbles

Before sealing the jars and putting them in the water bath or pressure canner, you need to ensure that all of the air bubbles are removed because there must be a delicate ratio of air to liquid. The jars must have enough air to form a vacuum seal as the heat escapes. If this ratio is off and there is too much air in the jars, then some of the vegetables or other goodies you are canning will not be covered, leaving them exposed and affecting the finished product.
The best way to remove the air from jars is to use a plastic or wood utensil to push the filling around and remove the air bubbles. You can buy a special home canning utensil for this or just use a plastic spatula, spoon, or wood chopstick. The South Dakota State University Extension cautions against using a metal utensil to remove air because metal can scratch the jars' inside, damaging the jar and making it susceptible to breakage.
7. Overfilling jars
Another common mistake that home canners make is overfilling the jars and not leaving enough headspace, which refers to the space between the food in the jar and the top of the lid. If there is not enough headspace and the jars are overfilled, the insides of the jar don't have enough room to expand and will seep out toward the seal and collect on the rim, which will affect the seal, and it won't seal properly.
However, if you leave too much headspace, then the food may not have enough processing time for the air to be pushed out. It's important to follow home canning recipes exactly and make a note of the recommended headspace. If you struggle with visualizing measurements, there are home canning tools to help you measure the headspace of your jars.
Home canning can be messy, and as you are filling your jars, it's inevitable that some jam or pickling juice will spill on the rim of the jar. It's important to wipe the edges of the jars because that trapped food, even if it's just a little, can prevent a proper seal.
8. Sealing jars with paraffin wax
Previously home canners used paraffin wax to seal jars of jellies and jams, which is a soft white wax that turns solid when cooled. This practice was thought to seal the jar, but paraffin wax contracts and expands with heat, so the seal is not solid, and mold and bacteria can creep into the jars. Today the National Center for Home Food Preservation advises not to use paraffin wax. So even if your grandmother and aunties used paraffin wax, times have changed.
While paraffin wax may not be the right seal for your jams and jellies, it is still used cosmetically (like a lotion and put on dry skin like hands and feet), and it is used typically for inflammation. So if you have some leftover paraffin wax, keep it out of the kitchen and put it in the medicine cabinet instead.
9. Using cold jars
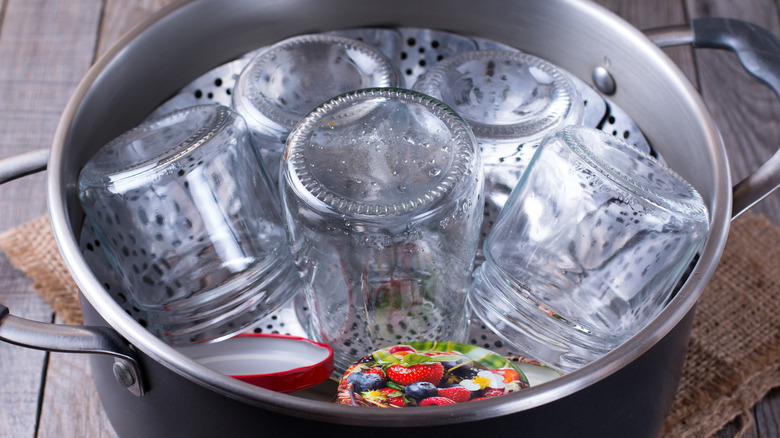
Before packing jars with your favorite foods, the jars must be sterilized. Sterilizing the jars ensures there are no extra bacteria that can grow in the jars. You can sterilize the jars and set them aside while preparing everything else. But when you are ready to pack your jars, you need to heat them. It doesn't matter whether you are water bath canning or pressure canning; both start with hot jars.
There are two ways to pack your goodies into canning jars, a hot pack, and a cold pack. A hot pack means that you heat the product and then place the hot product in a hot jar and process the jar. Cold packing, sometimes referred to as raw packing, is when you place fresh uncooked products into jars and then cover them with boiling water before processing the jars. Each method has pros and cons; some things can be either hot or cold-packed, while other products are best with one of the methods. Most home canning recipes specify the packing type for the best result; always follow the recipe. And both hot and cold packs start with hot jars.
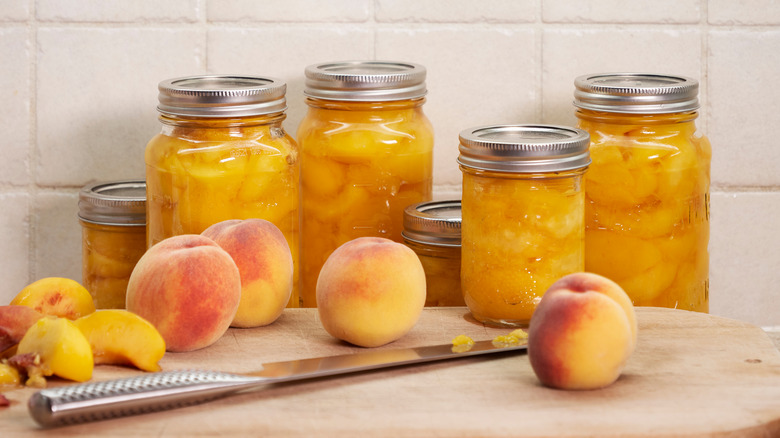
10. Canning anything with dairy
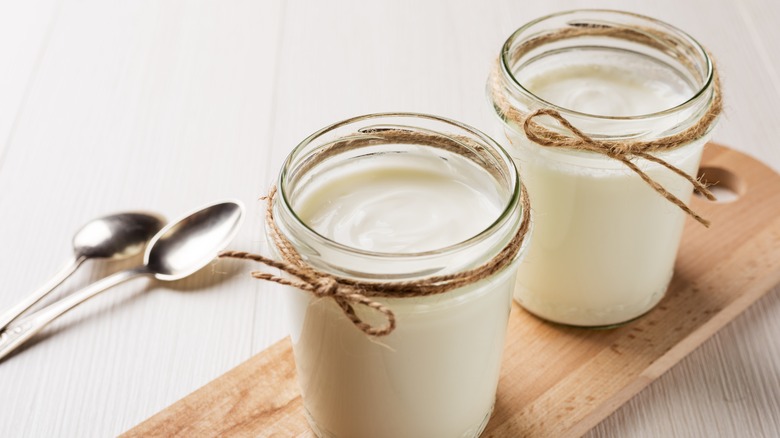
The most popular things to home can are vegetables, salsa, jams, jellies, and other fruit and vegetable combinations. Some experienced home canners even can poultry, meats, and seafood. But one thing that should never be canned is anything with dairy, including milk, yogurt, buttermilk, sour cream, and cheese. This also includes small amounts of dairy that may be in soups, sauces, and gravies. Dairy is too delicate and won't be able to handle the extreme heat that home canning requires.
The National Center for Home Food Preservation does not have any approved recipes for canning any type of dairy, and the food experts at Penn State Extension advise against home canning any dairy. They suggest instead freezing dairy for preservation. In the case of eggs, they explain that home canning is not suitable for fresh or pickled eggs because there hasn't been enough research to ensure safety. Instead, home-pickled eggs should be kept in the refrigerator like other quick-pickled products.
11. Putting hot jars on cold countertops

You have read the instructions and sterilized the jars, filled them, sealed them, and placed them in the canner. The processing time is up, and it is time for them to come out of the canner. You may think the process is over, and it's safe to just put them on the counter, but that is not the case. You need to make sure that you are not placing hot jars on cold countertops, which could lead to thermal shock and cause them to crack and destroy all of the hard work you put into canning.
Thermal shock is when something extremely hot is contrasted with something cold and either expands or contracts in response to the sudden temperature change. You might not think about the kitchen counter temperature, but the extreme heat the jars are exposed to is extreme enough to cause thermal shock and break the glass jars spewing hot liquid all over your kitchen. Luckily, this is easily avoided by placing a towel on the counter so the jars don't have direct contact with the countertop.
12. Forgetting altitude adjustments
Location is important in real estate, but altitude is key in home canning. If you are an avid baker, you know the importance of altitude in the final product. Most baking recipes will have extra instructions for high altitudes to accommodate the difference. And this difference affects home canning too. Since water boils at a lower temperature in high altitudes, the processing time in home canning needs to be extended.
Whether water bath canning or pressure canning, the cooking time will change — you don't have to be high up in the Rocky Mountains for the altitude to have an effect. Any place 1,000 feet above sea level will need to be adjusted. Many recipes will have information on the altitudes and time adjustments that depend on the method and the altitude range. Before you start home canning, find out the altitude of your city and check the recipes for adjustments. You can also consult the canning altitude adjustment chart from home canning experts like Ball Mason Jars.
13. Not testing dial gauges on a pressure canner
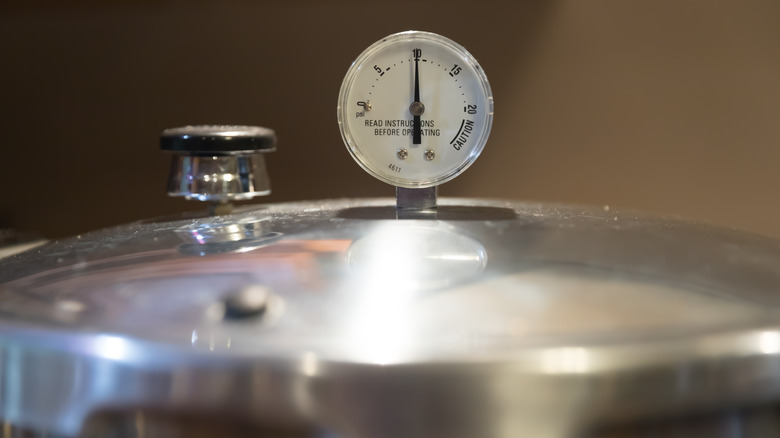
Pressure canners with dial gauges must be tested annually to ensure they are still calibrated correctly. In some cases, if the gauge is off, it can be adjusted, but if it's reading too high or too low, it may need replacing. You can find places in your area that test pressure canner gauges; many universities offer the service. Some pressure canner manufacturers allow consumers to mail in the gauge annually for testing at no charge.
If you find a pressure canner at a second-hand shop or are gifted one, it's best to have it checked and make sure it is a safe piece of equipment. Older pressure canner models have many screws and gaskets and may not be up to quality standards. According to the National Center for Home Food Preservation, all pressure canners should have the Underwriter's Laboratory (UL) approval that guarantees the canner is safe to use.
14. Not letting the jars rest
Home canning saves money and preserves food making it popular with many home chefs. But the reality is home canning is a time-consuming process; from preparing the jars, cutting the fruits and vegetables, packing, and processing, it is an all-day affair. And if you are doing multiple jars of different products, then you are looking at hours of kitchen time. Even after the jars come out of the canner, you are still actively home canning because those jars need to rest for between 12 and 24 hours before you can be sure the seal has set and they are safe to stack in your kitchen pantry.
Patience is key in home canning. Experts recommend not disturbing the jars while they are resting because the inside of the jar could accidentally come in contact with the lid and destroy the seal. So clear a space on the counter where the jars won't be disturbed, and they have a resting station; if you have a small kitchen, then this may take some planning and rearranging, but it's worth it.
15. Storing finished jars with the ring on

While canning lids are not reusable, canning jars and rings are reusable as long as they are in good condition. And one way to keep the rings in good condition is to remove them once the jars have rested and cooled. You can remove the rings, wash them in hot water, and let them air dry so they are ready for your next batch of canning.
Even if you are not planning another batch of canning soon, it's still a good idea to remove the rings before storing the jars; the rings are unnecessary as the lid is where the seal is made that protects the food. The main reason for removing the rings is to see if the jars are leaking. Without the ring in the way, you can easily see if there is any spillage or product seeping out of the lid. If there is any leakage, the ring will cover it, and rust and mold can start to form. While you can't see dangerous bacteria in home canned foods, you can see any leaks or moisture leaking out by removing the rings.