11 Tricks That Will Help Take Your Broiler Game Up A Notch
We may receive a commission on purchases made from links.
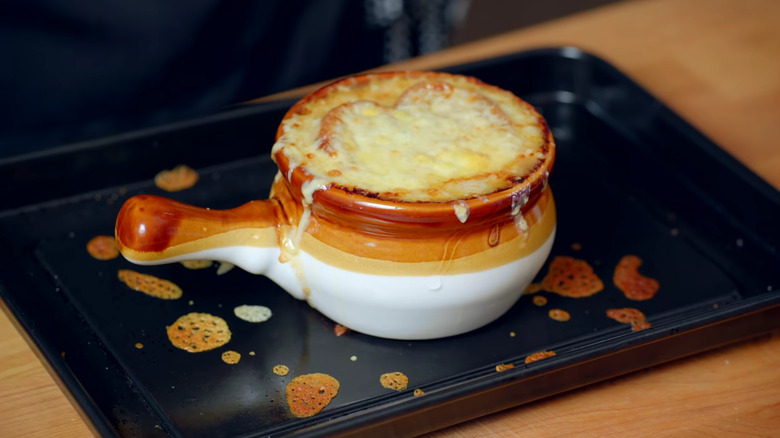
Broilers are an often overlooked feature of many modern ovens. From a culinary standpoint, this is a shame. As USA Today points out, broilers impart intense heat which makes them a wonderful tool for cooks. They are versatile and can serve a host of purposes, although they are usually employed for the browning of ingredients, most notably meat. They're also great for melting cheese on pizza or adding a nice, crisp finish to the top of a casserole.
Some will say the broiler has earned its difficult reputation. After all, this piece of equipment can very quickly turn food into ashes if left unattended. The notion that broiling is a challenging cooking method also has a basis in truth. However, when used correctly, the broiler provides a perfect compromise between the naked flame of a grill and the safe containment of an oven. With that in mind, here are a few tips to help you get the most out of your broiler.
1. Use it to finish meats
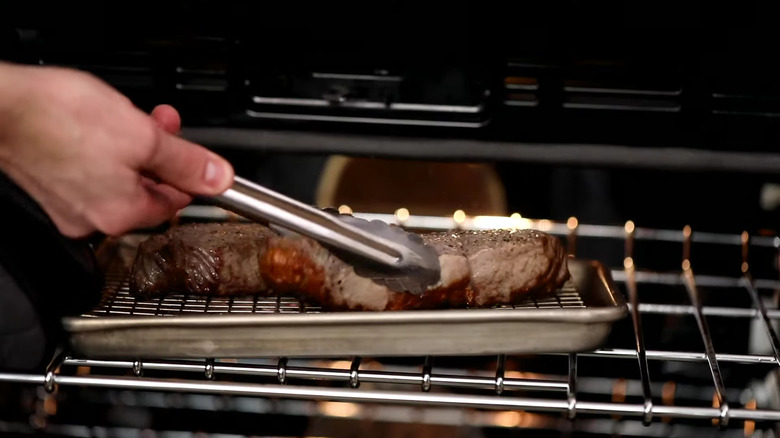
The most prominent of the broiler's uses is to brown food, particularly meats. The New York Times reports that broiling is an excellent way to finish off meat as the high, dry temperature results in a crisp crust developing. This is because the Maillard reaction, which is responsible for browning, occurs at its quickest under hot, dry conditions (via Modernist Cuisine).
Generally, the best cuts of meat to broil are relatively thin like steaks and pork chops. If your broiler has temperature settings these cuts of meat can usually be broiled quickly on high resulting in a well-caramelized crust developing. On the other hand, thicker cuts like chicken breasts, and more delicate proteins, like fish fillets, may be better suited to browning on the lower setting. This ensures a thorough and even finish without impacting the flavor and juiciness of the chosen protein.
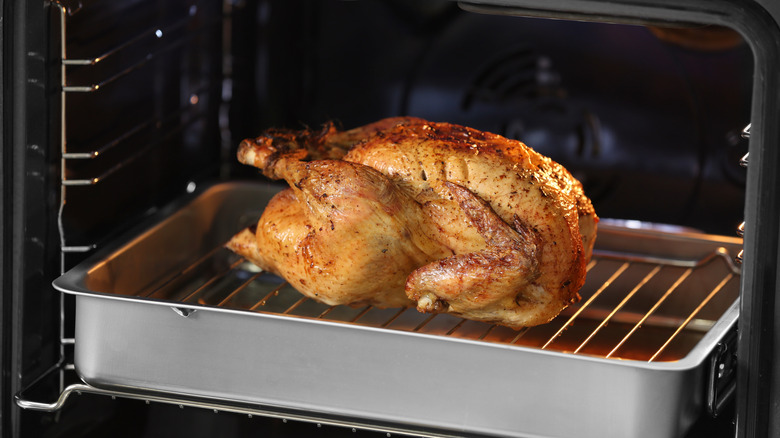
While ideal for browning, it is important to remember that the broiler is not well-suited to cooking whole cuts of meat all the way through. The extremely hot temperatures which make it good for browning will likely cause the surface of the meat to burn before the interior is sufficiently cooked. Instead, thoroughly roast the meat, then use the broiler as a final flourish to achieve high levels of browning. As James Beard winner Chris Shepherd tells Insider, "One of my favorite tricks is to switch from baking to broiling to finish off a dish in the oven and give meat a bit of color."
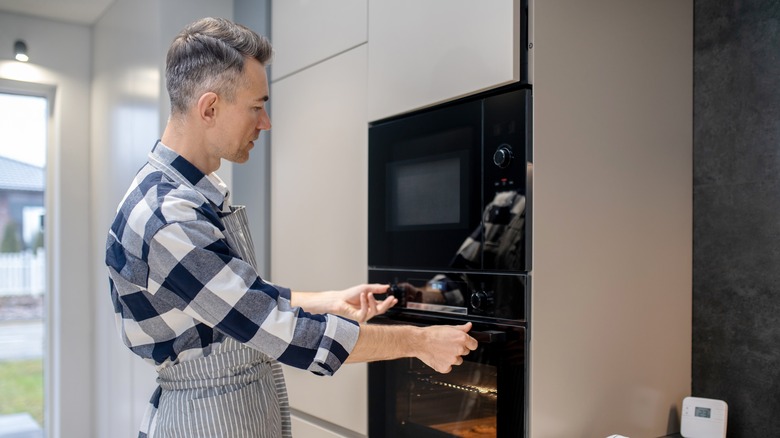
2. Preheat the broiler
Broilers are easily divisible into two camps, and spotting the difference is easy. Those that are gas-fueled use a heating element to produce small flames that are visible at the top of your oven. Electric broilers, on the other hand, utilize an upper heating element that will glow a bright red. In addition, some broilers can be found in a drawer that sits under the main oven. Either way, preheating your broiler is key. A gas broiler's flame allows it to heat up nearly instantly. However, electric versions take a little time for the element to produce intense heat. So, take a few minutes to preheat it before putting food under it for the most consistent results.
This is the perfect opportunity to preheat the pan that you plan to cook your food on as well. In fact, Martha Stewart highlights that preheating the pan is one of the main ways to ensure a good and even sear. This is because a preheated broiler and pan can result in the Maillard reaction occurring at a quicker rate. The preheating process doesn't need to be extensive. Just a few minutes under the intense heat is enough to get your cooking pan scorching hot.
3. Arrange food in a single layer
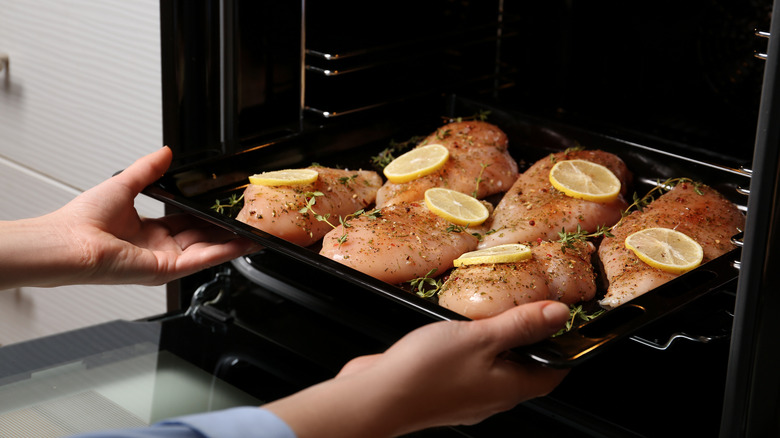
There are many common mistakes when it comes to cooking, under seasoning and overcooking among them. But perhaps the most common of all is overcrowding. In this sense, overcrowding does not mean having too much on your plate but means placing too many ingredients on your cooking surface. As Huffington Post reveals, home cooks are just as likely to overcrowd when sautéing as when roasting or broiling.
The problem with overcrowding when broiling is that it can drastically limit the amount of browning that takes place. Instead, ingredients like meats and veggies will just turn soft as they sweat instead of caramelizing to a crisp. Fortunately, the fix for this is simple; arrange your food in a single, well-spaced layer. This might necessitate broiling your ingredients in batches — or in separate pans. But the crisp and flavorful end result will more than make up for the extra time you invested.
4. Flip your food once
Broilers are often likened to an upside-down grill because instead of heat rising from the bottom up, it radiates down from above. While this intense, dry heat comes with many benefits, it also has its drawbacks. Namely that the side of food facing away from the heat source — the underside — is often cooked to a much lesser degree than the topside. This is a problem that grill masters will be only too familiar with.
Ovens and other cooking appliances negate this issue by cooking via ambient heat. However, broilers are less adept at this process, especially when food is only placed under the broiler for short periods of time. Of course, one way to combat this is to preheat your broiling pan, ensuring the surface gives off some heat. This can go some way to increase the amount of heat that the underside is exposed to. Another simple method that will help promote even cooking and browning is to flip the food a little over halfway through cooking, just as you would when cooking a hamburger on a grill.
5. Cook with a broiler pan
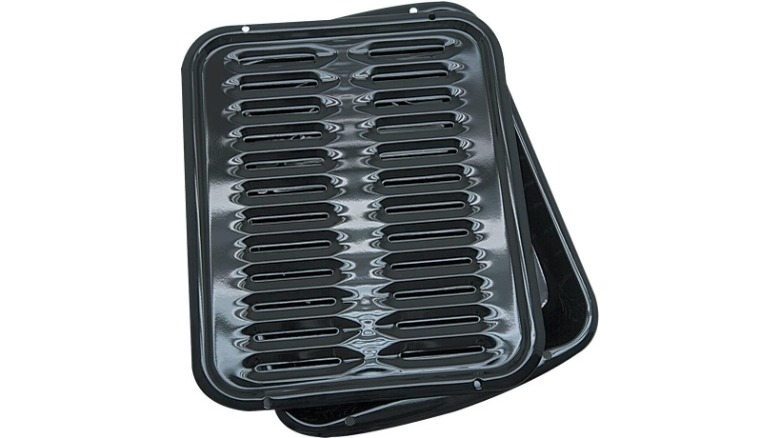
When using a broiler, it can be tempting to place your food on any old baking tray before flinging it under the heat source. However, there are some noticeable benefits of taking the time to locate and use your broiler pan. Stone Frying Pans reports that broiler pans differ in a few key ways from other pans. They are designed with a shallow profile so they can be placed close to the top of the oven. They also usually feature two surfaces, a top tray to hold the food and a lower tray that catches drippings. Keep in mind, these pans shouldn't be made with non-stick coatings that aren't formulated for high heat (via Foods Guy). Instead, look for durable options in aluminum, stainless steel, and cast iron.
By keeping food separate from its drippings, the broiler pan allows for the maximum amount of browning to take place. With meat, this placement may also create a leaner meal as the fat is drained and separated into the lower pan. Finally, allowing this fat to drain safely away from food can minimize splatter and the risk of a fire developing. For those without a specialist broiler pan, simple alternatives can be easily made. The easiest may be placing an elevated wire rack in your traditional roasting pan for the same effect.
6. Perfect the placement of your cooking rack
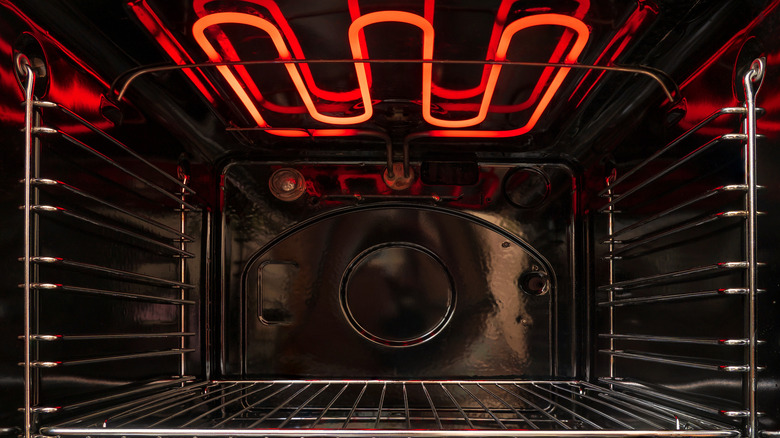
Most broilers have extremely limited, if any, temperature control. How close you place your food to the heat is one of the only ways that you can influence heat intensity and cooking time. So, the placement of your oven rack and broiler pan is of the utmost importance. Fortunately, this placement is an easy idea to wrap your head around. The closer the food is to the heating element — which usually sits at the top of the oven — the hotter the temperatures are.
According to Jenn-Air, the best way to get to know your broiler is by testing different rack positions, starting at the bottom. However, in general, the ideal height can be determined by what type of food you're broiling. The very top rack position is commonly reserved for tasks that need intense, short bursts of heat, like browning thin cuts of meat. The next position down is best suited for thicker cuts of protein that still require browning but at more moderate temperatures like fish. Positions towards the bottom of the oven are ideal for large items that are being finished with the broiler, such as a whole roast chicken. Keep the horizontal position of the heating element in mind as well. Make sure your pan is centered under the heat for the most even broiling.
7. Use a thermometer before broiling
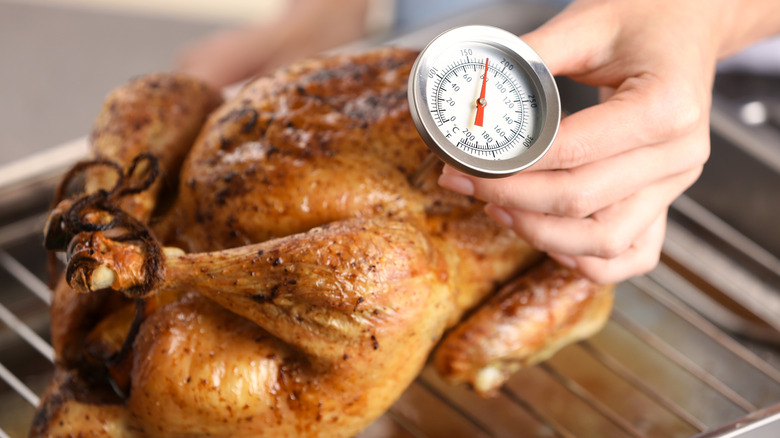
As we've touched on, broilers are more useful for finishing a meal than for cooking it all the way through. This is especially true for meat. When it comes to broiling high-risk foods, such as chicken, this guesswork can pose a very serious health concern. While the broiler produces extremely high heat, it's unlikely to cook the inside of a large piece of meat. Using a meat thermometer before broiling is the best way to mitigate this risk. After all, the last thing you want to do is serve nicely browned chicken that is raw on the inside.
FoodSafety.gov recommends that steaks and pork roasts be cooked to an internal temperature of 145 degrees Fahrenheit. To be safe, chicken and turkey should reach 165 degrees Fahrenheit. Before you place any of these meats under the broiler, make sure the internal temperature is at or above these minimums. Then, you know that it'll be safe even if the broiler doesn't impact the internal temperature much.
8. Get creative with thinly sliced foods
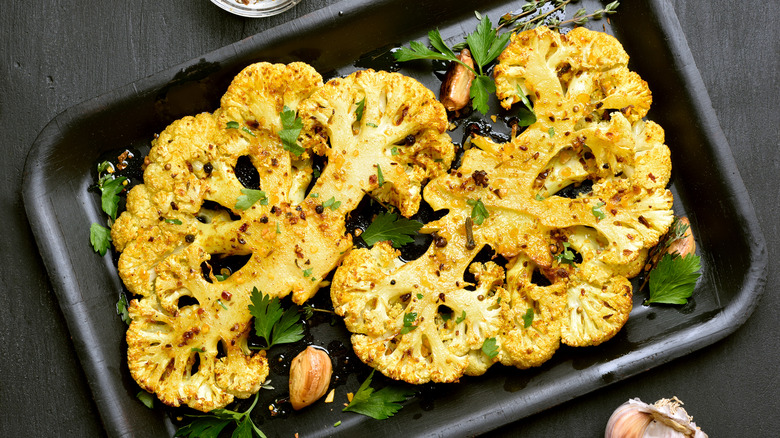
Although broilers can be used to melt cheese and brown chickens, they are also a fantastic tool for fully cooking other foods. While it's not the best method to prepare a turkey from start to finish, it can be the sole means for cooking other dishes. Martha Stewart highlights that the list of other foods, like tofu and veggies, that can be cooked in this manner is vast.
Many chefs swear by broiling items like cauliflower, broccoli, and a variety of squashes. Cut them in similar thin sizes so they cook evenly and make sure they are spaced apart for ideal browning conditions. Potatoes are another food that is super broiler-friendly. Take your go-to roasted potato recipe to the next level by adding flavors and an impressive texture. After cooking, pop them under the broiler for a few minutes to add a delightful crisp. Even fruit can be enhanced with a few minutes under the heat. Thinly slice bananas, pineapples, or peaches and broil them until caramelized. These make a wonderful sundae topping or as a melty treat on their own.
9. Avoid unsafe cooking equipment
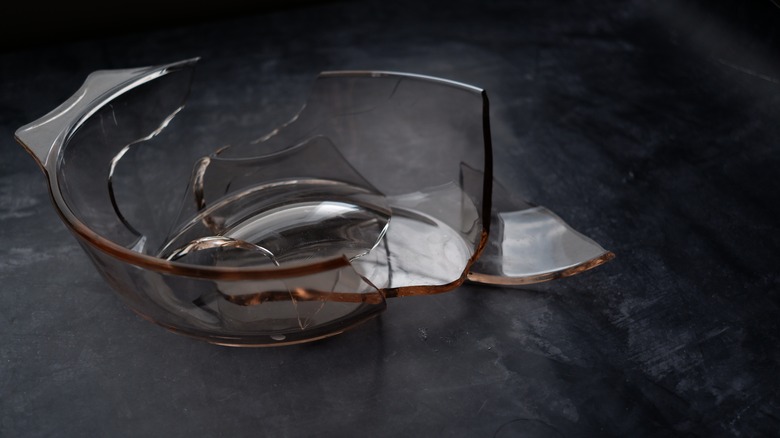
While we would always recommend using a broiler pan, we understand that people may not always have access to one. Fortunately, there are many other pieces of equipment that can be used in a pinch. Yet, not all cooking equipment is suited to the broiler's high heat with some types of cookware even being known to break under the stress.
This is the case when it comes to tempered glassware which many people know by the brand name, Pyrex. The reason behind tempered glassware shattering is explained by Jane Cook, a glass science specialist: "Temperature itself isn't what causes stress. It's a difference in temperature from one part of the glass to another part of the glass. If one part is expanding or contracting more or less than the other, at the region in between [is] where the stress happens. It's literally ripping itself apart. And if there happens to be a critical flaw in that region of higher stress between the hotter and the colder area, that's where it's going to break." (via The New York Times).
To put it simply, tempered glassware is not suitable for use under a broiler. Extreme temperatures can cause serious damage which, over time, may lead to the dish shattering. So, be sure to only use equipment that is broiler safe. If in doubt, do your research before chucking your new piece of cooking equipment under the broiler.
10. Watch your food closely
The high heat generated by a broiler provides a lot of benefits including rapid cooking times and unparalleled caramelization. However, there is one inherent risk to cooking at such temperatures and that's burning your food. For those used to grilling, keeping an eye on your food is second nature. But when broiling, many feel able to leave their food unattended. This is a big mistake. As The Washington Post points out, the line between perfectly broiled food and a burnt mess is an incredibly thin one.
Another reason to watch your food closely is to combat the risk of fires developing. As Anthony Mancuso, director of fire safety at the New York City Fire Department, highlights, broilers pose a significant risk. He tells Bon Appétit, "Broilers also cause a lot of fires because the food's so close to the flames."
So, whenever you use your broiler, be sure to watch your food like a hawk. And, be mindful of drips or spatters that can lead to accidental flames. Both your food, and your kitchen, will thank you for it.
11. Leave the broiler door open
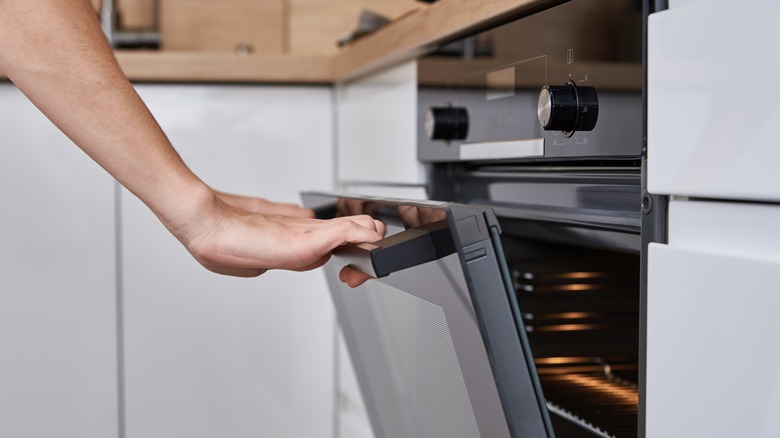
Another key piece of culinary advice is to broil with the door slightly ajar. The reason for this is twofold. Firstly, leaving the broiler oven ajar improves airflow allowing even cooking to take place. Secondly, many electrical broilers are designed to shut off once the oven reaches 500 degrees Fahrenheit (via MasterClass). So, having the door open is a way of preventing temperature build-up and ensuring your broiler remains on throughout the cooking process.
It's important to note that, while leaving the door ajar is common practice when using electrical broilers, it shouldn't be done if you are using a gas broiler with open flames. Many gas broilers also have built-in detection systems that will lead to them turning off if the door is left ajar for a prolonged period of time. Finally, you should always stay vigilant when cooking with the door open. Constant supervision is the best way of ensuring no mishaps or burns occur from an open oven, especially if you have children around.