The Heat Tip You Need To Remember For Perfectly Grilled T-Bone Steak
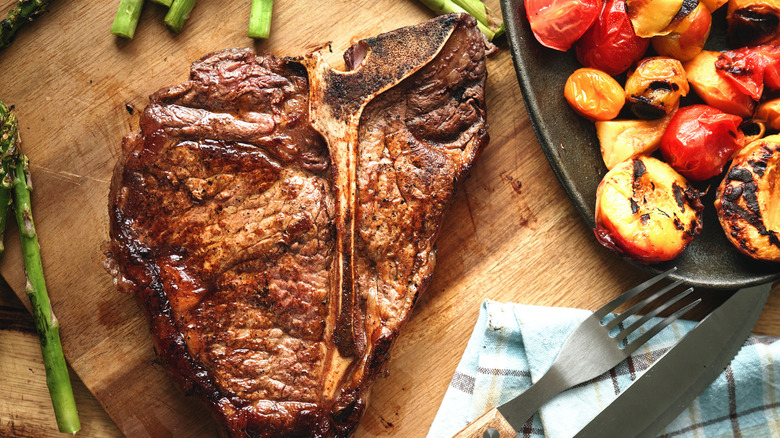
For some steak lovers, there's nothing better than biting into a juicy, tender T-bone. The prized cut remains king for many because it's essentially a two-for-one deal. On one side of the bone, you get a tender, hearty strip steak, and on the other, you get a juicy, delectable tenderloin. Often, you're dealing with a thicker cut, making it more difficult to reach that perfect point of doneness. T-bones are around 12 ounces on average, according to the USDA, though many retailers sell heftier versions that can weigh more than 2 pounds and measure between 1½ and 2 inches thick. As a result of these factors, T-bones benefit from a unique approach when it comes to applying heat during cooking.
If you want the perfect T-bone, then you should consider using the reverse sear method. This might go against the grain of how you were taught to cook a steak, but it can work wonders for the tenderness of your meat. Conventional front searing involves flash-frying your steak at a high temperature until it forms a nice crust. From there, you would usually move your steak to the oven to finish cooking. As the name implies, reverse searing steak means inverting the process. You start by cooking your T-bone on lower heat and finish by grilling over high heat. This will ensure that your meat is more evenly cooked than with traditional searing.
What to keep in mind when reverse searing T-bone steak

The reverse sear method is preferable for thicker steaks like T-bones. When it comes to these heartier cuts, front searing can lead to the outside being overcooked. You're left with beef that's perhaps a little too burnt on the outer crust and underdone in the middle. By reverse searing, you allow the meat to cook slowly and evenly.
You can apply a bit of color to the outside of your steak by searing it last, but since it will be mostly done by this point, you won't risk overcooking it by leaving it on longer than needed. With reverse searing, you're able to more thoroughly and evenly cook your T-bone because the method gives you greater control over the finished product.
However, it's important to keep in mind that reverse-seared steaks are typically drier. Front searing is thought to lock the juices into the meat, whereas with a reverse sear, more moisture drains out over time. It's something to watch out for if you typically like your steak cooked to a higher degree of doneness. Reverse-seared steaks also generally take longer, which isn't ideal if you're in a hurry.
More tips for reverse searing a T-bone steak

When it comes to reverse searing, you should aim to use the method for steaks that are 1½ inches thick or thicker. Otherwise, you run the risk of overcooking your steak. When it comes to preparing your beef for a reverse sear, you want to remove any extra moisture from your T-bone by patting it down with a paper towl until any visible moisture is gone.
The goal of the reverse sear is to get your T-bone slightly below your desired temperature of doneness prior to searing. You should aim for a temperature of 5 degrees Fahrenheit less. As a general guideline, the USDA notes that medium-rare is 145 degrees Fahrenheit and medium is 160 degrees Fahrenheit. When you sear your steak, it will finish cooking the meat.
For the first part of the cooking process, you can set the grill to a lower temperature, though it's also possible to properly reverse sear meat in the oven. When it comes to searing, consider utilizing an oil with a high smoke point for maximum effectiveness.
Another heat tip when grilling: Consider that the tenderloin of your T-bone is leaner and will cook faster than the strip side of your steak. To ensure an even final product, you can position your steak so that the tenderloin is away from the flames of your grill. This will allow it to cook at a similar pace as the strip portion of the steak.