12 Zesty Tips For Making The Best Key Lime Pie
If you do not make key lime pie correctly, you might as well not make it at all. At least, that's how connoisseurs look at it, and they're onto something because the dessert just isn't the same when you take improper steps to make it. This citrusy, creamy dessert gets its name from key limes, and people often associate the fruit with the Florida Keys, where the pie originated.
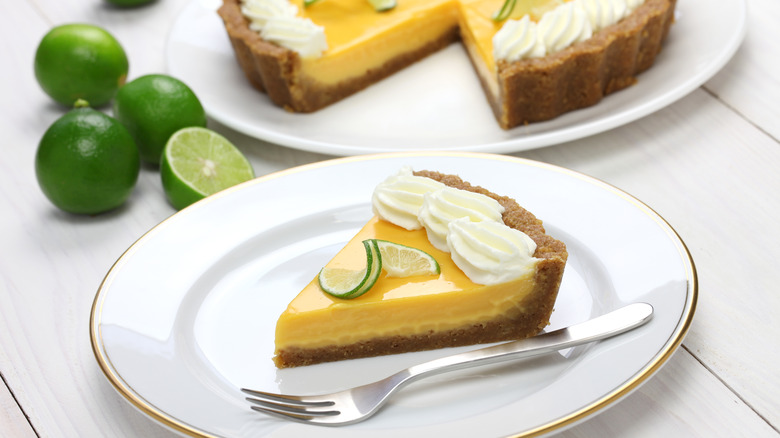
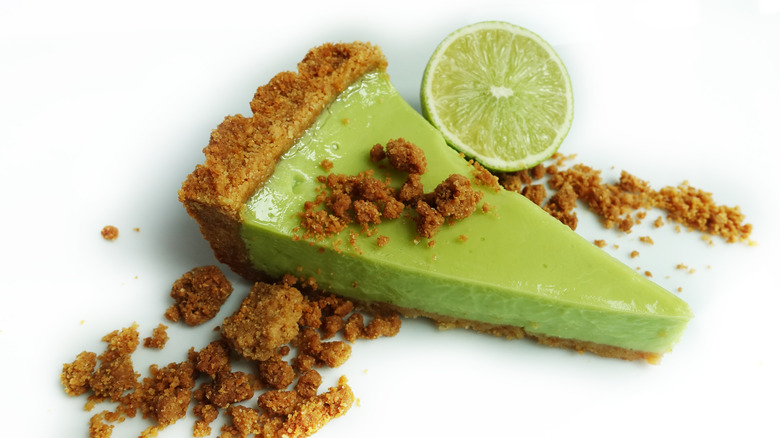
Although the sweet treat has such a basic formula, there is a controversial debate surrounding key lime pie because there's a divide on whether you should bake it, the type of crust you should use, and how to top it. Traditionally, the pie has a buttery graham crust, key lime juice, condensed milk, and egg yolk filling with an airy, sweet topping (whipped cream or meringue). The dessert is served cold, which further adds to its refreshing essence.
Even if you modify the original recipe slightly, there are unspoken rules regarding this dessert, like how it is better if you don't use any artificial food colorings or stray from the typical garnishes. Don't worry, though. All the information you need is here, so your key lime pie can turn out as authentic and scrumptious as possible.
1. Make the filling a day in advance
Make your pie filling a day in advance for the best flavor. Measure the ingredients, mix the custard just as if you are about to use it, and then transfer it to a container. Cover the container either with a tight-fitting lid or plastic wrap and allow it to rest in the refrigerator. When you plan ahead, the flavors in the pie, such as the fresh citrus juice and zest, have time to marry with the other components to let them shine.
It also helps create the ideal consistency you want for the dessert when you don't put the custard directly into the oven after you make it. In fact, making the mixture ahead of time is the crucial step people often miss when they make key lime pie. It also helps to break up the baking project into a couple of days, especially when you want to make it for a party.
2. Choose wisely with no-bake recipes

Back in the day, when the original key lime pie recipes were floating around, many didn't require baking. Your grandma might be adamant about the fact that she used to always serve desserts with raw eggs and nobody ever became ill, claiming that Salmonella is more of a myth than anything. However, times have changed and foodborne illness is a bigger risk now, specifically, since the 70s, when there was a noticeable surge of infected chicken eggs in numerous parts of the world.
Although there are now vaccinations for the chickens and frequent egg inspections at processing plants, the U.S. Department of Agriculture still states that consuming raw or undercooked eggs is unsafe. Luckily, this doesn't mean you can't make no-bake key lime pie. It's quite convenient to make sweet treats without turning on your oven, especially when the weather is hot outside. But when you pick a recipe, choose a no-bake formula that doesn't call for eggs; plenty of options exist. Many of these recipes have cream cheese to help thicken the filling. This way, you can enjoy your creamy dessert without worring about negative health side effects.
3. Don't overmix the filling
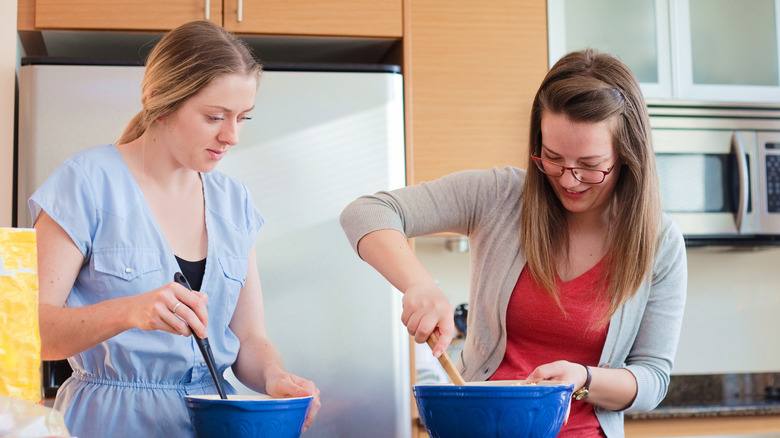
When you mix the custard base, you only need to stir the ingredients until they are combined. There is no need to mix it continuously, especially since all of the ingredients are relatively smooth, to begin with. Moreover, it's a good idea to break up your egg yolks so they're creamy before you introduce them to other ingredients. Then, all you need to do is make sure that the fruit juice and other elements thoroughly blend into each other. We recommend you create the filling by hand because a stand mixer is overkill and can incorporate large amounts of air into the mixture.
This isn't chocolate mousse pie; you don't want it to be super fluffy. If there are many bubbles in the filling, they can float to the surface of the dessert when it bakes, which are visible and ruin the presentation. Another possibility with excess air is that it makes the overall texture of the pie abnormal, and the custard cracks because it slightly expands in the oven and then collapses. Yes, you can allow the raw custard to rest for some time to help the air dissipate before you bake it, but you still want to be cautious and incorporate the least amount of bubbles from the get-go.
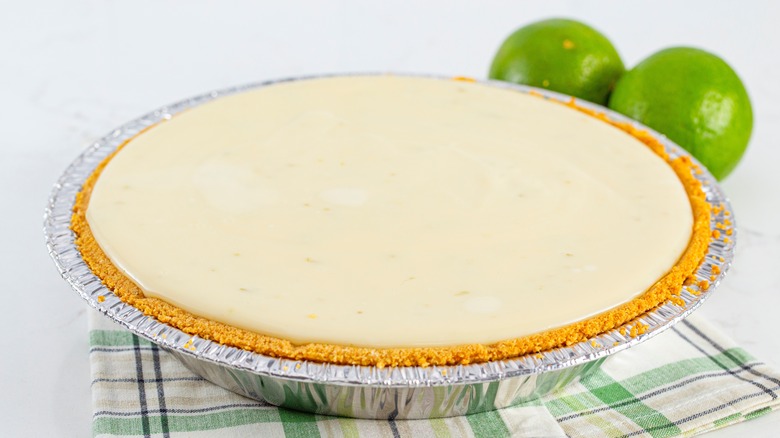
4. Use genuine key lime juice
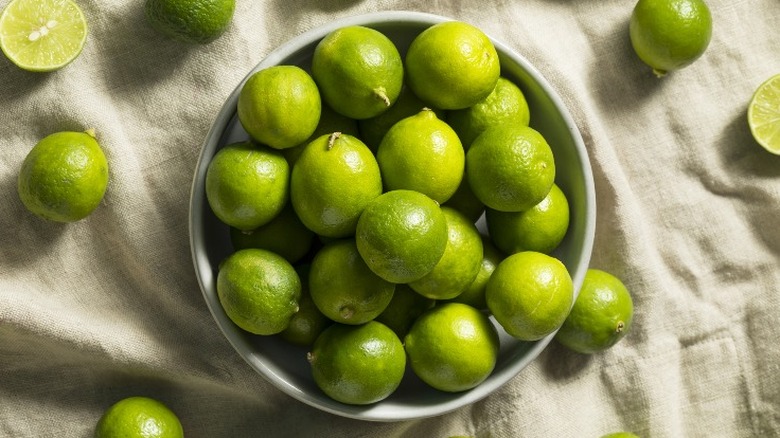
Since key lime pie only has a short list of ingredients, you must choose the best quality ones. Of course, as the dessert's name suggests, you should use key limes rather than other kinds, like Persian limes, which you most commonly see in your local grocery store. But what makes key limes and regular limes different? Does it make that big of a difference in the sweet treat? The significant difference between the fruit varieties is their size and taste. Specifically, Florida-grown key limes have the ultimate balance of sweet and sour flavors. Additionally, they are pleasantly fragrant. Hence, they work well with the condensed milk and graham cracker crust in classic recipes because all the flavors balance each other.
So, when you go to the supermarket to get your baking ingredients, look for the tiny yellow-green limes to make a genuine pie. And, if you can't find them, buy bottled authentic key lime juice; look at the bottle's label to ensure the company didn't add ingredients like sugar or food dye. As long as you use 100% pure key lime juice, your pie will turn out incredibly delicious, so don't fret.
5. Grate and juice the limes correctly
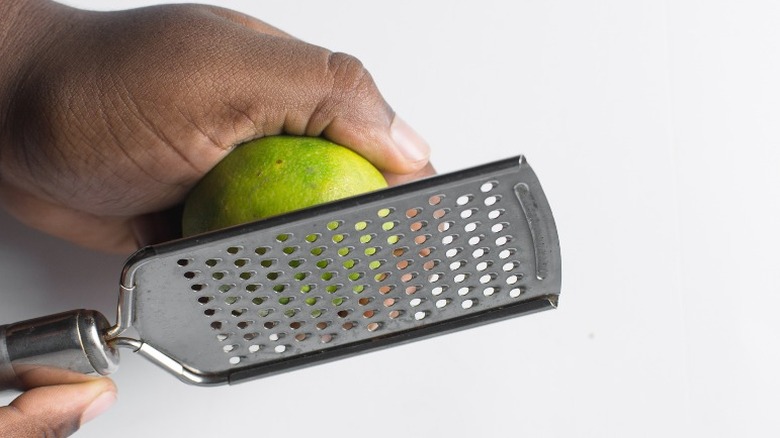
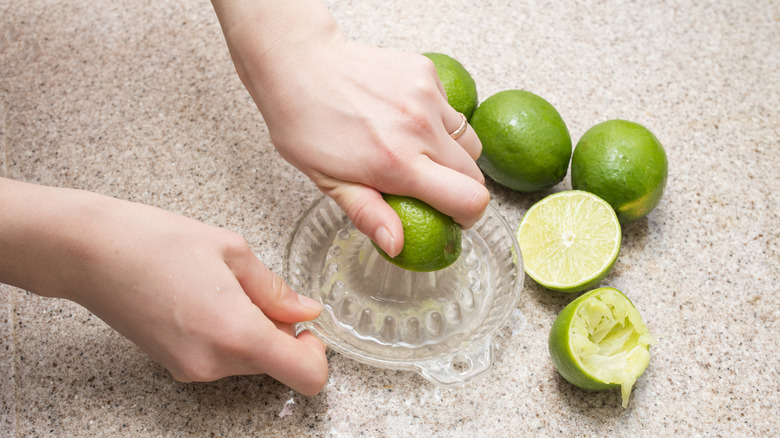
More likely than not, your recipe calls for both the zest and juice of the key limes. So, before you get too ahead of yourself, grate the fruit before you juice it. While you can, of course, can grate them after, it's not nearly as easy. Furthermore, use a microplane zester or another similar grater that makes thin shreds.
Also, since key limes are smaller than others, you need a considerable amount to get enough juice. To make the task easier, use a citrus press or juicer so that you don't have to extract the juice manually. Otherwise, it's a tedious process that cramps your hand. Something to watch out for when you juice them? The pith, which is a bitter white part between the segments and the peel. If you juice or grate the limes too much and include parts of the pith, your pie won't be as tasty. These desserts are supposed to be tart, not overly bitter, so be careful.
6. Don't use food dye
Indeed, many people associate limes with the color green, but don't let it fool you — the fruit juice is actually transparent yellow. Therefore, genuine key lime pie actually has a subtle pale-yellow tint, mostly due to the eggs. Sometimes, you'll find pies with vibrant green filling, but they have some type of food dye for them to achieve that hue. If you want the dessert to have vibrant color, decorate the pie with fresh lime wedges that catch the eye. The zest also imparts the dessert with green specks if you choose to add it to the custard.
But whatever you do, don't take out your old food coloring and add splashes of it to the base. It makes the dessert look too artificial and less sophisticated. In other words, any key lime enthusiasts know that it's not the real deal.
7. Make a homemade crust
For the absolute best pie, make the crust from scratch! While you can certainly use a store-bought crust, the quality is not nearly as good as one that is homemade. The most common type of shell for key lime pie is graham cracker crust, which is great for people who don't feel comfortable enough to make a flaky pastry crust. Graham cracker crust is super quick to whip up; it turns out crispy and tastes buttery-rich. At its simplest, it is just melted butter and crushed graham crumbs, but you can also add a pinch of salt, sugar, or some cinnamon to give it more depth.
Crush the graham crumbs evenly to guarantee the crust is uniform when you pack it in the pie tin. Once you make the mixture, it should resemble sand and hold its shape if you press it into the pan. Some home bakers prefer to make the pie shell with different cookie crusts. Flavor-wise, gingersnap cookies are an excellent choice because the spices in the cookies complement the zesty filling. In regards to shortbread shells, they take more time since you have to roll them out, but the sweetness contrasts the fruity filling quite well.
8. Par-bake the crust
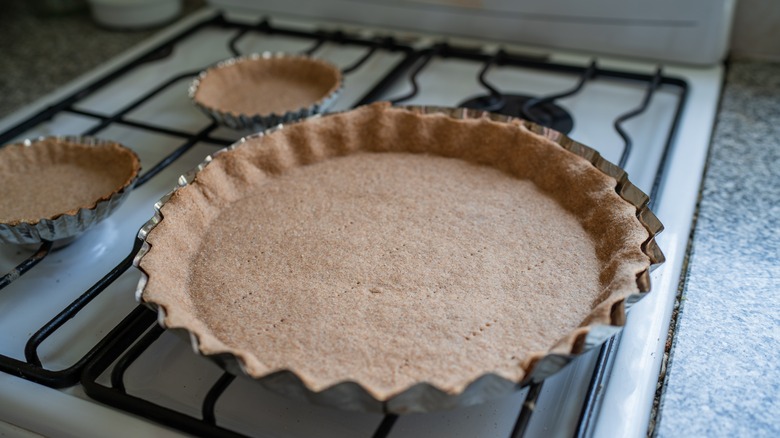
The last thing you want is a soggy pie. Ideally, with this dessert, the custard is velvety smooth, and the crust still has a noticeable bite. To prevent sogginess, bake the shell in the oven before you add the custard mixture. So, no matter what type of crust you make, it turns into a solid platform for the filling to sit on. This will also prevent the liquid mixture from seeping into it as if you pour it onto the dough.
Of course, if you don't eat all the finished pie right away and have it in the fridge for a few days, the crust softens over time. Yet, it makes a noticeable difference in how long the bottom stays fresh, so taking the extra step to par-bake it is worth it.
Use some pie weights for the shortbread crust so it doesn't shrink or puff up with air bubbles. For graham or other cookie crusts, you don't need to weigh it down, but if it shrinks, carefully press it back into shape while it's still hot. Either way, remove the empty pie shell from the oven once it starts to get color; you don't want it to get too dark, especially if you use a recipe where the crust returns to the oven for the filling to bake.
9. Fill the batter high
With many baked goods, like cakes or muffins, you must leave ample room in the pan or tray for the baked good to rise. Leaving space when you make desserts might be second nature for you, but that practice is unnecessary with key lime pies. If you pour the raw filling and it only goes halfway up the pie shell, it, unfortunately, isn't going to get any higher while it is in the oven. This is why you need to pay attention when you choose a recipe because some might call for different size pans than what you have.
Sometimes, you need to increase the filling recipe to compensate for deeper or larger baking dishes. So, make sure you have enough custard base and pour it to the rim of the crust; it doesn't overflow in the oven, and the final product won't leave you feeling disappointed.
10. Bake it at a low temperature
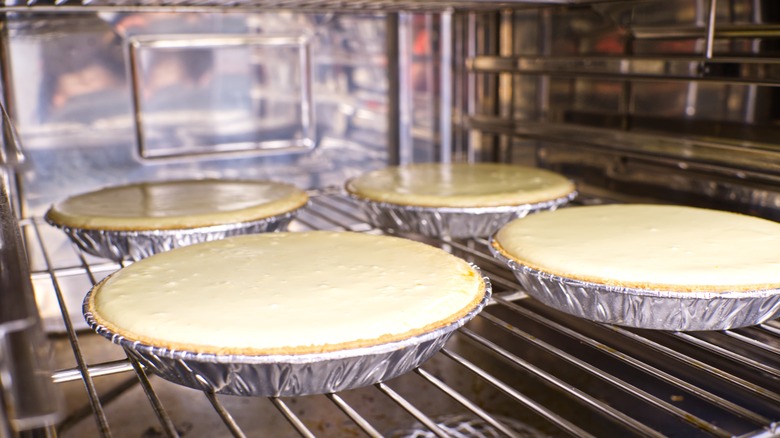
Whether your specific recipe contains eggs or not, it's a good idea to bake it at a low or moderate temperature to avoid scorching the delicate filling. Additionally, these temperatures are best because the pie becomes thoroughly cooked. If you try to rush the process and crank the heat, only the surface and outer edges cook while the center is still sloshy. Of course, every recipe is different, but you certainly don't want to bake it at a temperature above 350 degrees Fahrenheit. Some folks even go as low as 200 or 250 degrees Fahrenheit for pies with eggs to guarantee that the base never reaches a boiling point.
You can bake the key lime pies "low and slow" as you do a cheesecake and even use a water bath for them, too, if you want to be extra cautious. A baking thermometer is handy since you can check the dessert's temperature if you insert it into the custard. Specifically, yolks coagulate between 149 and 158 degrees Fahrenheit, but since you mix them into the filling, you can cook the pie until it reaches 160 to 175 degrees Fahrenheit, and it won't curdle. Ultimately, if you keep an eye on it and bake it at the ideal setting, you'll be golden.
11. Remove it from the oven at the right consistency

Not everyone has a cooking thermometer, but fortunately, you can tell when the pie is done by its consistency, too. The ideal characteristic to look for is a center that still slightly jiggles, but the outer part of the custard is firmer. The center isn't supposed to be liquid-like, so if you try to remove it from the oven at that point, it won't solidify when you refrigerate it. As for color, key lime pies don't need to brown much at all; it's okay if it lightly browns on the edges, but any more color than that and it is overcooked.
There are a couple of ways to check for doneness; the first is if you gently press your finger onto the pie's surface. When you do so, you know it's ready if it doesn't feel sticky, and your finger effortlessly lifts back off of it. Additionally, you can insert a knife to see if it comes out clean — although, many people try to steer clear of this method since it leaves a slit in the middle of the pie. If you plan to decorate the whole top, this isn't an issue, but the mark can be distracting if you want to place garnishes only on the rim of the pie.
12. Allow it to rest for several hours
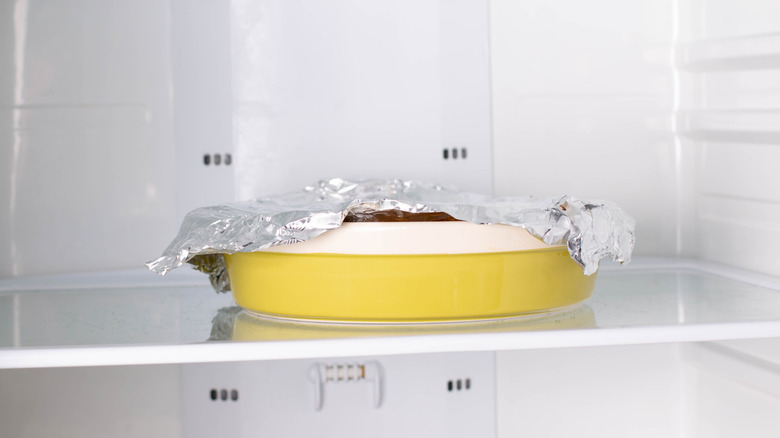
After you bake the citrusy pie to perfection, you must give it time to rest in a chilled environment. Don't directly transfer it from the oven to the fridge; wait some time for it to cool to room temperature first. Once it is in the cooler, allow a few hours to set and thicken. You can even make the dessert in the evening and then let it chill in the refrigerator overnight.
Furthermore, you want it to be entirely cold when you apply any toppings to it. Both whipped cream and meringue are extremely fragile, and they are usually the toppings of choice for bakers who make this tangy treat. Hence, if you pipe or spread the meringue or whipped topping onto it while it is still hot, it melts it and ruins the overall presentation of the dessert. After all, you want the pie to taste as fresh as possible. So, give it plenty of time to solidify, and then add the garnishes immediately before you serve the dessert.