16 Milk Cooking Tricks You'll Wish You Knew Sooner
A cold glass of milk partners beautifully with cookies, cakes, and cereal, but why limit yourself? The contents inside that container can work real magic, in some very unexpected ways. You might think that the stuff can only be poured into a cup or glass for drinking, warmed up on a stove, or used in a few random, complicated recipes, but there are plenty of out-of-the-box milk cooking tricks that add to its versatility. And once you master them, you'll wish you had known about them sooner.
These tricks are especially helpful if you have extra milk that is either approaching or past its due date. Or, maybe you've given up on making homemade hot chocolate with real milk because it keeps burning. There are solutions for all of these scenarios. Most of these suggestions can be used with regular and plant-based milk, but be open to experimenting. Milk products have different flavorings and fat contents and may or may not include added sugar. So the next time you think about pouring that extra milk down the drain, just stop. Here are some amazing milk-cooking tricks that you'll want to use often — some of them are pretty cool, too.
1. How to stop milk from burning

Before milk was pasteurized, people scalded it to kill bacteria. This method heats the milk until just before boiling, and then it's removed and cooled. Problem is, milk can easily bubble over, burn, and leave a black film in the pot. This happens because milk proteins are sensitive to heat, so they glob up and scorch. This can also ruin the milk's flavor and consistency.
Recipes for homemade custard, sauces, and cakes may call for scalded milk, but that shouldn't scare you away. This method reduces cooking times and boosts the flavor and texture of bread and other baked goods, so it's worth a try. Constantly stirring the milk while it's cooking can help, but this isn't a fail-safe.
Milk should never be poured right into a dry cooking vessel because those sensitive proteins will attach to it. To prevent burning, use cooking spray or water to create a barrier. Keep in mind that the spray might add unwanted oil and flavor and that water is just as effective. You could even use a bit of butter, but that will also change the final result. There's a bonus to these methods, too — the cleanup will be much easier.
2. Microwave it the right way

People have the same fears about burning milk when heating it in microwaves. And not only can it scorch, but too much heat can also result in an unpleasant film of protein resting atop the liquid. But once you get the hang of microwaving milk, it will become a familiar go-to. It's easier than heating it on the stove and just as safe as long as you wear potholders and stay next to the microwave while the milk is cooking.
To heat milk this way, pour it into a microwave-safe container and leave room on the top. As a guideline, it takes about one to two minutes to heat ½ cup of milk in a microwave, so set the timer accordingly at 70% power. Put in the container, press start, and pause the power after 15 seconds. Stir the milk and keep repeating the process until you see steam coming from the top. To scald 1 cup of milk, do 40 to 45 seconds on high, checking it halfway through.
3. Always bring it to room temperature for cooking and baking
If you've ever seen a recipe that calls for room-temperature eggs, this trick will be more familiar. Adding one cold ingredient to others that are warmer leads to lumpy batter, dense textures, and blob-filled sauces. This is all a matter of science, with a basic explanation. Like eggs, room-temperature milk combines easier with other ingredients and creates emulsions that catch air and then release it while cooking — this is what makes your favorite vanilla cake so fluffy. Room-temperature milk also makes baking times more accurate since you're not adding one cold ingredient that throws things off.
Milk can safely be out of the refrigerator for up to two hours without spoiling, according to Undeniably Dairy. Just measure out what you need and leave it on the counter along with any other refrigerated items being used in your recipe. And you probably won't have to wait the full two hours, either, since it usually warms up faster than that.
4. Use milk to thaw fish

Before you start freaking out about this one, think about New England clam chowder. This soup is made with milk or cream, shellfish, and even other fish like cod. Thawing fish with milk is a useful trick when fish bought at the market can't be eaten within a day or so and gets put into the freezer.
This isn't a shortcut because food shouldn't sit out on counters to thaw out. And while running it under cold water for a short time will thaw the fish, you'll be sacrificing taste. To thaw fish in milk, take it out of the freezer and place it in a sealable container. Cover it completely in milk and put it to bed in the fridge overnight. The milk will essentially absorb that frozen vibe, and the fish will taste like it was just caught or bought. When you're ready to prepare the fish, discard the milk and prepare as usual.
5. Boil corn in it

There are plenty of ways to cook ears of corn, and boiling it is one of the easiest ones. You can make things taste sweeter by adding milk to the water in the pot. The basic method is to fill the pot up and then pour in 1 cup of milk. If you want to give the corn even more flavor, you can also add in butter — that way, you won't need to slather it on afterward. If you're boiling six to eight ears you can use a whole stick; otherwise, reduce the amount accordingly.
The fastest way to boil corn on the cob like this is to add the two liquids into a tall, large pot, and drop in the husked ears. Turn the temperature on high and let it boil, uncovered, for five to seven minutes. Then, turn off the heat, put the lid on, and go about your business for another five minutes. Remove the corn with tongs and discard the liquid.
6. Swap regular milk with coconut milk
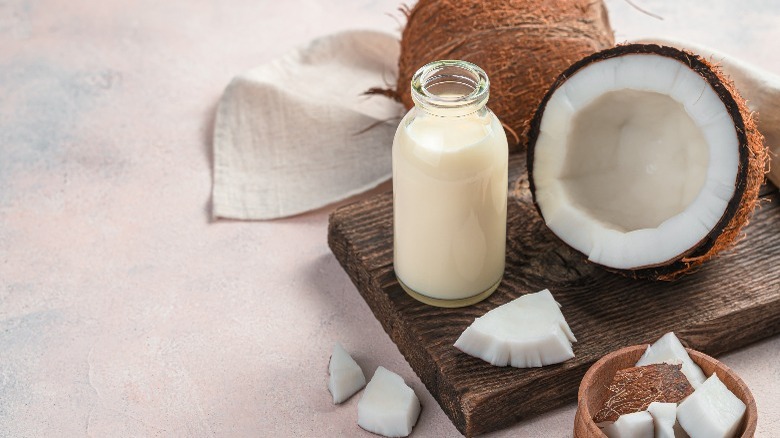
Regular milk tastes rich and creamy but can be hard on the stomach. Low-fat and skim can be easier to tolerate, but anyone sensitive to dairy products or lactose likely prefers to stick to plant-based milk like coconut. This isn't the same thing as coconut water, which comes from unripened coconuts. The milk combines this water with coconut flesh and is paler than plain milk.
Coconut milk also tastes nuttier and has no lactose. Still, it can be used in the same way as regular milk as long as the products have the same fat content as the milk used in the recipe. Canned coconut milk is generally full fat, but you can find other versions in your grocery's refrigerated milk section. There are also cans of cream of coconut in the cocktail mixers sections, and that can be exchanged for heavy cream in recipes. Whichever coconut milk product you choose, just use it in the same ratio and expect the finished product to taste a bit different — who knows, you might even like it better.
7. Thicken soup

Flour and cornstarch will thicken soup, but you always have to worry about those lumps. Milk can thicken both canned and homemade soups and makes them richer and more satisfying without the unwanted globs. It upgrades chicken noodle soup, cream of broccoli, tomato soups, and any others that will benefit from thickening. Full-fat milk will create the most velvety textures, but if you're watching your fat intake, try something a little lighter.
To thicken soup with milk, take the milk out of the fridge and heat the soup until it boils. Quickly turn the heat down to low until the liquid is simmering. Add a small amount of milk, swirl it in with a whisk, and let it simmer for a few minutes. You may want to add a bit more, but only do so a bit at a time because if you go too far, the soup won't taste balanced. Coconut milk is also a good soup thickener.
8. Make better bread

There are plenty of reasons to add milk to bread dough, and as you might guess, the first is improved taste. From a scientific perspective, milk fat makes gluten bond together more effectively, and this makes bread fluffier. It also reduces the grain size for easier slicing. Additionally, milk has a higher pH than water, which slows down fermentation. So while it may take longer for the yeast to rise, the bread will have a longer shelf life.
The lactose in regular milk will also caramelize, deepening the color of the bread's crust. Sour milk, buttermilk, and powdered milk (with water) can also be used. Adding milk to a bread recipe will also make the final result taste a bit richer, yet lighter, than usual; once you taste it, you'll understand. The key to this trick is to replace the water with the same amount of milk. Remember to bring the milk to room temperature, or it will shock the yeast and the dough will take even longer to rise.
9. Drink milk when your mouth's on fire

Long hots, Buffalo wings, and vindaloo pork are deliciously hot and spicy but can make eyes water and set tongues afire. And when the effect is too strong, plain water will not be effective, and the burning sensation might not go away for hours. If this happens when you're in a restaurant or at home, request a glass of milk or grab the carton from your fridge ... taking a few swallows of milk works every time.
This is because some spicy foods contain capsaicin, a pungent, naturally occurring chemical. Capsaicin triggers pain receptors in the mouth, and that's where the burning sensation comes from. People who eat it often can become desensitized to its effects, but for everyone else, it can be uncomfortable and even frightening.
Regular milk counteracts the effects of capsaicin quickly because it contains casein, a protein. This attracts the oily capsaicin molecules, coating them enough to neutralize the effects. And since coconut, soy milk, and almond milk don't contain casein, those will not work.
10. Sour milk = buttermilk
Most people who open up milk containers and smell sourness generally pour the contents down the drain. But unless it's really gone bad and you can't take the stink, sour milk can be used in place of buttermilk in recipes. Store-bought buttermilk isn't fresh like regular milk because it's fermented with active bacteria like yogurt. That's why it's thicker and lasts longer in the refrigerator.
You can use sour milk in recipes for pancakes, biscuits, cakes, waffles, and cookies, and that's just a start. It makes these foods fluffier, without any sour taste. But if you're afraid to use sour milk, there's no judgment here. You can make your own buttermilk, though, and it's cheaper than buying it. Just pour 1 tablespoon of plain vinegar into a measuring cup and pour in milk until it reaches the 1-cup line. You can use low-fat milk, but avoid plant-based versions. Mix it up and let it settle for five minutes before using.
11. How to prevent curdling

While using sour milk can be fine, it shouldn't be used if clumps have formed in the liquid. These curdles, or small, lumpy masses, are helpful for tofu- and cheese-making but should never be consumed otherwise. While a small sip shouldn't cause symptoms, drinking larger quantities of milk that's this spoiled can cause temporary vomiting, diarrhea, and other gastrointestinal symptoms, according to the Missouri Poison Center. Check the expiration dates when buying packaged milk and use it before those globs start forming. Yuck.
Milk spoils and curdles faster when left out of the refrigerator for too long, so use a timer if you need some at room temperature. Boiling can also cause milk to curdle, so what's the best way to heat and scald it? Don't turn the burner onto high, and you should be good. Milk should be heated gradually on medium or medium-low heat while being whisked often.
Acidic ingredients like tomato sauce can also curdle milk, so either avoid those or whisk in a bit of baking soda or flour with them. And don't add salt until right before serving the food, because milk doesn't get along with that, either.
12. Make homemade evaporated milk
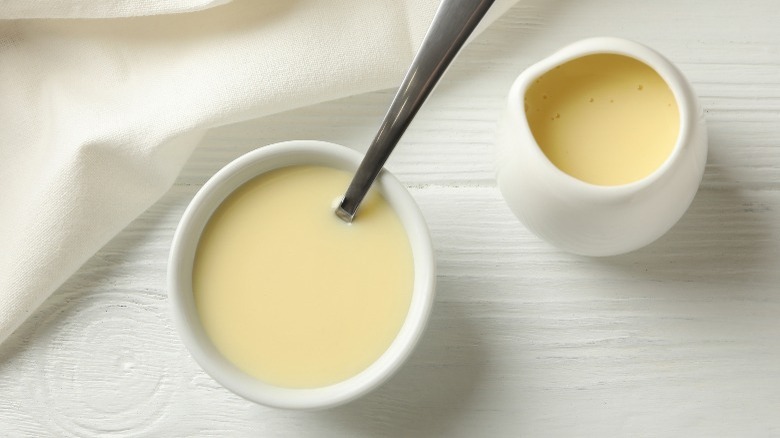
Canned evaporated and condensed milk typically share shelf space in grocery store baking ingredient aisles, so how are they different? That's easy: Condensed milk contains sugar. Evaporated milk was invented before homes had refrigerators and is made by heating homogenized milk until it condenses and the liquid reduces by 60%. It is also less prone to curdling and enhances the flavor of macaroni and cheese, pudding, and, of course, pumpkin pie.
Never substitute condensed milk for evaporated milk in a recipe, because it won't come out right. Light cream could work in a pinch, but if you don't have that either, just DIY. Pour whole or reduced-fat regular or coconut milk into a pot and simmer for about 20 to 25 minutes until the liquid is reduced by 60%. You can gauge the percentage with a measuring cup, and once you've figured out how much milk you need to reduce, record the measurements for next time. Homemade evaporated milk needs to be cooled before use, so put it in an airtight container and stick it in the fridge. It should last for 10 days, but canned evaporated and condensed milk are shelf stable and last much longer before opened.
13. Make homemade condensed milk
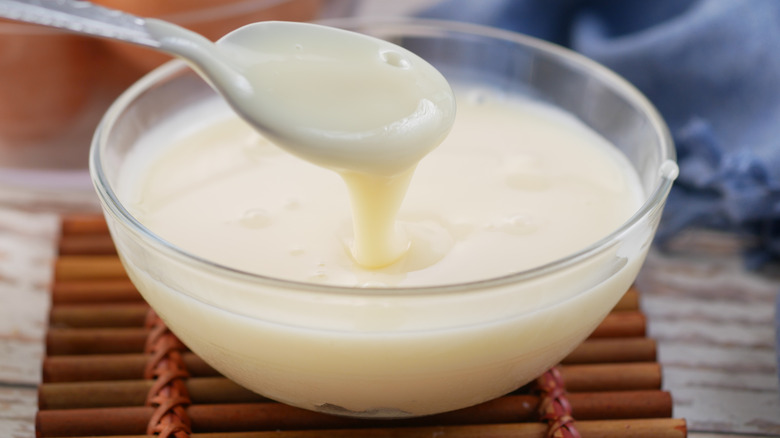
If you can make DIY evaporated milk, cooking up homemade condensed milk isn't hard, either. It is often called sweetened condensed milk for a reason — close to half of what's inside the can is sugar. It's used to make treats like fudge, cake batter, and tres leches cake. If you're making something sweet and bought evaporated milk by mistake, that can be used — you'll just need to add sweetener. Start by adding 1 tablespoon of sugar at a time until it reaches the desired taste.
Heavy whipping cream can also pinch-hit for condensed milk since it's thicker than regular milk. Add ¼ cup of sugar per cup and mix well. But for the most authentic taste, heat milk and heavy cream until it's reduced to 1 cup. Then, mix in ⅔ cup of sugar after removing it from the heat, plus a pinch of salt. Almond milk and other plant-based milk work well, too. Store your homemade condensed milk in the same way as you would evaporated.
14. Freeze it into ice cubes

While freezing milk (other than breast milk) might not be a common practice, it works just as fine as long as it's thawed and used within 30 days — any longer, and the liquid starts becoming grainy. Frozen milk cubes are best used in cooking and baking recipes for this reason, but you can try them for flavoring hot chocolate, tea, and coffee.
The smartest way to freeze milk is in an ice cube tray because you can take just a bit for a cake glaze, to thicken a soup, and so forth. Milk expands when frozen, so when pouring it in, leave a little space on the top. Milk is prone to absorbing odors in freezers, so it should be sealed. Freeze the tray until the milk is almost set, then slide the whole tray into a sealable freezer bag or container. If you don't have something for the tray to fit into, just take out the cubes when they're solid and seal them that way.
15. Use it to braise pork
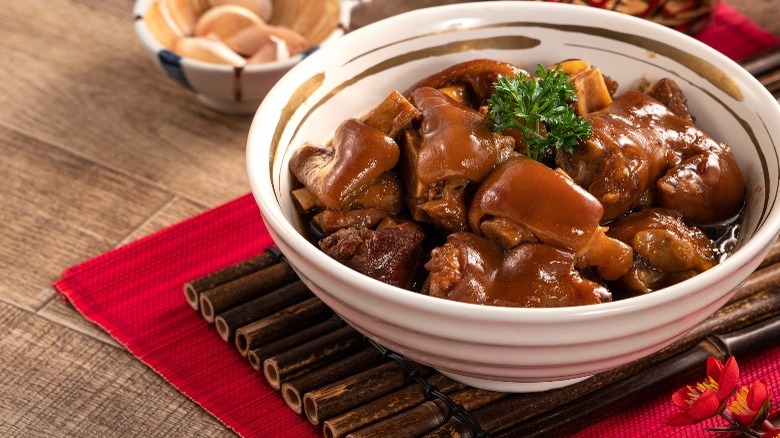
Braising is like stewing because meat gets browned on high heat and then simmered in liquid on low heat. You might be familiar with short ribs braised in stock and wine, but regular milk can do an even better job, especially with pork. The lactic acid softens the fat, keeps in the moisture, and adds subtle sweetness so the result is tender and flavorful. The cooking heat also curdles the milk, but in a good way, because it makes a rich brown gravy that can be whisked and strained.
This kind of braise works best with whole milk because of the lactic acid, plus the liquid has to be sturdy enough to balance out bone-in pork. Brown the meat in a large, heavy-duty pot (oven-safe if possible), remove it, and add garlic, lemon zest, and other herbs and aromatics. This can go right into the oven, or you can transfer it into a roaster pan. This dish gets better as it cooks, so use low heat for about three hours. The milk will work its magic into the pork, and this dish is good enough to serve on holidays.
16. Turn milk into heavy cream

Some people confuse heavy cream and whipping cream, but they are different. Whipping cream has less fat, whips up nicely with a bit of cream of tartar, and gets plopped on top of pudding and pie. Heavy cream has up to 41% fat, so it's better suited for cake frostings and ice cream — it's also a soup thickener and goes well in savory recipes like curry.
So what happens when an experienced chef is out of heavy cream and needs a substitute? Milk comes to the rescue, but it must be buttered up. Milk doesn't have enough fat for an even swap, and regular butter contains 80-84% milk fat. The basic ratio for DIY heavy cream is one part melted butter to three parts whole milk. The ratio changes with low-fat milk or half-and-half. An immersion or handheld blender can be employed to get the right consistency to use in hot dishes like pancakes. But for baked goods like cream pies and cakes, use a light oil instead of butter, or the consistency will be off.