7 Tips For How To Dry Age Your Own Meat
The process of dry-aging meat is not as simple as slapping a piece of meat on a plate and just sticking it in the refrigerator at home. If it were that easy, dry-aged protein would not be among some of the most expensive cuts of meat to eat. Dry-aged beef is highly prized for its robust, beefy flavor and tender texture. If you are wondering why dry-aged meat is so pricey, it all boils down to the effort put into the drying process and final result — as seen in this TikTok video. Many people believe that the added flavor, time, and quality are well worth the extra cost. However, it's totally possible to save some coin and try the method of dry aging your own meat right at home.
In order for you to successfully age the meat of your choosing, there are preparatory techniques, choice of meat cuts, and equipment decisions to make. Why would you want to wait for meat to dry out? For the taste, of course! If you've tried dry-aged meat you know just how delish the results can be. According to The Butcher Shop, moisture inside the meat is drawn out and distributed elsewhere, creating a different flavor profile as the air circulates around it.
To get you started, we're sharing seven tips for how to dry age your own meat.
What is dry aging?
The entire process of dry-aging meat is meant to enhance the taste of it over a period of time. Before we get into all the little details regarding prep time, cook time, and meal time, first we have to break down what the dry-aging process actually is. While the entire undertaking seems simple enough, it's actually quite a time consuming and scrupulous method of curing meat. The good news is, it doesn't take high tech equipment or limitless funds to get started dry aging your own meat — just a little more patience and preparation is necessary.
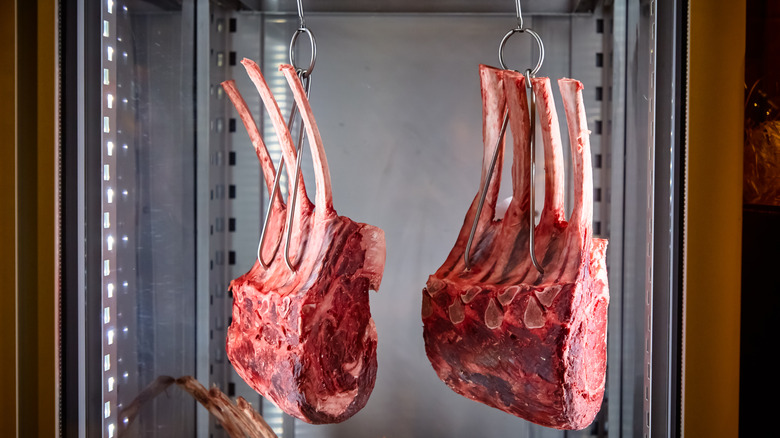
According to The Aging Room, the process of dry aging is when cuts of beef are exposed to temperature controlled environments for extended periods of time. During this time, as the cut of choice sits there, it loses moisture and dries out. As the meat loses moisture, the beef 'ages,' which concentrates the flavors. The loss of moisture in the piece of meat causes it to significantly decrease from its original size and develop a darker color. Instead of a bright pink tone, the final result usually produces a dark red color. As the physical changes are happening the flavor is developing as well. "As the moisture is pulled out, the natural enzymes in the beef break down the muscle over time which makes it tender," notes The Aging Room. The length of time that the beef is aged will depend on the desired level of flavor and tenderness.
Gather the right tools
With a little more understanding of what dry aging is, you can get started on collecting all the necessary tools to begin the meat-drying process. To dry-age beef at home you will need a cool, dry place to store the meat for an extended period of time. This is important to check off the list first. A dedicated location is crucial to the success of dry aging meat. Simply placing the meat in the refrigerator everyone opens and closes multiple times a day would not be ideal. The constant fluctuation in temperature will disrupt the drying process and potentially spoil the meat. Not to mention any other food aromas inside could impede the flavor of the beef.
You can certainly purchase a SteakAger system that is built just for this cooking method but it isn't a requirement. You can prepare to dry age meat with just the basics: a dedicated refrigerator, thermometer, sheet pan, fan, and wire racks (via BBQ In Progress). A food-grade container, plastic container, or box with plastic wrap inside could be used to hold the meat and yield similar results. Once the location is finalized though, temperature control is the next crucial step. Ideally, the meat should be kept at a consistent temperature of 32-40 degrees Fahrenheit with variable humidity levels. Any fluctuations in temperature, higher or lower, could result in bad bacteria growth or rotted meat. The fan is placed inside the refrigerator and used to maintain consistent and proper airflow all around the meat.
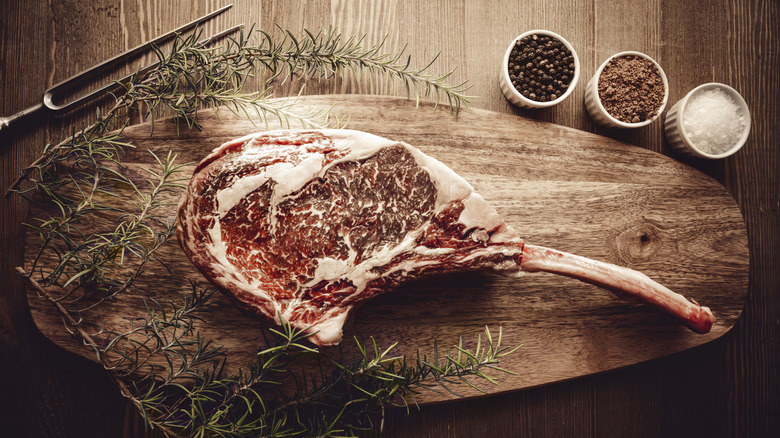
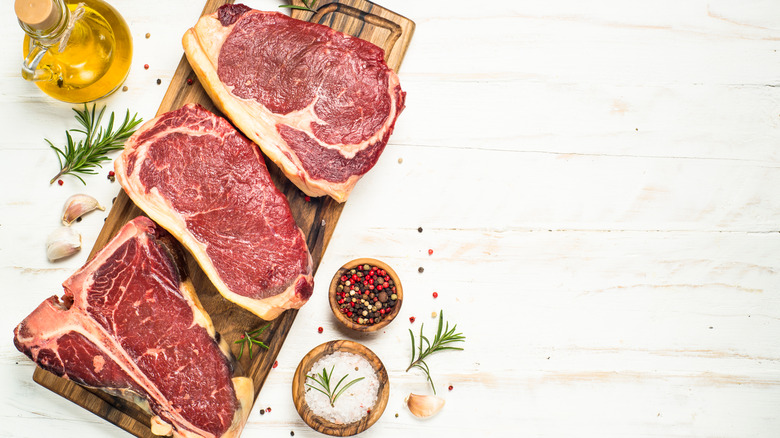
Choose your cut of meat
When dry-aging beef, at home or otherwise, the cut of meat you select is pivotal to your success. When looking at the various choices of meats you could choose from, stray away from selecting single cuts and smaller sized pieces. As the meat dries out, it will only get smaller in size. Then you have to consider the trimming that's mandatory afterward, once the drying process is completed. The impact the cooking process has on the cut of beef means beginning with a decent sized piece of meat is important. When choosing which meat to dry age, start by looking at high-quality cuts of beef.
Consider the type of beef that you are purchasing and choose a cut that is suitable for the intended cooking method. Preferably, you will want a pretty large size cut of meat with plenty of fat on it. The best cuts of meat to use for dry aging are meats like sirloin, ribeye, or loin (per Dry Ager). These cuts tend to have a good amount of fat marbling, which will help to preserve the meat during the drying process and add robust flavor.
Consider selecting cuts of beef that have been properly sourced from a reputable supplier and (of course) stored correctly. You should avoid any cuts of meat that have discoloration or blemishes, as these may be signs the meat is old or not fresh. Additionally, factor in the age of the beef you're purchasing. Younger beef will likely be more tender and have a milder flavor, while older beef has a more intense flavor and firmer texture.
Don't add too much seasoning
Less is more when it comes to seasoning your own dry-aged meat. According to Worthy Recipe, dry-aged meat does not require bold seasonings in order to lock in flavor. The use of marinades and intense flavoring will actually cover up the natural taste of the meat once it's done aging. In general, the longer the beef is aged the more intense the flavoring will be.
To properly season dry-aged beef, start by allowing the meat to come to room temperature before seasoning (and sealing) it. You may also want to use a sharp knife to make shallow slashes in the fat layer on top of the beef, which will help the seasoning to penetrate the meat more evenly. This will help the meat lock in moisture during the drying process. And this allows the seasoning time to penetrate the meat and helps blend the flavors together, which can enhance the overall taste and texture of the beef. For a simple seasoning, you can use a combination of coarse salt and ground pepper (via Steak Locker).
Make sure to season the meat evenly, including the sides and any crevices. Once the beef is seasoned to your liking, you can then secure the meat on a wire rack or put it in a vacuumed sealed storage bag before placing it in the refrigerator.
Seal in the flavor

To store dry-aged meat, it could be beneficial to wrap the beef in butcher paper, cheesecloth, clear wrap, or in a vacuumed sealed bag. Vacuum sealing is a popular method for storing dry-aged meat. The sealed container removes the air from the bag which helps prevent the growth of bacteria and extend the shelf life of the meat. According to My Chicago Steak, vacuum sealing the meat can help keep good flavors in and bad ones out. This is especially helpful if you are dry aging multiple cuts in the same storage container with different flavor profiles.
If you don't have a vacuum sealer, you can also use a food-safe storage bag to seal the meat. If you choose to use a storage bag, simply place the meat in the bag and use the water displacement method to remove the air from the container. To do this, close the bag almost all the way, leaving a small opening at the top. Slowly lower the bag into a container of water, making sure the water level is below the bag. The water will push the air out of the bag as it's submerged until it's completely out of air and fully under the water (via The Recipe Cookbook).
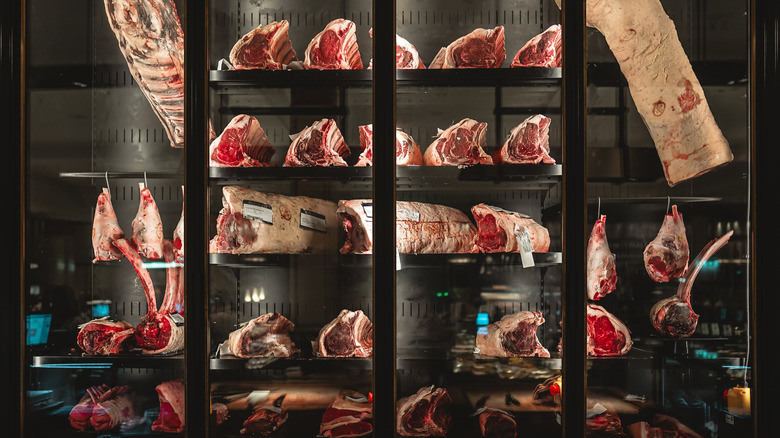
No matter which method you choose, it's important to label and date the container so that you know how long the meat has been stored for and when you should use it.
When the wait is over
How long do you wait to actually age beef? According to the Barbecue Bible, it takes a range of 14 to 21 days for dry-aged meat to properly dehydrate and flavors to develop. Although, some types of dry aged beef are aged for much longer. If the meat is removed from the refrigerator any sooner than the recommended allotted time, while you may taste the difference, it's not quite dried out enough. Ultimately, the length of time that the beef is aged depends on the desired level of flavor and tenderness. In general, the longer the beef is aged, the more intense the flavor will be and the more tender the meat will be. For a milder tasting meat, dry age it for a shorter period of time.
Determine the length of aging time for your own meat by considering the cut of beef you're working with and personal taste preferences. It's recommended to check on the beef every few days and rotate it if necessary. How do you know if it's done? You will want to look for beef that has a consistent, deep red color and a firm texture — when the right amount of days have passed. You should throw out and avoid any beef that looks slimy or has any "off" odors, as these may be signs that the meat isn't fresh.
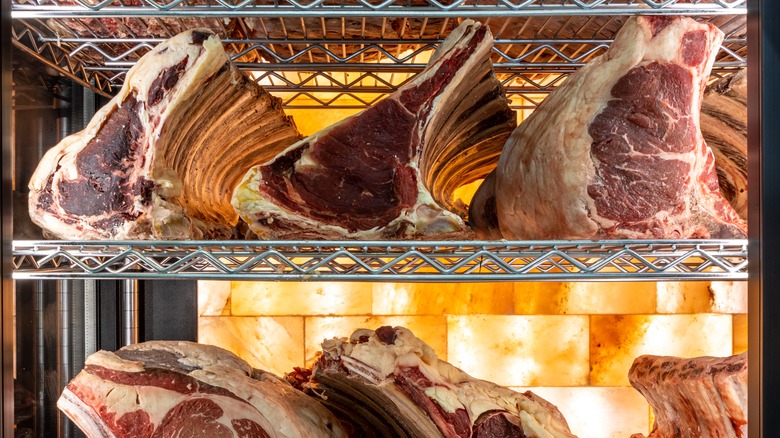
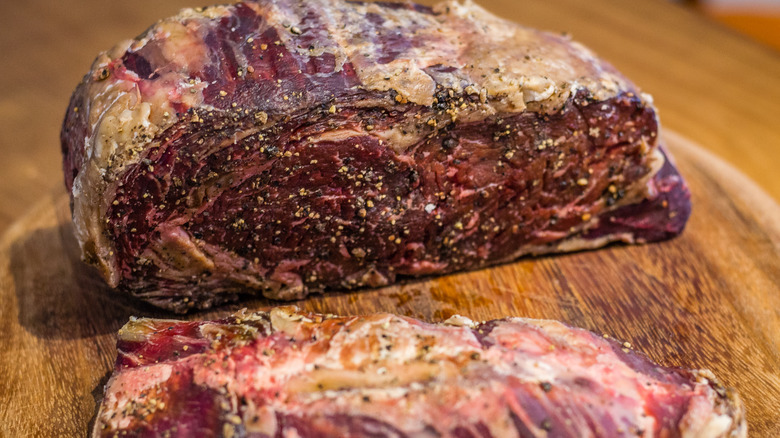
Check for signs of mold before trimming

Mold is common to see on the outside crust of the dry-aged meat, according to Traegar. In ordinary cases the mold growth is cut off and discarded before the meat is cooked. Now, telling if meat has turned to the point that it's inedible is best done with your eyes and nose. Intense mold through the meat layers and a putrid smell would be overwhelmingly hard to miss. Also, look for any areas of the meat that are discolored or have a texture different from the rest of the meat. These areas can be cut away before discarding the entire piece. To prevent your meat from rotting during the drying process make sure the airflow and temperature are consistent. Resist the urge to constantly open the refrigerator to check on it!
To trim dry-aged meat, start by identifying any areas of the meat that have excess fat or gristle. These can be trimmed away using a sharp knife. In the video "Trimming Dry Aged Beef," Ron from My Backyard explains how important using a sharp knife to trim is (via YouTube). Pro tip: Be sure to trim the meat as close to the surface as you possibly can without removing any of the desired meat. Once you've trimmed the excess fat and any undesirable areas of the meat, you can shape and cut the meat accordingly.
How to plate it
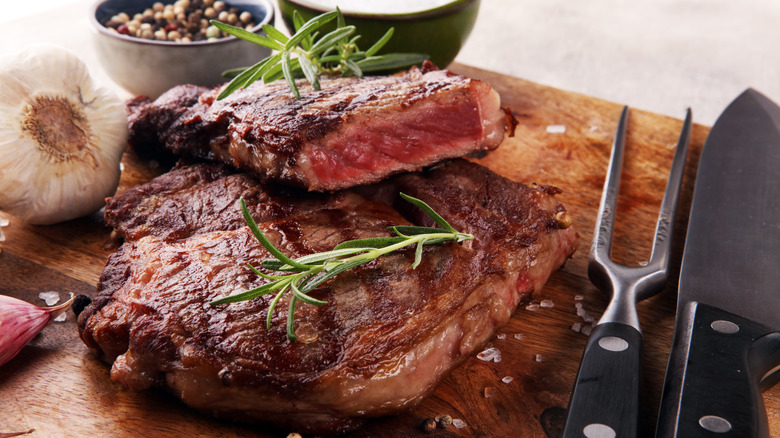
Dry aging beef at home requires patience and attention, but the end result may be worth it. Once the meat is completely done drying out and your patience has paid off, cooking it is the final step before tasting how successful the aging process was. To properly cook a dry aged meat, it needs at least 30 to 60 minutes of room temperature resting time, according to Gingin Beef. For a simple seasoning before placing in the plan, you can use a combination of salt and pepper, even a little olive oil. For a more complex flavor, coat the meat with a dry rub or marinade.
When it's finally time to enjoy the fruits of your labor, choose your cookware wisely. There are several ways to cook dry-aged beef and the best method will depend on the cut of meat and your personal preference. Some of the most popular ways to cook dry-aged beef include grilling, pan-searing, and roasting. Remember, it is important to not overcook dry-aged meat, as it is already quite dry and can become even tougher if cooked too long. Instead, aim for a medium-rare to medium level of doneness to ensure a tender and juicy bite. Be sure to use a meat thermometer to ensure the internal temperature of the meat reaches its desired level of doneness. No matter which cooking method you choose, it's important to allow the meat to rest for a few minutes afterward before slicing and serving — this allows the juices time to redistribute and the flavors to meld.