7 Tips To Get Perfectly Home-Cooked Chicken
We may receive a commission on purchases made from links.
You may have tried every single type of chicken recipe there is. Possibly flipped through every page in all the best cookbooks, maybe even followed every step-by-step on those pinned ones, but the end result still left your chicken, well, bland and dry. If this sounds like a chicken dish coming out of your kitchen, you are not alone and we're here to help.
Before you begin following the steps of the next chicken recipe your mouth is watering for, try adopting some new culinary techniques to help you cook a perfectly home-cooked chicken. With a few new pointers you can transform a dull dish into a delicious one. There is more to cooking a tasty chicken meal than just the right amount of salt and pepper. And making it at home is easier than you think!
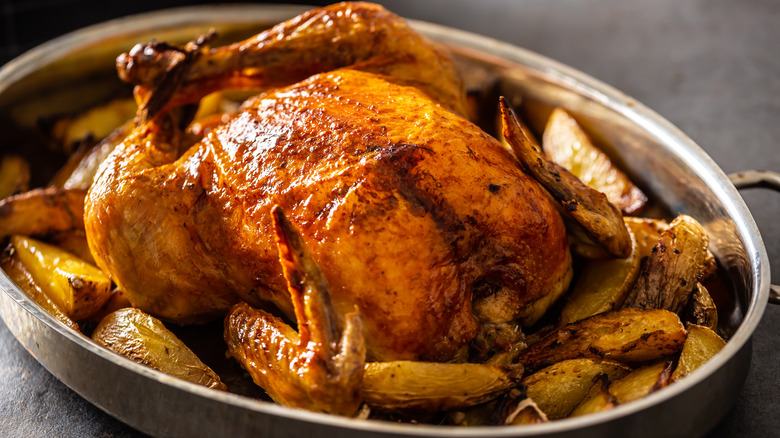
Celebrity chef Tyler Florence told Insider, "There's nothing I like to make at home more than a classic roast chicken. It's all about learning a few easy techniques to get an end result with crisp skin and a juicy interior. Once you've mastered it, I promise it will become a go-to." Fortunately for you, being an expert chef isn't required to feel confident about cooking chicken in your own kitchen. Sometimes whipping up a flavorsome chicken meal is accomplished with a few friendly tips — and we have the pointers to make sure you get a perfectly cooked chicken every time.
Give it time to warm up
When you're putting together a chicken dish, in a professional or home kitchen, preparation is important. For any recipe you are cooking, it's best to begin preparing the protein before it's baked, fried, grilled, or boiled. Do you preheat the oven before you use it? To achieve perfectly cooked chicken, allow the cuts of meat a similar warm up time, just without the oven.
For most culinary creations, raw chicken is pulled directly from the refrigerator at home for the meal and plopped into the pan. This ultimately leaves the poultry cold and stiff. Rather than immediately seasoning and cooking it right out of the door, let it sit. Before you place the chicken in the oven or even in the casserole dish, give it time to reach roundabout room temperature, according to MasterClass. "A lot of chefs will temper their meat," James Wilschke, sous chef at Bavel, told Food and Wine. The warm-up time allows the chicken to retain more moisture while cooking. Simply add at least 15 or more minutes to the recipe so the meat may rest on the counter before it's covered in spices, stuffed with a filling, or layered piece by piece into a dish. But don't leave it out too long. According to the U.S. Department of Agriculture, it's recommended that meat not be left out on the counter for over two hours. For rooms with higher temperatures above 90 degrees F, chicken should be out no longer than 60 minutes.
Marinate it long enough but not too long
If you are someone who loves to eat chicken, you know all too well how important a juicy first bite is. Let's take a minute to introduce you to the secret behind how you can achieve a tender piece of chicken for your next home-cooked meal. The key ingredient to no more dry chicken is wet marinating. Introducing flavor to a piece of poultry on the inside is just as important as seasoning its skin side. You can inject flavor using any combination of ingredients that's delectable to your taste buds. The most common marinade fundamentals usually consist of some type of oil, mixture of spices, herbs, and some acidic component like citrus or vinegar (via Chicken.ca). You can always stick to a favorite mixture recipe or experiment with your own blend.
As the poultry sits in the liquid, it is absorbing the flavor profile you have created. And when chicken is properly marinated, the flavor and juices should flow right out of it. A minimum of 30 minutes (if it's boneless) or longer in the marinade you have prepared is needed if you want the chicken to be tasty and juicy. Just try to keep the entire marinating time under 24 hours as per Bon Appétit. A short amount of time can make all the difference when cheffing up a home-cooked chicken, so don't be fooled into thinking more time is going to make it taste drastically different.
Soak it in a brine
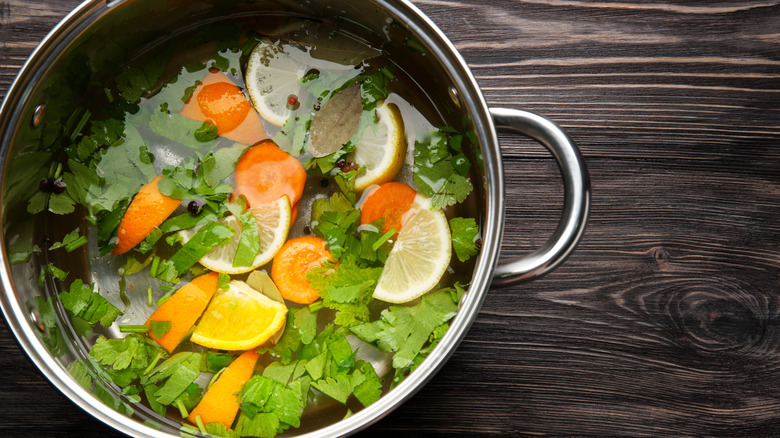
Marinating isn't the only culinary option you have for tenderizing chicken. In fact, chicken is such a versatile protein that it soaks up just about anything you put it in. With a bit more planning and slightly more labor, you can add incredible flavor to your next home-cooked chicken meal. If you want a juicy, moist chicken then brine, baby, brine.
You may be asking, what is a brine? There are three types of brine to choose from: wet, dry, or buttermilk. While any brining method can pique the palette, which one you choose depends on how much time you have. You can brine a whole chicken or various cuts of the bird all at once. For larger cuts of meat allocate at least a day and for smaller pieces at least an hour or so (via MasterClass). Pro tip: if you need to tenderize the chicken quickly, cut the meat into smaller chunks before brining.
Similar to a marinade, brines consist of a mix of seasonings and water. The key ingredient to any good brine though is the salt, as per The Culinary Pro. Why salt? The saltwater is how the chicken gets its taste! As the meat sits in the brine, the salt breaks down proteins allowing the juices to flow into the meat. For a very simple way to transform your next chicken dish that will surely impress the taste buds, follow the few easy steps on how to create a brine.
Let the bird rest
From start to finish of the recipe, you did everything right. When preparing and cooking the food, you properly seasoned the chicken and got it in the oven at the desired temperature for the right amount of time. Kudos, but it's not ready to be served just yet. When the chicken you're cooking finally reaches its proper internal temperature, there's still a little more cooking for the chicken to do. It's just done outside of the oven. Once the timer goes off, find some counter space for the pan full of chicken to be situated on before serving it and digging in.
Chef Aaron Robins of Boneyard Bistro in Los Angeles told Food and Wine, "Once you've hit 165 degrees, stop the heat and let it rest for a few minutes before cutting, so the juices redistribute themselves back through the meat." This waiting period is crucial to developing that flavor palette you worked so hard to create using either dry rubs or wet marinades and retaining moisture. The juices that were soaked up earlier need time to be reabsorbed so the homemade chicken is perfectly cooked and moist when you cut it open. If you decide not to wait and cut the chicken too soon, then those juices, all that flavor, the tenderness, will be lost on the cutting board. If your chicken is dry all the time this could likely be a reason. You're not resting the chicken long enough! Go ahead, give it a try next time.
How hot is your pan?
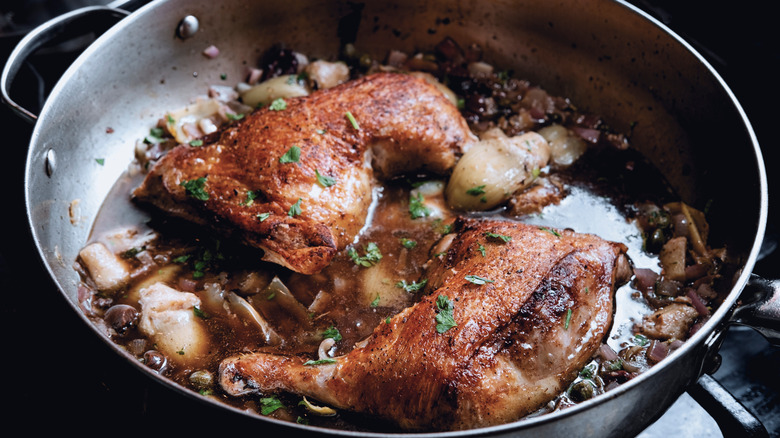
Not every chicken dish needs to be prepared in an oven. In fact, achieving a perfectly cooked piece of poultry is a possibility using just the stovetop. If using the stove, you'll likely want to achieve a perfect sear on the chicken. How to master it depends on a few factors. A detail to consider when cooking chicken on the range at home is how hot the pan is when you begin. When making chicken, any pan may do but not every heat setting will. So how hot does the pan need to be? Let's look at the chicken being prepared ahead of turning up the heat. The temperature of the saucepan will determine your end result.
Before you place the chicken in the frying pan or even turn the dial to crank the burner on for preheating, go ahead and check the chicken. You'll want to inspect if the chicken you are cooking is skinless or not. Thus, when frying chicken that has the skin attached, you'll want to begin with a cold pan and the opposite for a skinless chicken. Cooking a chicken meal with a pan that's cold is often practiced in French cuisine and guarantees the skin turns out crispier while the inside remains tender (via Tip Hero). The cold pan allows you to control the cooking temperature better, allowing the ingredients time to blend with one another as the heat rises.
Get a meat thermometer
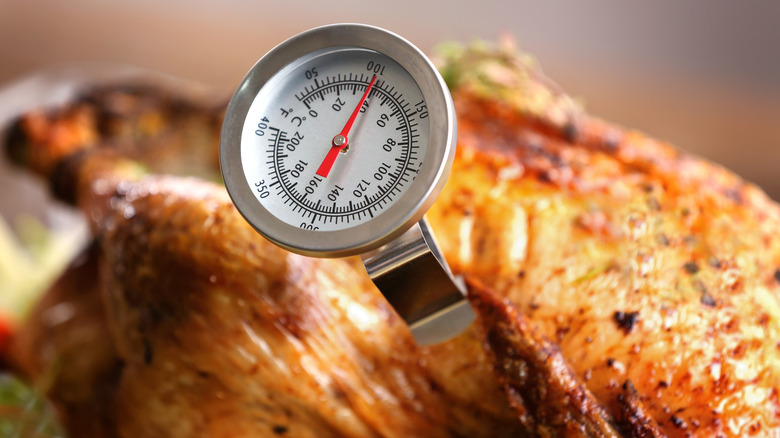
Cooking chicken at home isn't uncommon. Just how do you know what you are preparing is actually thoroughly cooked though? Definitely not by just eyeballing it. According to the USDA, chicken needs to be cooked to 165 degrees F internally in order to be considered edible. This isn't a metric someone could gauge by just using their eyesight or sense of smell. If you want perfectly cooked chicken every time, check the internal temperature using the right tools, like a food-certified thermometer.
Every home cook should have a reliable meat thermometer readily available. The kitchen tool is very useful. It allows the cook a chance to check for certain if the meat being prepared reaches its desired temperature before being served. If you have never used one before, don't sweat it, you'll quickly get the hang of it. As per Eat Right, there are several types of food thermometers for you to choose from. When shopping you may come across oven-safe, pop-up, digital, and instant thermometers. They mostly vary in usability as pop up thermometers are a one-time use tool that is meant to stay inside the food while it cooks, while the other type can be reused over and over. Either one will be able to read the temperature toward the end of the cook time. If you do not have one already, consider adding one to your kitchen as a food thermometer is useful for more than just poultry.
Make sure all the pieces are even
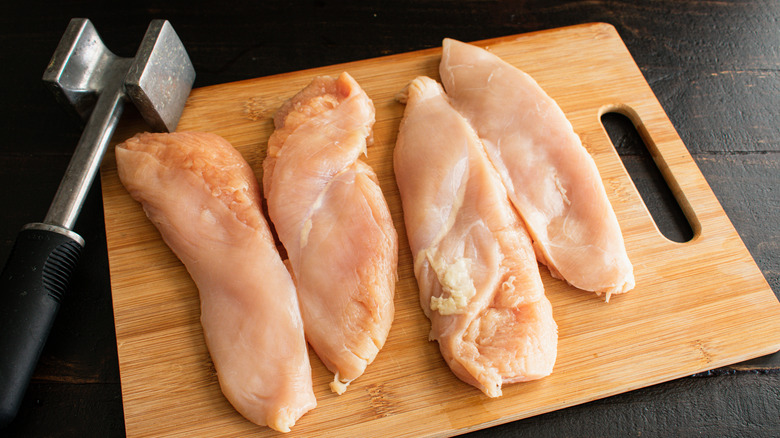
If you are cooking multiple chicken breasts then this tip is for you. Whether you are baking, frying, or grilling chicken, all the pieces should be about the same size. When the chicken pieces you are preparing are all different sizes, it's likely they will cook at all different times. This causes some of the pieces to be dried out, overcooked, or uncooked. For the perfect chicken, carefully divide and wrap each breast into parchment paper before cooking or seasoning the poultry. Once covered, use a meat mallet or rolling pin to apply pressure until the desired thickness is achieved. Doing this step before cooking chicken will make sure each one cooks evenly and in about the same duration (via Tasting Table). Take the guesswork out of cooking with chicken by making sure each piece finishes around the same time.
Whether you are someone who prefers boneless, skinless, fried, grilled, or the whole bird, avoid overcooked, dry, bland chicken dishes by trying some new techniques like brining, marinating, cool pan frying, and resting periods.