Cake Hacks Every Baker Will Wish They Knew Sooner
Cake is extremely popular, which isn't surprising considering there are so many types to suit your taste. According to The Food Timeline, the first cakes originated in ancient Egypt, but they were more like bread than the cake we know today. The word "cake" itself is said to come from the 13th-century Norse word "kaka." The forerunners to present-day cakes date back to the 17th century, but modern cake is a 19th-century product resulting from the rise of chemical leavening agents and the mass availability of other necessary tools and ingredients.
The variety of cakes available is seemingly unending, from red velvet to Johnny cakes to cheesecake to basbousa. While heading to the local cafe for a slice of carrot cake can be a fantastic treat, sometimes we crave a homemade dessert. And baking has the added benefit of making us feel good. According to a study by the Department of Psychology, University of Minnesota, Minneapolis, creative activities like baking help us flourish.
That may be true, but that doesn't mean we can't benefit from a good baking hack once in a while. These hacks will help your baking go more smoothly, from rescuing dry cakes to decorating tips to preventing a messy cake plate.
Follow the recipe
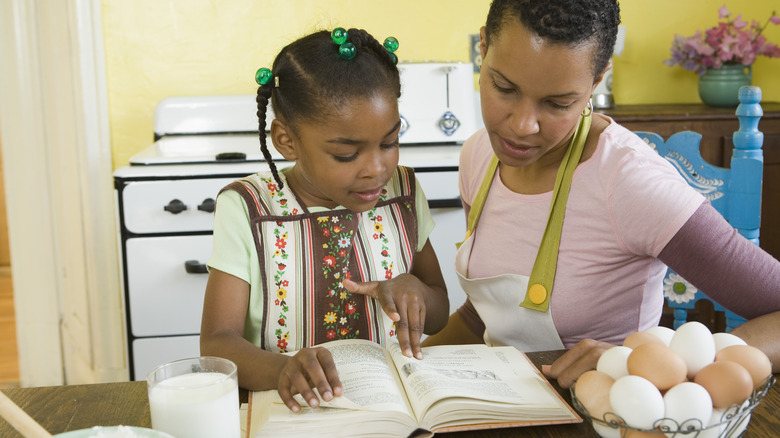
Baking is more chemistry than art. Follow your recipe, because every ingredient in a cake has a specific function. For instance, Science of Cooking explains that salt's role in cake is twofold: First, it helps sharpen the complexity of flavors. That's because, in small amounts, salt reduces bitterness and increases sweetness (per Science Focus), which will make the final result taste more balanced. Salt can also help whipped egg whites maintain their volume in some recipes.
So while diverging from your recipe (likely) won't result in any hazardous waste, you might end up with a mess or a decidedly untasty dessert. If you need or want to swap out some ingredients, you must learn what each ingredient in your cake does. According to Bakerpedia, there are two cake formulation categories: High ratio, in which the amount of sugar in the cake is either the same or more than the flour, and low ratio, in which there is more flour.
People usually look to swap out four main ingredients: flour, sugar, egg, and fat. In a batter-type cake, the flour helps with water absorption, and the gluten helps bind the batter. During baking, the starch gelatinizes, supporting the cake's structure. Sugar helps break down fat during creaming, and it helps with rising and browning while baking. Eggs help with volume and stabilization, and the air in fat assists in leavening. Once you understand how ingredients affect your recipe, you can better substitute them.
Boxed mix hacks
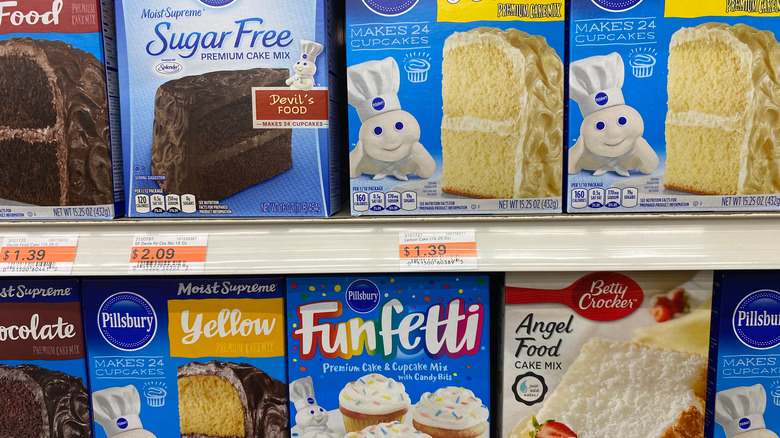
There's no shame in using a box mix, but if you're looking to take that powder up a notch, there are hacks to make boxed cake mix taste homemade. The average cake mix calls for water, oil, and eggs, but that doesn't mean you have to use those ingredients. If you use milk or buttermilk instead of water, your finished cake will be denser, just like from scratch. You can also use mayonnaise, yogurt, or sour cream. These will result in a more decadent, moist cake. For this hack, you can add a couple of tablespoons to the typical recipe or replace the called-for liquids with these ingredients. You can even melt ice cream or butter and use these instead of oil and/or water. For an extra-fluffy cake, try adding an extra egg.
Or maybe you're looking to play with the flavors of your boxed cake mix (or veganize it). In that case, substitute a 12-ounce can of soda pop for all wet ingredients, combine it with the dry mix, and bake. Suppose different flavor combos are what you want. In that case, you can also try changing out your water for different types of juice or flavored milks. Adding spices you already have in your cabinet can elevate the flavor of your boxed mix, too. Yellow cake mix quickly becomes spice cake with the addition of cinnamon, allspice, and nutmeg.
Vegan hacks
Whether you yourself are a plant-based eater or you're cooking for one, there are tricks for the vegan baker that will make the process go smoothly. It's essential to think about the function of each ingredient and how the cake is made. There are batter cakes, which include pound and layer cakes; foam cakes, which include sponge cakes; and chiffon cakes, which are a mix of batter and foam cakes (per Bakerpedia). How you make your cake will help you decide what you replace.
If your original cake calls for sticks of butter, it's a good idea to replace it with vegan butter and not vegetable oil. To avoid throwing off sugar ratios, use unsweetened plant-based milk. If your cake calls for buttermilk, you can make it with soy, hemp, or oat milk and an acid, such as lemon juice or apple cider vinegar. Use a ratio of 1 cup of high-protein plant milk to 1 tablespoon of acid. It will curdle in about a minute.
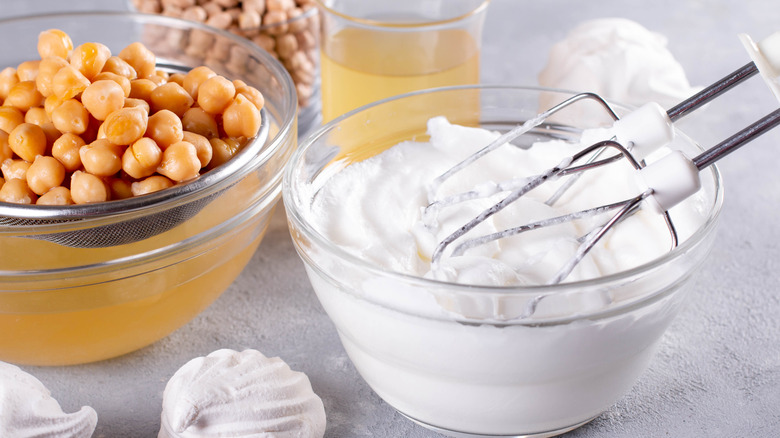
While flax and chia eggs are popular egg substitutes – and can be made by mixing these 3 tablespoons of these seeds with 1 tablespoon of water – they're better for batter cakes. If you're making a foam or chiffon cake, you're better off using aquafaba to make vegan "egg whites." Finally, be aware that in the U.S., many sugars aren't vegan, as they are processed with animal bone char. Certified vegan sugar, organic sugar, beet, and coconut sugar are plant-based.
Gluten-free hacks
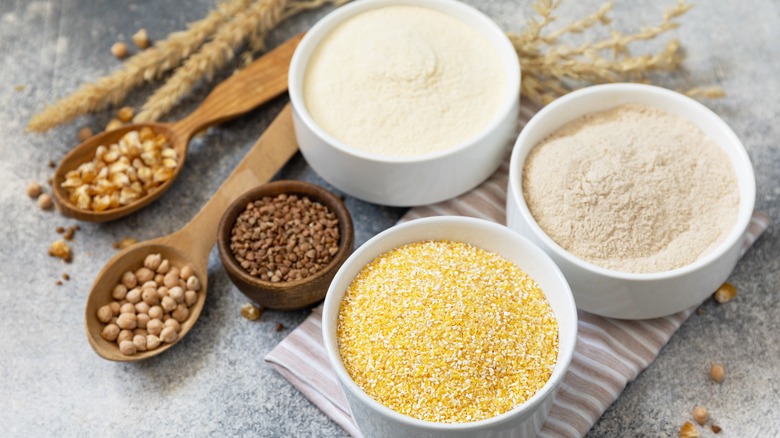
Gluten-free baking is becoming increasingly popular, but mastering it can take patience and perseverance. There are some tricks for the gluten-free baker to help you get there, though. First, since the gluten in the flour is what binds your cake together, you have to use a binding agent when making a gluten-free cake. You can try high-protein flours like buckwheat or chickpea or an additive like xanthan gum. There are also pre-mixed gluten-free flour mixes, and they are your friends. You may need to increase the amount of liquid you use in your gluten-free recipes.
But ingredients aren't the only things that need to be adjusted for truly delicious gluten-free cakes. For one, you should let your gluten-free batters rest for about 20 minutes before popping them in the oven. Doing so gives the flour more time to hydrate and improves overall structure (in regular cakes, gluten gelatinizes during baking and provides structure). Beyond Celiac states that baking times may change for gluten-free baking and can be a bit of trial and error. High altitude can also affect gluten-free baking. If you're in a high-altitude environment, up your oven temperature by 25 degrees Fahrenheit and use about 2 tablespoons less liquid than normal.
Moisture hacks
In the world of desserts, there's not a lot worse than dry cake. Fortunately, there are many ways to ensure you have a moist cake. One of those is mayonnaise. That might sound off-putting, but mayonnaise is mainly oil and eggs, two ingredients already in cake. Per Quaint Cooking, the origin of the first chocolate mayo cake recipe is contentious, and one story involves a $100 bribe for the recipe. The outlet states that while the cake is moist and decadent, it is still controversial, and many people just don't want to eat it. Another cake that caused a bit of debate is the chocolate sauerkraut cake. Atlas Obscura says that while the exact inventor of this "don't ask" cake is unknown, it's common to use vegetables to moisten cakes (think carrot cake). That's why sauerkraut works so well. The use of fermented cabbage likely dates back to moments in history when cabbage was a surplus commodity.
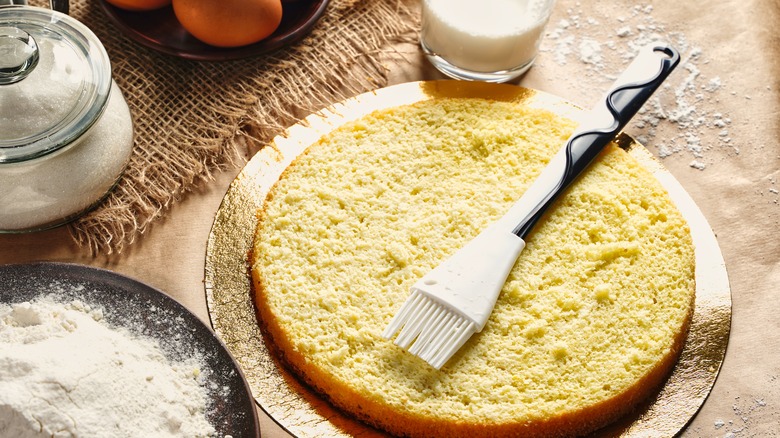
If you're looking for something less contentious, try another foolproof technique for moist cake: a cake soak. This hack is great because it is also a post-bake remedy for a dry cake. All you need to do is brush your cake layers with syrup, milk, or even coffee. The soak is great because you get to add moisture and flavor simultaneously.
Frosting hacks
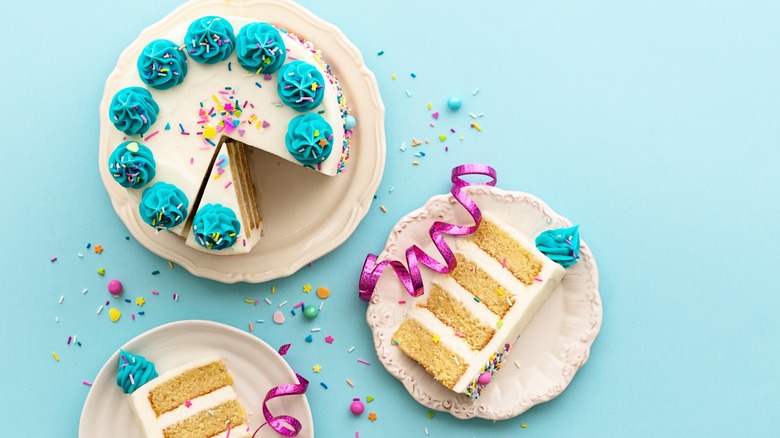
Yes, there is a correct way to frost a cake. First, know that Bakestarters mentions there are eight main types of frosting. For the home cake baker, the most well-known are probably buttercream, cream cheese, glaze, and ganache. There are a few tools that will make frosting your cake way easier; these include an offset spatula, turntable, serrated knife, piping bag, and piping tips.
Next, there are different styles of frosting: naked, semi-naked, and fully-frosted. A naked cake only has the top frosted (and frosting is sandwiched between the layers, if there are layers). A semi-naked one has a thin layer of frosting around it. And a fully-frosted cake is just that.
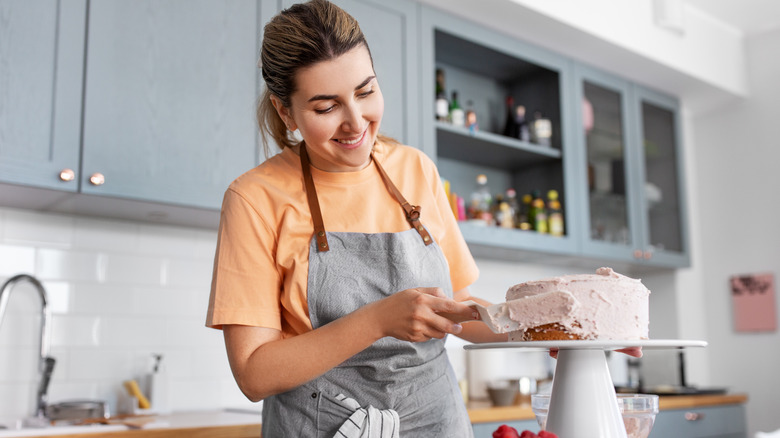
To frost a cake, use your knife to make sure the cakes are even and level. Next, put your first layer on the turntable and use your offset spatula to put a layer of frosting on the cake. Place another layer on top of it. Repeat until you've finished your layers. If you're making a naked cake, cover the top, and you're finished; otherwise, move on to the next steps.
Now you're going to put a crumb coat on your cake. This thin layer of frosting keeps crumbs from getting all over your final layer of frosting. If you're making a semi-naked cake, congratulations, you're finished. To make a fully-frosted cake, you should chill the cake so that the crumb coat sets. Then put another thick layer on the cake, and it's time to decorate.
Decorating hacks
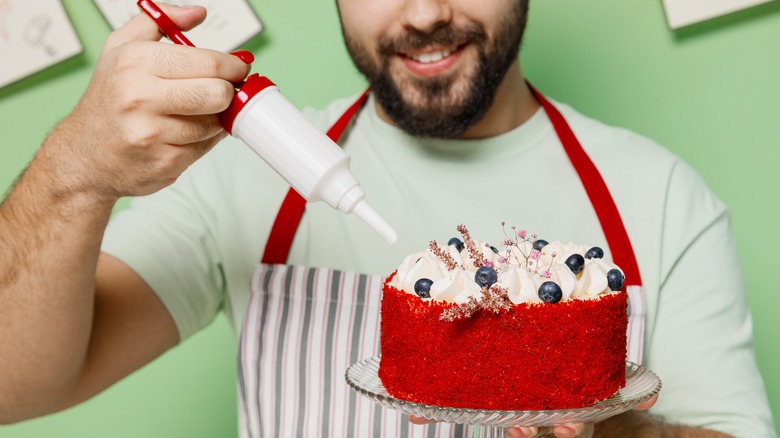
You don't need fancy items or a degree in art to decorate a cake. You can make a beautifully decorated cake with sprinkles, a spatula, cookie cutters, and a plastic bag. First, if you want an array of buttercream frosting colors, you can mix them in one bowl. Just color them in the correct order: yellow, orange, red, green, blue, and finally, purple. By using this order and combination, your colors won't muddy each other.
Place strips of parchment paper on your turntable before you put your cake on it and start decorating. These will catch the mess and keep your table clean because you can clean them up after you finish decorating.
If you're worried about your ability to make neat lines or create pretty flowers, use cookie cutters as stencils for your designs (per British Girl Bakes). You don't even need fancy tools to decorate a cake. British Girl Bakes explains that you can scoop frosting on with a soup spoon and then smooth it out with a regular spatula. You can then pour sprinkles along the bottom edges of the cake and leave as is, or push them up along the bottom and sweep off the excess once the frosting has set. Finally, you can use a zip-top plastic bag to pipe frosting. Just fill the bag, close it, and snip a small cut out of one of the bottom corners.
Storage hacks
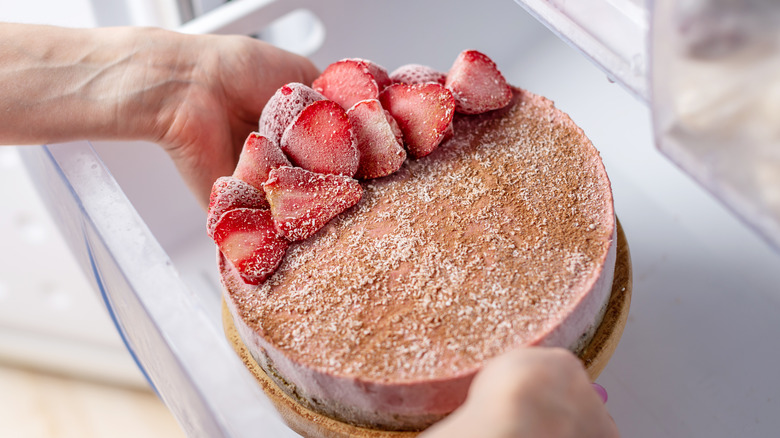
There's a chance you won't finish your cake the first time you serve it. No one likes dry second-day cake, but it doesn't have to be that way. One hack you can do is to use parchment paper on the leftover cake. All you need to do is stick a piece of parchment paper over the parts of the cake that are exposed to air. Doing so will keep your cake nice and fresh.
Pillsbury Baking has a few other tips. The company suggests only storing your cakes once they're completely cooled. It says you can freeze cakes that are frosted or unfrosted. Unfrosted cakes can last for about six months. You should thaw your cakes at room temperature for about two to three hours.
Storing your cake in an airtight container can cause it to absorb the frosting, so it's best to cover it lightly with something like foil or a cake cover.
Serving hacks
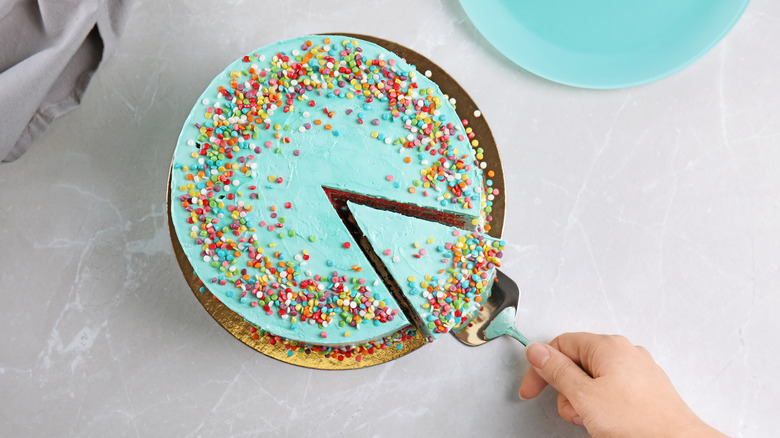
It's true that there's something very aesthetically appealing about a thick triangular slice of cake on a plate. However, that's not necessarily the optimal way to slice a cake. It's possible you've been cutting cake wrong your whole life. The better way is to cut horizontally down the middle and cut rectangular, thin pieces. Every piece will be a perfect bite, with an even ratio of frosting and cake. And this way, once you've served the cake, you can push the pieces together and keep your cake moist.
King Arthur Baking suggests the tools you use to cut your cake are also important, and it suggests using either a tomato knife or a serrated one that you've warmed up. These two knives create neater, prettier slices. Also, popping your cake in the fridge for about 15 minutes before cutting it will help you get cleaner pieces (without making your cake cold). You can even use dental floss to cut a cake – just make sure it's not mint-flavored.