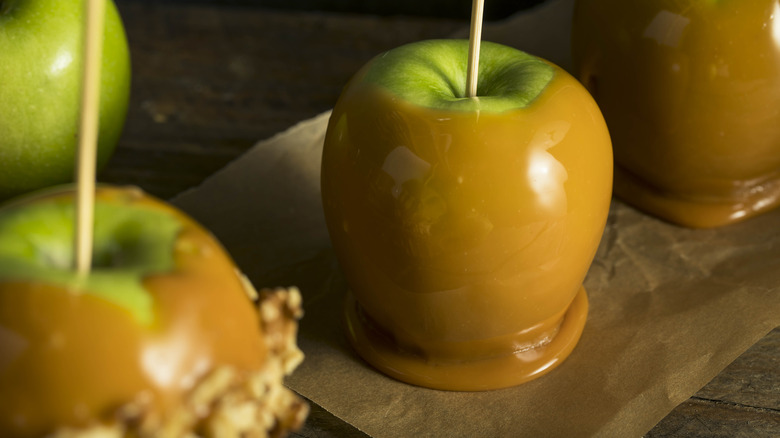
How To Avoid That Pesky 'Candy Foot' While Dipping Your Halloween Treats
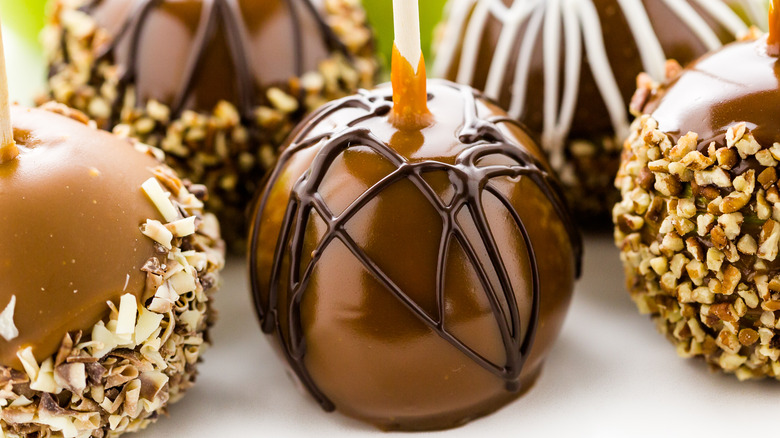
Spooky season is coming in hot, and it's time to start thinking about what you're going to make for this year's Halloween party. While packaged candy is the prize on every trick-or-treater's mind, a proper graveyard smash requires some sweet homemade candy treats like popcorn balls and hard candy apples. If you're planning to make a selection of dipped sweets for your favorite ghouls and goblins, and you want them to look professional, the key is to make sure you don't end up with a puddle of candy at the bottom of your treat when it's placed on a surface to cool. This is also known as a candy foot. If you've ever bought a professionally-made candy apple or a chocolate-dipped banana at the state fair, you might have noticed that they don't have those feet. That's because whoever made them knows the secrets to avoid excess candy coating: Don't over dip, and when a foot forms, break or cut it off and smooth over the broken edge.
Taking a minute or two after your treats have cooled to tighten up the look of your goodies is an extra step, but it makes all the difference when it comes to presentation — especially if you're planning to post some pics on social media.
Don't over dip — tap off excess
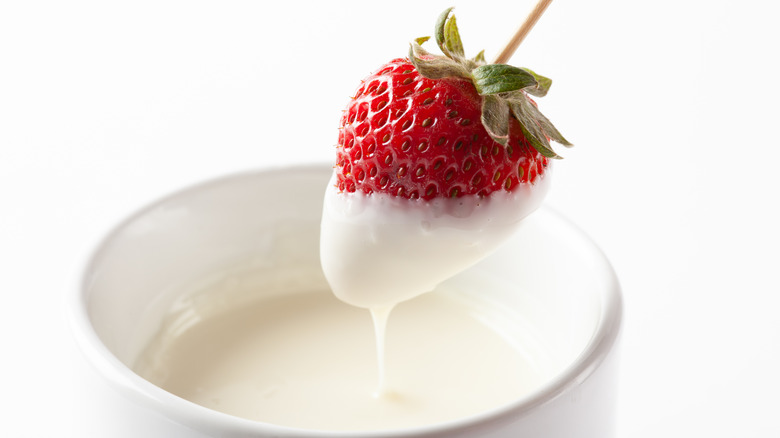
The first step in avoiding candy foot — or any decorating problem for that matter — is to prevent it from happening in the first place. If you don't want a foot to form, make sure that whatever you're dipping your treat into is at the proper temperature that's recommended in the recipe. When caramel, candy coating, and chocolate start to cool, they get goopy — and it's easy to get too much caramel on your apple, Rice Krispy treats, or cookies. Then, when you place the dipped treat on a piece of parchment or wax paper to cool, the excess dip pools at the bottom. If your dip is temperature-specific, keep a quick-read thermometer on hand and check the bowl of dip often. Remember that every time you dunk an object like an apple into the dip, you're also lowering the temperature, so you'll need to rewarm the dip periodically throughout the process.
Sometimes you just can't help getting too much dip on your candy treat — whether the candy is just kind of goopy or your eyes are bigger than your stomach. In either case, scrape or tap your treat against the side of the bowl before you put it down on the parchment to get some of the excess dip off before it sets.
Break or cut the foot off
Sometimes, no matter what you do, you can still end up with a candy foot after you dip all your baked goodies or candied fruit. In that case, all you have to do is remove the foot before you serve the treats.
If you're making candy apples or anything with a hard candy coating, wait until the coating cools to a hard crack, and then gently break off the foot — or use a pair of kitchen shears to trim the edges away. If there's an obvious flat and broken edge where the foot came away, heat up a metal spoon over the flame of a gas stove (or dip it into boiling water, then dry it) and use the back side to smooth over the rough edges. If you're fancy enough to own a home crème brûlée torch, you can also use that in quick bursts to melt the candy and smooth out the edges.
If your dip is soft, like chocolate, you can dip a paring knife in hot water to warm it up and then carefully trim away the foot. The warm blade will smooth over your knife cuts. The warm spoon trick will also work if your cuts still look jagged.
It may seem like a little extra work at first, but getting rid of the candy foot will make your treats look like you went to pastry school. Plus, you get to eat all the extra candy trimmings after you're done making everything look pretty.