Don't Make These Mistakes When Cooking Deviled Eggs
The popularity of deviled eggs can't be denied, as cookbook writer Anne Byrn discusses on Southern Kitchen. Common sights at picnics, potlucks, and parties, stuffed eggs were commonly served as appetizers as far back as ancient Roman times (per North Carolina Egg Association). The term deviled was used to describe them starting in the 19th century, referring to the spices used to add heat and flavor to the egg filling.
At its most basic, a deviled egg is hard-boiled, sliced in half, and then stuffed with a filling made from the cooked egg yolks and other ingredients, commonly using mayonnaise as a base. While that description sounds simple, there are a multitude of mistakes that can be made while crafting deviled eggs, and potential pitfalls in every stage of the cooking process. From choosing which eggs to use, to getting the cooking time just right, to finding the perfect garnish, a lot can go wrong. We've put together some of the most common missteps here — make sure to avoid these blunders the next time deviled eggs are on your menu.
Only using older eggs
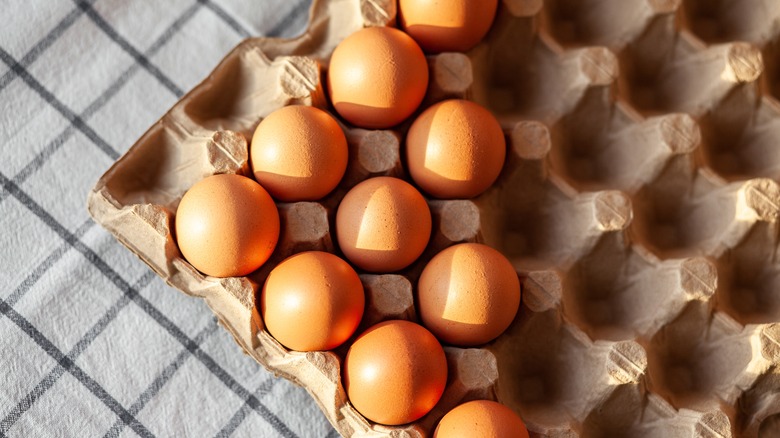
It's a widely accepted belief that when making deviled eggs, or hard-boiled eggs in general, older eggs are a better choice than fresher ones, as Cook's Illustrated reports. Proponents of this theory believe that older eggs peel more easily once they're cooked — as the contents inside of an egg shrink over time, it stands to reason that the shell would be less sticky and easier to remove (per Wired). But is there really truth to this truism, or is it folklore?
After an exhaustive, data-driven study, The New York Times discovered no discernible difference between peeling farm-fresh eggs or ones that had been sitting on supermarket shelves for weeks. And as Cook's Illustrated points out, older eggs are more likely to exhibit other flaws, like that unseemly gray-green ring around the yolk, or the odd divot that sometimes forms on one end of the egg. These may just be cosmetic defects, and won't affect the deviled eggs' taste or texture, but if you want your eggs to look as tantalizing as possible, opt for the freshest eggs you can find.
Not cooking extra eggs
No matter what you're cooking, it's always a good idea to prepare for any problems that may occur by having a little extra of everything just in case. When making deviled eggs, therefore, play it smart and make sure you cook a few more eggs than you need for your batch. As the Fresh Eggs Daily blog mentions, having additional eggs means you'll have more whites to choose from, in case some of your eggs end up broken or misshapen or are impossible to peel.
Using extra egg yolks is the best way to bulk up your deviled egg filling if it's too thin, as Pantry and Larder points out. Adding extra yolks can also help fix any flavor issues — if you've accidentally added too much of a certain ingredient or seasoning, you can use the yolks to mellow it out. You may not need to use the extras every time, but that just means you've got a few hard-boiled eggs to snack on later, so it's a win-win either way.
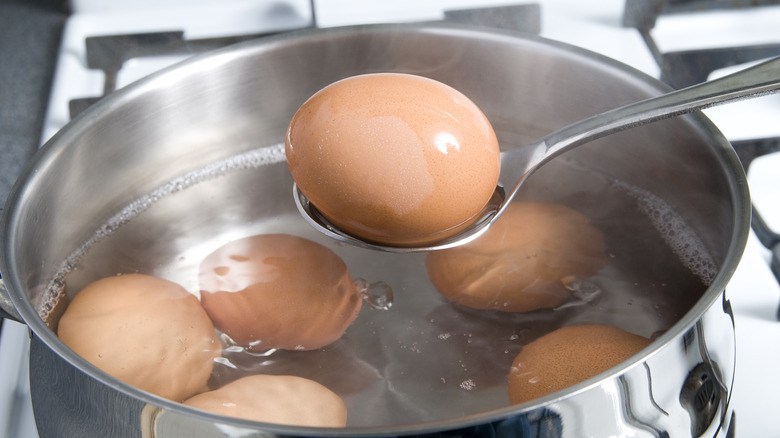
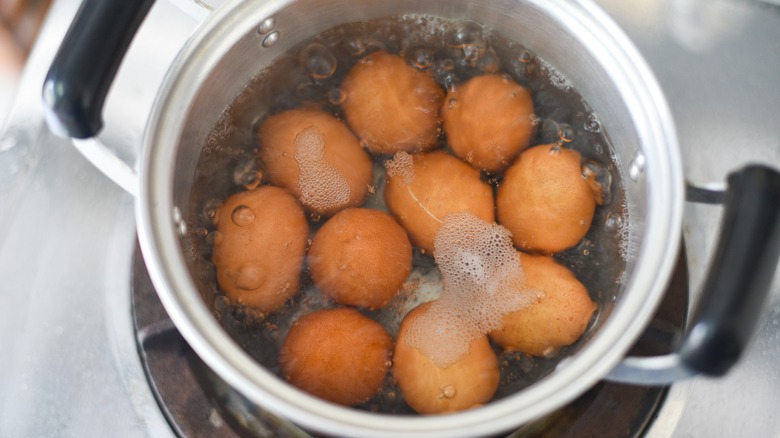
Cooking eggs straight from the fridge

If you want your eggs to cook quickly, safely, and evenly, don't boil them until they've reached room temperature (per Southern Living). Throwing cold eggs into boiling water can cause all kinds of problems. First, the sudden jarring rise in temperature can cause the shell to fracture, letting the egg white leak out into the water. Secondly, if the shell manages to stay in one piece, it'll be harder to remove once the egg is cooked. And third, the texture of the cooked egg whites are likely to be unpleasantly rigid.
Besides these advantages, room temperature eggs also cook a little bit faster (per The New York Times). A minute or so may not seem like a lot, but if you're making several batches of eggs, that time adds up. Southern Living mentions a helpful tip — as soon as you turn on the stove to boil water, put your eggs out on the counter. By the time the water's ready, the eggs will be ready, too, and it won't take up any extra time.
Dropping the eggs into the pot
Whether you're placing your eggs in a cold pot or adding them to water that's already boiling, always treat them with care, according to Insider. Even a tiny drop from your hand onto the hard surface of your cooking vessel can cause the egg to crack, allowing the white to seep out and water to enter the egg's interior, ruining it in the process. Besides risking the danger of a cracked shell, harshly dropping an egg can disturb its contents, leading to asymmetrical yolk placement. This can make the deviled egg harder to fill and less visually pleasing.
Instead of using your hands, place the eggs into the pot smoothly by using a utensil such as a slotted spoon or a spider. This tool allows you to release the egg gently without any impact against the surface of the cooking vessel, all while keeping the eggs' insides calm, composed, and centered.
Overcrowding the pot
If you're making a large number of deviled eggs for a crowd, it may be tempting to try and boil them all at once. But overcrowding your pot with too many eggs can lead to disaster, as Cuisine at Home points out. Water at a boil causes the eggs to move around, and the possibility of them banging into each other gets riskier the more eggs you cram into the pot. This can lead to lots of cracked shells, leaks, and ruined eggs.
To avoid that mess, make sure you're only cooking a single layer of eggs at a time. The number of eggs will vary depending on the size of your pot — just make sure they aren't on top of each other. This minimizes the likelihood that the eggs will collide with one another and cause damage. It may take longer to cook your eggs in smaller batches, but it'll save you time — and frustration — in the long run if every egg makes it through the cooking process in one piece.
Under or overcooking the eggs
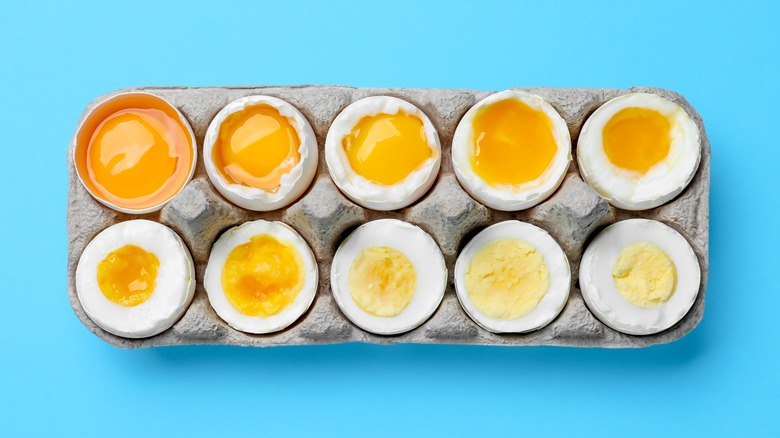
Timing is everything, and with boiling eggs it's especially true — an increment of a minute or less can be the difference between a perfectly cooked golden yolk and an inedible disaster. Because precision is key, having a timer is a necessary tool for perfectly cooked eggs, as Insider recommends. But how long to set that timer is a more complicated problem to solve.
While both overcooking and undercooking are undesirable outcomes, undercooking is an easier fix — if the shell is still whole, you can finish boiling an undercooked egg without any food safety risk, according to All Recipes. There's no way to turn back time and salvage an overcooked boiled egg, however, and once the yolk has turned green, it's too late. As culinary scientist Jessica Gavin explains, this unfortunate reaction occurs when sulfur from egg whites and iron from egg yolk come into contact for too long with too much heat, creating the unsightly ring around the yolk, as well as an unpleasant caustic smell.
Getting the timing right can be a challenge, as cooking times will vary based on factors like egg size and method. Insider recommends 10 minutes for fully cooked yolks — use this as a baseline, and adjust as needed. It doesn't hurt to use one egg as a test subject to see if you need to add or subtract a minute or two to get your perfect egg.
Not chilling the eggs after cooking
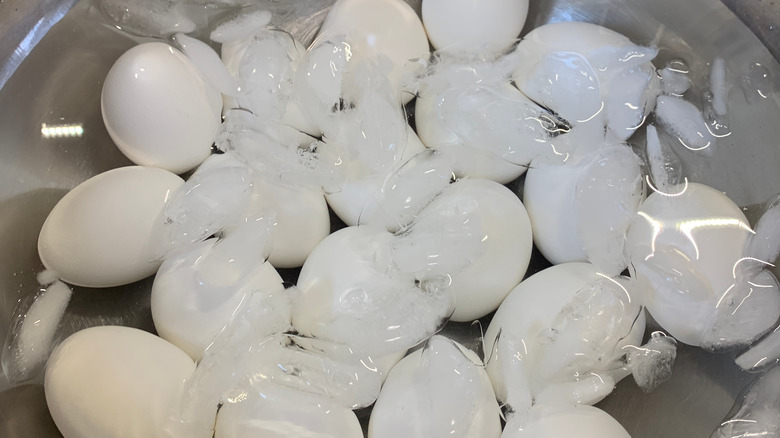
Once the kitchen timer dings and the eggs are fully boiled, it's time to get them out of the hot water or they'll keep cooking. To minimize the danger of them becoming overcooked and developing that dreadful green yolk, the next move is to bring their temperature down as quickly as possible, according to Egg Farmers of Canada.
This can be done a few ways, with somewhat different results. Creating an ice bath is a commonly recommended method — submerging the still-hot eggs into an extra cold environment certainly cools them down quickly. However, it may make peeling more of a challenge (per The New York Times). Such extreme cooling may not be necessary, as Lifehacker suggests; simply using cold, not icy, water seems to yield excellent results for both peelability and proper yolk texture.
So while it's generally agreed that eggs need to be cooled after cooking, if you'd rather save your ice cubes for cocktails, go ahead. In the end, it shouldn't affect the quality of your deviled eggs.
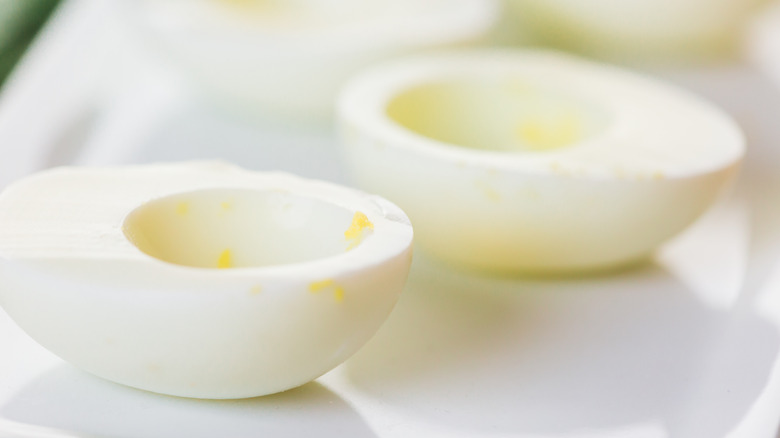
Not peeling the eggs carefully
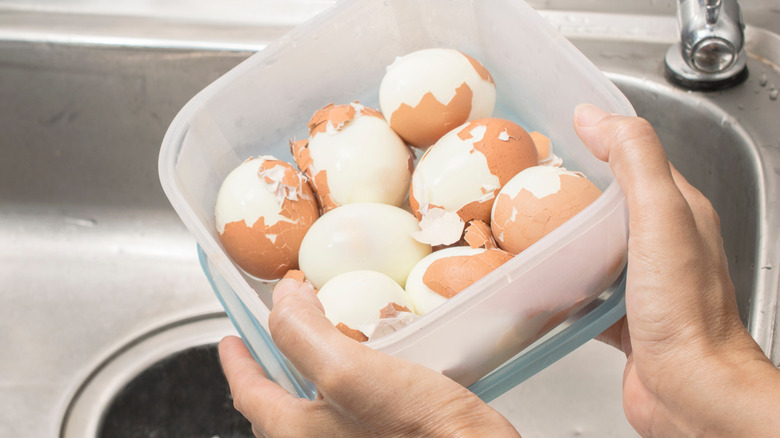
Now comes the part everyone dreads: peeling the eggs. It's the real moment of truth, when you find out for certain if all of the painstaking effort has paid off and you're able to remove the shells as painlessly as possible. There are several methods for peeling hard-boiled eggs that people swear by, and you may want to try each to see what works best for you.
Egg Farmers of Canada recommends the tap and roll method, which takes a gentle touch: Give the egg a few soft smacks against a hard surface like a cutting board, then roll it in both palms using a little bit of pressure until the shell comes apart. Running cold water over the eggs as you peel them is another method, particularly helpful if your eggs are still warm as it's easier on your fingers (per Martha Stewart). The running water gets between the shell and the egg white, making them easier to separate.
The shake method may seem gimmicky, but it's been endorsed by America's Test Kitchen — basically, you place chilled eggs in a lidded container with water and shake it until the shells are completely cracked. Another popular trick is to insert a spoon between the egg white and the shell, then twist the egg until they're completely separated (per Southern Living).
Leaving the yolk lumpy
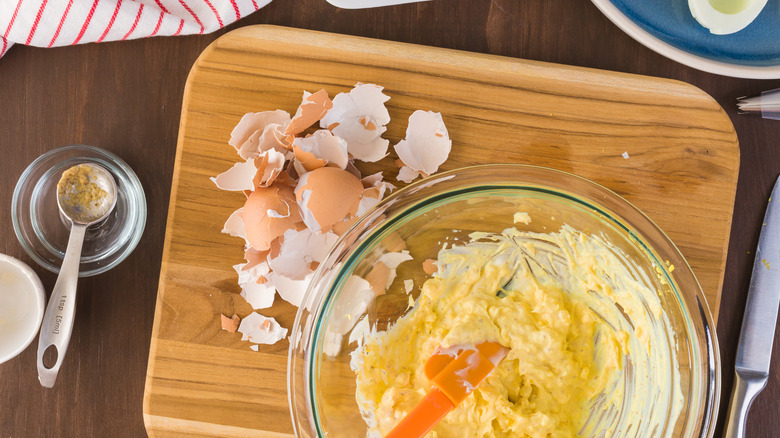
What makes a deviled egg deviled is the filling, and that filling starts with egg yolks. If you don't mind a more rustic, lumpy filling, it's easy enough to mash the cooked yolks with a fork and call it a day. But if you are looking for a smooth, creamy deviled egg stuffing, there are several methods you can use that will give your yolk mixture a silky, velvety texture.
After the yolks are scooped out of the boiled eggs, giving them a spin in a food processor, or something similar like a blender or hand mixer, will give them an airy smoothness (per Ruth Reichl). For a more hands-on approach, Getty Stewart recommends pressing the yolks through a sieve to achieve a similar fine texture. Once the yolks are smooth and lump-free, the rest of the ingredients can be mixed in to create a satiny, refined substance that's easy to pipe. The smoothness achieved by these methods ensures consistency in flavor and texture for each deviled egg.
Not stabilizing the eggs
Once the eggs are peeled, sliced, and the yolks have been removed, another problem presents itself: How do you keep the egg white bases stable? Whichever way you halve your eggs, the bottom of each base is round, which means it's going to roll around. This makes deviled eggs difficult to fill and garnish, and especially challenging to transport if you're bringing them to another location. No one wants to show up to a party with uneven, smashed-up deviled eggs.
One simple solution, per Ruth Reichl, is to give each egg white a trim. Cutting a small piece off the base gives it a flat surface, allowing the egg to stand up straight and stable. This little step will make the rest of the assembly process so much easier, as you won't be fighting to keep the eggs steady. A specialty deviled egg tray is another option — you can even make your own, using egg cartons and foil (per Real Life Dinner).
Making the filling too thick or too thin
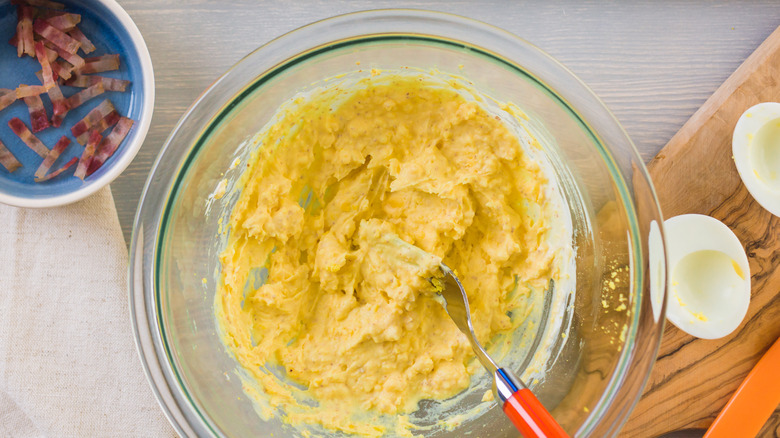
Deviled egg filling can be made with just about any ingredient, and in any flavor combination that can be conjured in one's culinary imagination. While the addition of mustard and cayenne pepper is what originally gave the eggs the deviled label (per Southern Kitchen), there's no need to stick to a specific set of ingredients or follow a single classic recipe. Experimentation can be part of the fun.
That said, with experimentation comes risks, and deviled egg filling does need to maintain a certain texture. As discussed on Today, if you add too much liquid to your filling mix, it can end up too thin, unable to hold its shape when added to the egg white base. Not enough moisture can make it unpleasantly stiff and gluey. Getting the right balance might require lots of little adjustments, so keep extra egg yolks on hand if you need to add thickness, and liquids like vinegar or citrus juice in case you need to thin it out.
Under or overseasoning the filling
Along with a balanced texture, deviled egg filling needs balanced flavor. One of the toughest elements to get right is the level of salt. If you taste your filling and find you've overdone it with the salinity, no need to panic — there are plenty of ways to fix it, as Blue Crystal Sky reveals. But before you get into triage mode, keep in mind that if you're tasting the filling for seasoning without the egg whites, you're not getting the complete experience. If you've followed these tips thus far and cooked a few additional eggs, you can use the extra whites as taste testers to get a more accurate reading on your salt level.
If the filling is still too briny, adding more mayo and egg yolks is the simplest way to adjust, without bringing in any new flavors. Other dairy items, like yogurt or cheese, can also mellow out that salty bite. Stronger flavored ingredients like hot sauce, mustard, and horseradish can also work by adding intensity to match the saltiness.
Too much seasoning can be an issue, but remember you don't want your filling to be bland, either. Southern Living recommends always having an element that adds tang or heat — in addition to the aforementioned mustard and hot sauce, keep items like vinegar and relish in mind to add extra dimensions of flavor to your filling.
Assembling the eggs too far in advance
Deviled eggs are delicate items, and they need to be treated gently while being cooked and assembled. Even once they're finally put together with the base, filling, and garnish all perfectly in place, there's still a risk they can be ruined. As Southern Living points out, deviled eggs can be made in advance, but if you prepare them too early you'll end up with odorous whites. The filling will lose its luster, too, and as its moisture evaporates a dry skin can form over the top.
To ensure your deviled eggs are served at their best, store the whites and the filling separately until just before you need them. Keeping the filling in a sealed plastic bag will prevent it from drying out. The whites should also be refrigerated in an airtight container or covered in plastic wrap, with care taken to make sure they don't get mushed together, so they hold their shape.
Ideally you want to fill and garnish your deviled eggs at the destination you're serving them, as transporting them fully formed risks squished and sloppy eggs by the time you reach the party. If that's not an option, The Pioneer Woman explains you can store prepared deviled eggs relatively securely in a lidded container, and there are even specially designed carriers made specifically for deviled egg conveyance.
Not piping the filling neatly
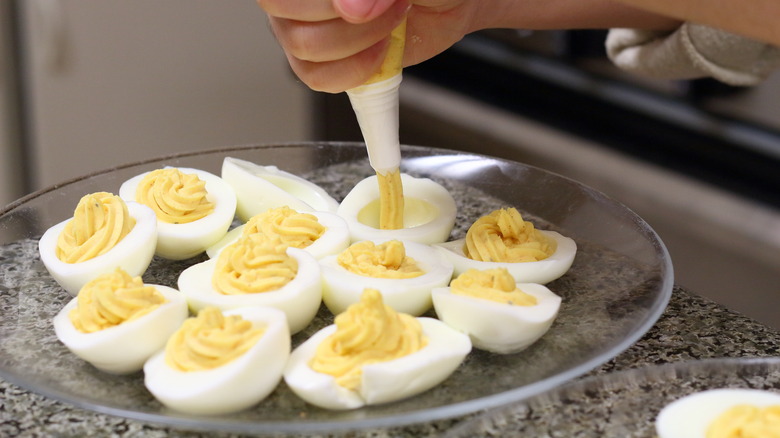
If you're not too worried about appearance, deviled egg filling can be added to the egg whites with a spoon. But if you want to create the most visually impressive deviled eggs possible, piping the filling is a must — and it's easier than spooning, according to Ruth Reichl. Frequent bakers may have pastry bags and piping tips in their kitchens already, and these are great tools to use to get that polished, professional look. Depending on the texture of your filling, you'll want to make sure you choose a piping tip that's the right size and shape so that any solid filling ingredients don't get stuck, as Striped Spatula points out.
No baking tools in your kitchen? Not a problem — a plastic bag works just as well. Spoon your filling into the bag, cut off one corner, and pipe away. You can even cut cross-slits into the corner of the bag to emulate the effect of a star-shaped piping tip, giving your deviled egg filling a ruffled, wavy appearance (per Leaftv).
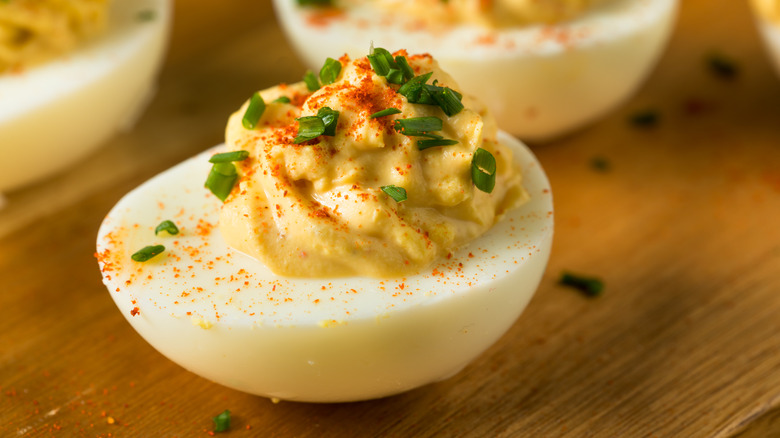
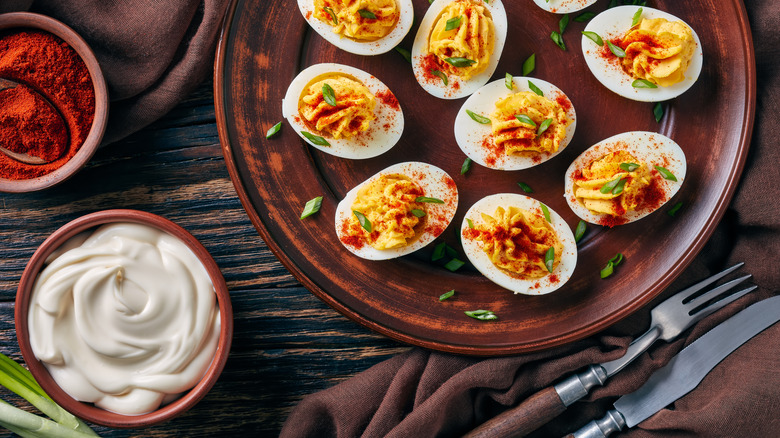
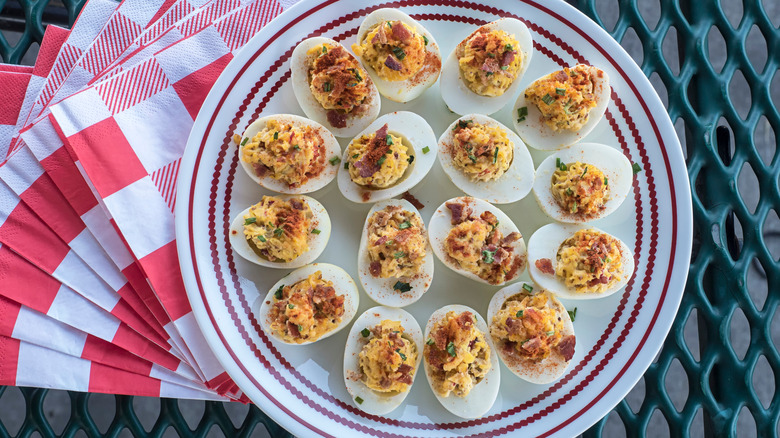
Not garnishing the finished eggs

A sprinkling of bright red paprika is the traditional topping for deviled eggs (per Today), but there's no need to limit yourself when it comes to garnishes. The possibilities are truly endless, and a well-crafted garnish can elevate deviled eggs to the next level, adding a flavor boost, texture, and visual flair. Basically, any food item small enough to fit on top of an egg is fair game.
Similar to the way paprika is used for classic deviled eggs, other dried spices can be flecked atop your yolk filling. Chili powder can enhance spicy deviled eggs. And fresh herbs can add a vibrant punch of flavor. Garnishes can consist of one simple ingredient, or if you're feeling particularly inspired, you can combine multiple toppings, creating a more complex embellishment to your eggs, as The Pioneer Woman demonstrates. Not garnishing your deviled eggs is a missed opportunity.