It's A Big Mistake To Leave Your Bread Dough Uncovered At Any Point
When it comes to getting bread right, every step matters. It matters how much you mix the ingredients and what order you mix them in, and it matters how long you knead the dough and how exactly you do it. Breadmaking isn't hard, per se, but it does require precision — even during the steps where you aren't actively doing anything. Although proofing is just setting aside the dough to rise before baking, how you proof bread can greatly affect your final loaf.
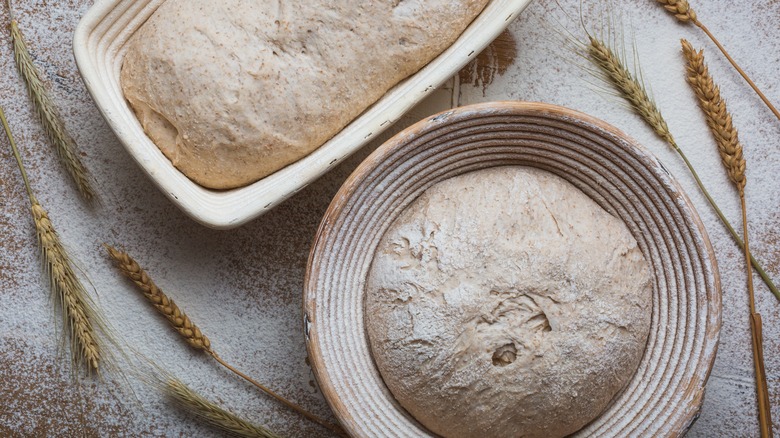
One of the most important proofing conditions to consider when making bread at home is that too much air exposure can end up ruining your loaf. Typically, bread dough is set aside to rise twice. The first rise is generally called "bulk fermentation" and takes place after all the ingredients have been mixed and the dough has been kneaded. The second rise is called "proofing" and takes place after much of the dough's air has been lost during shaping. The bread dough should not be left uncovered during either of these rising stages (often interchangeably called proofing). If the dough has had too much air exposure, this could be a reason your bread isn't rising, and your final loaf can end up dry.
Air exposure can ruin your loaf
The proofing, or fermentation stage, is when the yeast releases carbon dioxide as it consumes the starches and sugars, causing the dough to rise. There are several considerations for your proofing conditions to get this reaction right, like temperature and time, that involves some guesswork. However, this isn't the case when it comes to using a covering.
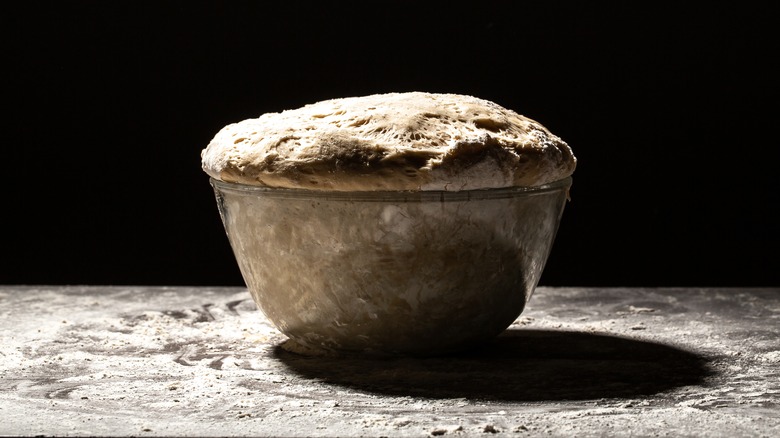
When dough is left uncovered, the water molecules on the surface begin to evaporate as the dough comes into contact with the air and it will start to dry out from the exposure. Evaporation occurs when there is less moisture in the air than in the dough, allowing the water molecules to move from the dough into the air, so the drying out will happen more quickly in low-humidity environments with lots of air exposure.
This dryness manifests as a coating on the dough, which gives it a disagreeable texture and makes it more difficult to shape it properly, as the dry skin makes the dough less malleable. This skin also impedes the dough's rise, meaning that the exposed dough will not rise as well as dough that has been covered. If you allow your dough to be exposed to air for a long time, you'll end up with a loaf that is dry and overly dense, rather than one that's moist and light.
The best covers for proofing your dough
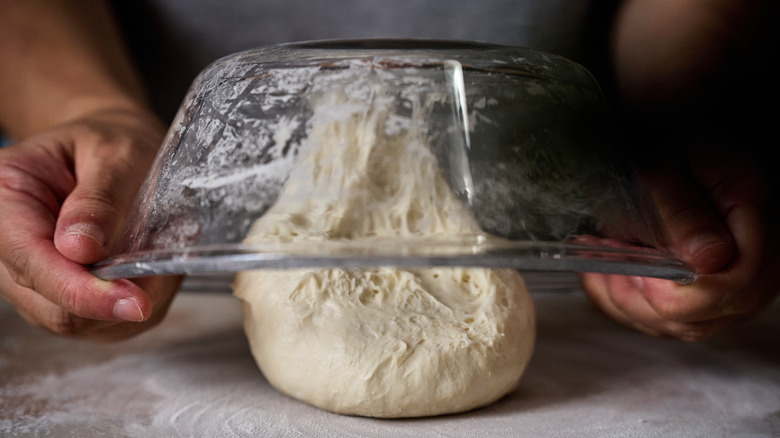
Nearly every baker will tell you not to expose your rising dough to air, but what you should use as a cover for proofing leaves room for discussion. Dish or tea towels are common, easily accessible covers, but the porous material and loose fit will still let in air. You're looking for a cover that will cut off the dough's air contact. Plastic wrap is a common solution that creates the right barrier and lets you observe the dough as it rises, but if you don't have any (or just want a more eco-friendly option), it isn't the only proofing implement to which you can turn.
Large, deep reusable plastic or glass containers that have snap-on lids will carry you through your baking career and work well for the first rise, where the dough doesn't have to maintain a certain shape. You can also use a shower cap at any stage, since the elastic band will cling to whatever container you're using (and a rubber band can be used if it doesn't). If you're really dedicated to this culinary craft, you can also buy special proofing bags. If you'd rather find the simplest solution, though, you can always set your bread dough on a clean surface and set the bowl on top of it. As long as the dough isn't exposed to air, it can proof in peace.