The Key To Tempering Chocolate
If you've ever broken a bar of chocolate (and let's face it, who hasn't), then you'll probably recognize that perfect cracking sound that occurs: It's clean, crisp, and delightful. This utterly satisfying snapping sound can only be achieved when chocolate has been tempered properly.
While this is easy for chocolatiers like Jacques Torres to do because they have the proper equipment, it can be a harder task for home cooks, when they are limited to a few kitchen tools. However, there is no need to despair because Mr. Chocolate (aka Jacques Torres) has an ingenious and foolproof method for easily tempering chocolate at home. All you need are a few basic tools (hair dryer included), good quality chocolate, and the desire to have some fun. (And an appetite for chocolate never hurts either.)
Watch his video for a step-by-step explanation, plus some extra tips and points he mentions below. Good luck and enjoy!
Why do we temper chocolate?
If chocolate isn't tempered, it will be missing more than the lovely cracking sound. It will be grainy, sticky, and won't set properly. Basically, you have no choice but to temper.
What can you do with tempered chocolate?
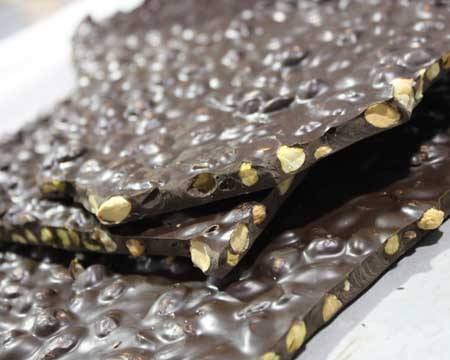
Pretty much anything. You can dip dried fruit, pretzels, coffee beans, or candy in it (Torres sells chocolate-covered Cherrios that are somewhat addicting). You can also use it to make chocolate bark, simply combine the chocolate with whatever ingredients you'd like mixed in — pistachios, almonds, walnuts, or pieces of dried fruit.
What do you need at home to temper chocolate?
"To ride a bike, you need a bike. To work with chocolate, you need these tools." Torres says that there are three tools you need to successfully temper chocolate at home (aside from a microwave, which can be a good tool). First, he recommends using a glass bowl and microwaving the contents in 20-second increments and then stirring it. The chocolate will start melting and then, when it's about one-half to two-thirds melted, he says to pour the contents into a cold bowl (to stop the heating process). Then, using an immersion blender — the first tool — mix the chocolate until it reaches about 88 degrees. To measure the temperature, you need your second tool, the laser thermometer.
Because the laser thermometer only reads the top layer, it's necessary to mix the chocolate so that you can get an accurate read.
Lastly, if you find that the temperature is dropping below 88 degrees, then whip out your hair dryer — yes, your hair dryer — and use it to bring the temperature back up. Also, if you removed the chocolate from the microwave before it was hot enough, you can always use the hair dryer to bring the temperature up.
What type of chocolate should you look for?
Torres recommends chocolate with a lot of cocoa butter because that's what helps give melted chocolate its fluidity. Also, it's easier to buy chocolate that is in smaller pieces so that you don't have to break it up yourself. Most chocolatiers, himself included, sell pistoles that are perfect for melting.
What to do after dipping?
Place it in the refrigerator for 10 minutes so that it can properly cool. (This is when crystallization will occur.)
Where's the best place to store your chocolate or chocolate-covered goods?
"Your stomach," according to Torres. But if you find yourself with leftover chocolate, then he recommends storing it in a cabinet away from any heat, i.e, not above your stove or next to your oven.
What to do with leftover chocolate?
Make lollipops! Buy some molds online at Life of the Party and make these easy treats that are perfect for kids or holiday presents.
His last words?
Remember that this is supposed to be fun and that even professionals make mistakes, but, as Torres says, repeating our work a few times and learning from these mistakes is what allows us to get the feel of it.