How To Roll Your Own Sushi Like A Pro
If you are the kind of person who likes to go out for sushi often, there is an alternative that will not put as much of a dent in your wallet: Making your own sushi. While it takes years to learn the art and craft of professional sushi masters, it is relatively easy to make sushi rolls at home that will satiate your cravings in a pinch.
You do need a few specialty tools, but they are inexpensive and easily available. The most important item you will need is a sushi mat. These are traditionally and commonly made with bamboo sticks that have been laid parallel and tied together into a mat. Parchment paper or tea towels will do, but if you foresee yourself rolling a lot of sushi, it is worth it to get a sushi mat. Plastic sushi mats are also available these days, which are very easy to clean and almost infinitely reusable. A dedicated rice paddle is preferable for making sushi, as they are made specifically to scoop and spread rice.
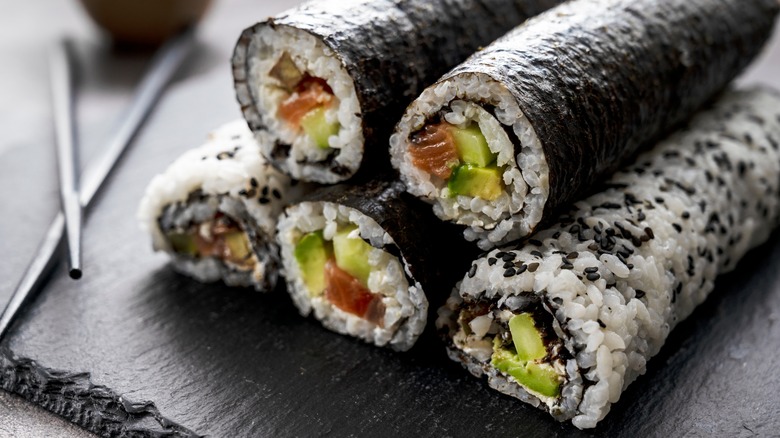
In terms of specialty ingredients, you will need seaweed sheets (called "nori" sheets) and short-grain sushi rice. Regular jasmine rice or basmati rice will not work as it does not have the starch content required for the rice to stick together. As for fillings, any of your favorite ingredients will do. However, if you plan on using raw seafood, make sure they are sashimi-grade so that they are safe for consumption.
Just keep rolling
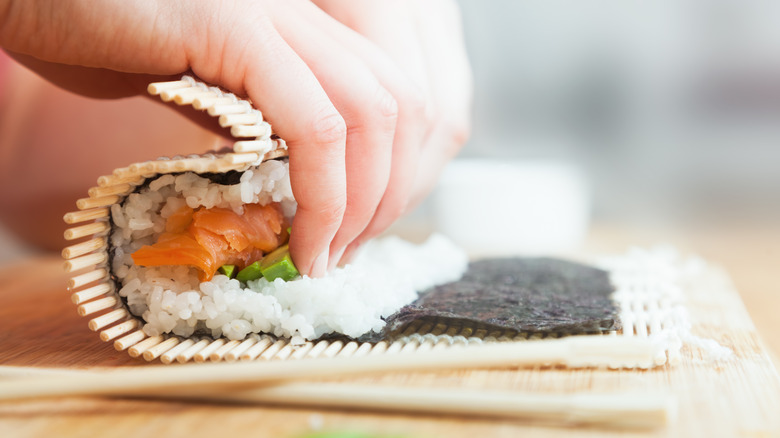
To assemble, lay the clean sushi mat on your work surface. Then, lay a sheet of nori, facing the rough side up. Use the rice paddle to scoop the cooked sushi rice then spread it on the nori sheet in a thin layer, no more than a quarter of an inch thick. Leave about an inch of empty space on the far end of the nori sheet.
Once the rice has been layered on, begin arranging the filling on the side closest to you. Whatever filling you use, make sure that it is cut long and thin into baton shapes, also called the Julienne cut. This is so that the sushi rolls are much easier to eat later. Remember to not overstuff the sushi roll as it will then be prone to falling apart when rolling and eating.
Lift the end of the mat closest to you, along with all the ingredients you just layered onto it. Use your fingertips to tuck the fillings in while rolling the mat, and gently use your palms to compress the roll. Keep rolling, tucking, and compressing, all the while keeping the mat out of the way. Once you get to the end, run a wet fingertip along the inch of seaweed you left bare earlier so that it will stick to itself. One final roll and you are done.
Extra tips for perfect sushi rolls
One of the most useful tips for sushi rolling is to keep a small bowl of water nearby. Dip your fingers in it periodically while rolling so that rice does not stick to them, though make sure they are not too wet. Also, if you are using a bamboo mat, line it first with a sheet of plastic wrap so that it is easier to clean up later. Then, when rolling the sushi, make sure to separate it from the ingredients as you are rolling.
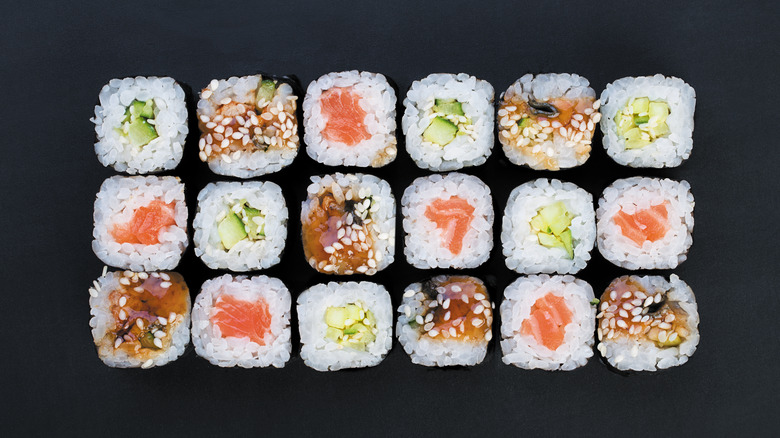
You will likely not be an expert at sushi rolling after just one attempt, but keep at it to build muscle memory. Use cheaper ingredients like imitation crab and cucumber strips to practice with. Once you get better at your rolling skills, you can upgrade your sushi roll fillings and even use more expensive raw fish. You can also try the "inside-out" sushi roll, or uramaki, where the rice is on the outside of the nori. Have fun too with different topping ideas, like rolling the outside of the sushi in furikake or tobiko (fish eggs) for extra pops of flavor.