Step-By-Step Guide To Making Your Own Wedding Cake — And Why You Should Consider It
Step-by-Step Guide to Making Your Own Wedding Cake

You may think that we're mad for suggesting that you make your own wedding cake. There's no doubt that undertaking this baking challenge is nerve-wracking. However, if you're a keen and confident baker, who is having a relaxed, rustic wedding, then a homemade wedding cake could make the most spectacular centerpiece.
Decide the Design

Before you start baking your own wedding cake, you need to have a clear idea in your head of what you're aiming for. Try to avoid dreaming up a complex, extravagant, and consequently unattainable creation, as you'll only be left disappointed by what you do manage to achieve. Something, simple, elegant, and maybe a little rustic is what you should really be aiming for.
Choose the Cake

Wedding cakes were traditionally fruit cakes because they're sturdy, and they last. However, most of us would much rather eat a chocolate or vanilla cake on our wedding day. Thankfully, this is totally possible. When you're looking for recipes, you need to find one that makes a moist, sturdy, and sweet cake. If no recipe you've used before springs to mind, try out a few different ones to see which works best.
Prepare Yourself

Baking a wedding cake is nerve-wracking and time-consuming. It's not something that can be left to the last minute. Set aside at least three days to make your cake, and make sure that you're starting with a clean kitchen, all the equipment and ingredients you need, and maybe even an assistant to help you out, keep you calm, and supply you with coffee.
Cake Preparation

When baking a wedding cake, a few extra, detailed steps need to be taken. Firstly, grease your pans well: Grease them, line them, grease the paper, and finally flour them. You don't want your cakes to stick to the tin. Secondly, scrape down the sides of the bowl regularly when you are making the cake to avoid any unwanted lumps of butter or flour. Thirdly, to get even layers, and perfectly proportioned tiers, weigh the batter as you divide it between the pans.
Cake-Baking

Bake all your cakes on the middle rack of your oven. This may mean doing them in multiple batches, but it will ensure all the cakes are baked evenly. Remember to rotate them halfway through as well, so that they're all baked to the same degree. You should also bake the cakes on a lower temperature than normal (obviously test this out before the real thing), to stop them from rising too much.
Freeze the Cake

Once the cakes are baked, cooled, and removed from their tins, you need to freeze them. Tightly wrap each individual layer in plastic wrap and freeze overnight. Let the cakes defrost at room temperature on the day you're going to decorate them.
Make the Filling

The filling of your cake needs to be a spreadable texture, and that's the only rule. You could use compote, ganache, or icing — it just needs to be both sticky and malleable. Make your filling ahead of time, refrigerate it, and bring it up to room temperature when you're ready to layer it on your cooled cakes.
Decide on the Frosting

There are multiple cake-frosting options to choose from, and you should make your pick based on your taste and experience. The easiest option is to make a naked cake, which doesn't require you to put any frosting on the sides. If you want a more traditional cake, Swiss buttercream frosting or royal icing are the best choices.
Naked Cake Tips

If you decide to make a naked cake, you are a very sensible baker. With no frosting required around the sides, this wedding cake project just got so much easier. All you need to focus on is making sure that the cake layers are even as every part of them will be on display. Use a serrated knife and a steady, supporting hand to make any small cake adjustments.
Swiss Buttercream Frosting Tips

To make Swiss buttercream frosting, you're going to need an electric mixer. This frosting won't look like at all appetizing to begin with, but it will come together eventually: It just requires a bit of patience. It can be made ahead of time and refrigerated: Just bring it up to room temperature and rewhip it briefly before using.
Royal Icing Tips

If you're using a classic fondant icing with a layer of marzipan underneath, then make sure you have a large, clean work surface to work on. Knead the fondant well before you put it on the cake, and make sure you work quickly, as fondant cracks when it is exposed to air. Also, always have a pin handy to burst any bubbles that appear.
Assembly Tools

When your cakes are cooled, and your frosting and filling are prepared, it's time to gather your tools. Make sure you have all the essentials before you start: a serrated knife, dowel rods, a rotating cake stand (or an improvised one), an offset spatula, piping bags, cardboard cake circles the same size as the cake tins, and extra decoration to go on top.
Even Out Layers

Before you start filling or frosting the cakes, you need to make sure the cakes are even and flat. Use a serrated knife to cut the cakes into layers, and cut off any uneven bits around the side or on the base. Perfectly flat cakes are the key to every successful wedding cake.
Border of Frosting

To stop the filling between the layers of cake seeping out the sides, create a border of frosting on each layer. Simple pipe a thin layer of frosting around the top edge of every layer, and put the cake in the refrigerator to set.
Fill the Cakes

Bring the filling to room temperature and rewhip it if necessary. Carefully spoon the filling onto the cakes and spread it using an offset spatula, making sure to stop as soon as it reaches the frosting border.
Crumb Coat

If you're using a buttercream frosting, you need to create a crumb coating. To do this, simply blob buttercream all over the cakes and use an offset spatula to spread it in a thin layer over the whole thing. Refrigerate immediately to set this base layer in place. If you're using royal icing, layer the marzipan over each tier, pressing down firmly to set it neatly.
Second Coat

For buttercream frosting, set the cake on a rotating cake stand, and pipe the frosting evenly over the crumb coat. Dip your offset spatula in hot water (this stops the frosting from sticking to it), shake off the water, and then even out the frosting until it's smooth. If you're placing fondant icing on top of marzipan, make sure you slick the marzipan with water first, so that the fondant attaches neatly.
Decorate the Cake

Pipe on your extra decoration with a piping bag and room temperature frosting, stick on extra sugar decorations with royal icing, and delicately place on any fresh flowers or extra ornaments. If anything is fragile, then save it to be put on or piped on at the venue.
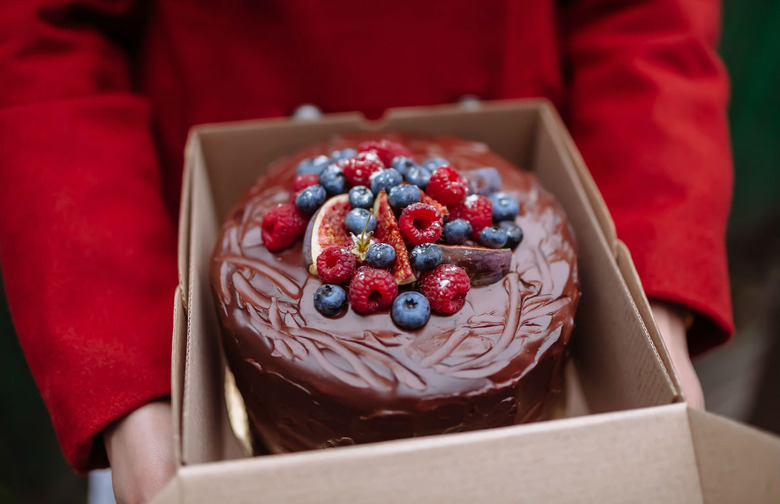
Transport Carefully

Never try to transport a cake when its tiers are already stacked up high. Put the cakes in individual boxes and make sure they sit in the car without sloping downwards (use towels to flatten out the base if necessary). Drive slowly and carefully to the venue: This is a dangerous step.
Stack the Cakes

To layer up the tiers, the cakes are going to need some support. Take your dowel rods — or you could use plastic straws — and push them into the cake. Trim the rods so that they sit flush with the top of each tier. Every tier also needs to sit on a cardboard disc which has been cut into the exact shape of the cake. Create these carefully, and place them on the supporting rods before placing the next tier on top.
Finishing Touches

When the cake is towered high and is sitting where it's going to be for the reception, it's time to add the finishing touches. Use frosting or icing to cover up any gaps between the layers, and to disguise any smudges or chips that have occurred in transit and construction. Add on the final decorations, and stand back to admire your handiwork: Wedding cake mission, complete.