How To Make Thanksgiving Turkey Cookies
There's something universally appealing about iced sugar cookies; whether it's their custom-designs or subtle sweetness and crunch, everybody seems to love them. If you've ever wanted to make your own at home but were worried that your decorating skills weren't up to par or that you wouldn't have the right tools on hand, Patti Paige, author of the genius book You Can't Judge a Cookie By Its Cutter, has a few solutions for you.
Her book has step-by-step instructions for creating more than 100 cookie designs using just a handful of cutters (who knew you could tackle four holidays with just one cookie cutter? Patti uses a Santa head-shaped cutter to make Easter bunny cookies, Thanksgiving turkey cookies, and Halloween witch cookies, too!). She also shares recipes like her easy-to-make and easy-to-work-with sugar cookie recipe.

(Credit: Jennifer Causey)
(Credit: Jennifer Causey)
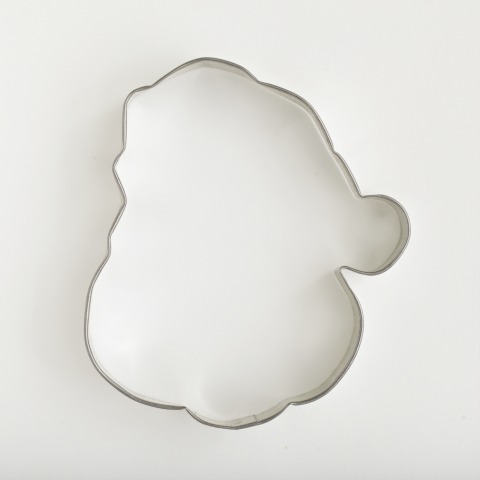
If you're looking for something fun and festive to add to your Thanksgiving dessert table, why not making Patti's turkey-shaped iced sugar cookies? If you don't have a turkey-shaped cutter, don't worry; you can make them using a Santa head cutter instead. The directions are detailed, but there are really just a few basic steps: outline your cookies, fill in the outlines, and add details. After a practice cookie or two, you'll be decorating like a pro. Just be sure to plan ahead; these cookies take several hours to dry. It's easiest to make them over the course of two days.
What you'll need:
4¼-inch Santa head cookie cutter
Cookie dough (click here for Patti's Sugar Cookie recipe)
4½ cups royal icing (click here for our recipe)
Pasteurized egg white or water
Gel food colors (chocolate brown, sunset orange, whitener, bright red, buckeye brown, lemon yellow)
7 plastic or parchment paper piping bags
7 #1 pastry tips (for the piping bags)
Assorted paintbrushes
Make the Cookies
• Cut out 16 cookies from the dough, bake 9 to 15 minutes at 350 degrees, and then cook them for 5 minutes on baking sheets before moving them to a wire rack to cool completely.
Mix the Icings
You'll need two types of royal icing for these cookies: the icing that you'll use to draw the outlines and the icing that you'll use to fill the cookies in.
• Mix two cups of royal icing with chocolate brown gel for the turkey's body. Thin the icing so that you can pipe an outline with it. Put one cup of the icing into a piping bag fitted with a #1 tip and then thin the remaining icing until it can easily flood the inside of the outline. Cover the flooding icing with plastic wrap.
• Mix ¾ cup royal icing with sunset orange gel for the feathers. Thin the icing so that you can pipe an outline with it and then spoon ¼ cup into a piping bag fitted with a #1 tip. Thin the remaining icing until it can easily flood the inside of the outline. Cover the flooding icing with plastic wrap.
• Mix ½ cup royal icing with whitener gel for the white feathers. Thin the icing so that you can pipe an outline and then spoon ¼ cup into a piping bag fitted with a #1 tip. Thin the remaining icing until it can easily flood the inside of the outline. Cover the flooding icing with plastic wrap.
(Credit: Jennifer Causey)
• Position the cookie so that Santa's pom-pom is at the upper left-hand corner (it will become the turkey's head). Using the brown lining icing, outline the silhouette of the turkey, excluding the feathers and making a scalloped edge where the feathers are attached.
• Using the orange lining icing, outline the orange feathers, butting the line up to the brown outline where the feathers are attached to the turkey's body and leaving a ⅛-inch edge for the white feathers.
• Then, using the white lining icing, outline the white feathers, making a scalloped pattern along the edge of the cookie. Let the outlines set for 5 minutes.
Fill the Outlines
• Using a paintbrush and the brown flooding icing, paint in the body of the turkey.
• Using a paintbrush and the orange flooding icing, paint in the middle section of the tail feathers, butting the icing up to the piped brown lines.
• Using another paintbrush and the white flooding icing, paint in the white tail feathers, butting the icing up to the orange line. Let the cookies set until the icing is hard, 6 to 8 hours or overnight.
Mix More Icing
• Add ½ cup of royal icing to two bowls (so that each bowl has ½ cup of icing in it). Cover one with plastic wrap.
• In the other bowl, add bright red gel to make icing for the wattle and top feathers. Thin the icing so that you can pipe an outline with it. Put ¼ cup of the icing into a piping bag fitted with a #1 tip and then thin the remaining icing until it can easily flood the inside of the outline. Cover the flooding icing with plastic wrap.
• Uncover the other bowl and add chocolate brown and buckeye brown gels to make a dark brown for re-outlining the turkey and the orange feathers. Spoon all of it into a piping bag fitted with a #1 tip.
• Mix 2 tablespoons of royal icing with lemon yellow get to make icing for the beak and feet. Thin the icing so that you can pipe an outline with it and then put all of it into a piping bag fitted with a #1 tip.
Detail the Cookies
• Using the red lining icing, outline the turkey's wattle. Let it set for 5 minutes, then use a paintbrush and the red flooding icing to fill it in, butting the red icing up to the brown lining icing on the head.
• Using the dark brown lining icing, re-outline the brown parts of the turkey's body, adding the details for the neck, feathers, and wing. Re-outline the scalloped edges of the orange tail feathers. Pipe a brown dot for the eye.
• Using the red lining icing, outline the red feathers, making a wider scalloped edge on top of the orange feathers so that they cover about half of the orange icing. Let the icing set for 10 minutes. Using a paintbrush and the red flooding icing, paint in the red feathers, butting the icing up to the dark brown outline. Let the cookie set for 4 to 6 hours.
• As the red flooding icing sets, fill in the beak and feet with the yellow lining icing.
• Using the red lining icing, re-outline the wattle.
• Mix ¼ cup royal icing in a bowl with whitener gel to make white for re-outlining the red and white tail feathers. Thin the icing so that you can pipe an outline with it and then spoon it all into a piping bag fitted with a #1 tip. When the red flooding icing of the feathers is set, use white lining icing to re-outline the outer edge of the red feathers and the outer edge of the white tail feathers.
Kristie Collado is The Daily Meal's Cook Editor. Follow her on Twitter @KColladoCook.